Social advocacy
Social advocacy lets users share automatically through Interact. Each social channel requires setup on its own developer platform and corresponding configuration in the Marketplace.
Before you start
You need:
- A Power User account in Interact with access to Control Panel > Marketplace.
- An administrator account on each social platform's developer portal you intend to configure (Facebook, LinkedIn, X).
- Your intranet domain to hand, to build the redirect URLs.
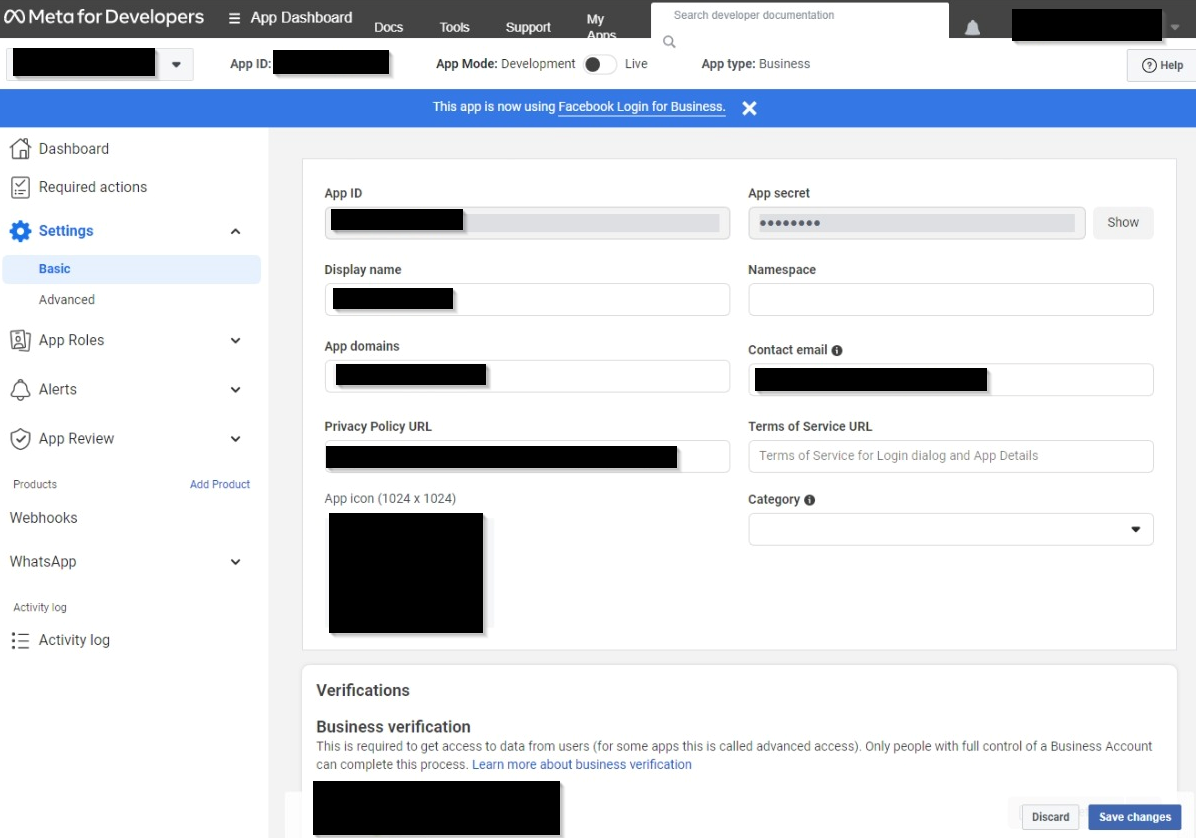
To set up the Facebook integration, first create a Facebook app on the developer portal at https://developers.facebook.com/apps/. This page lets you create a new app or edit the settings of existing apps.
- Select Create App.
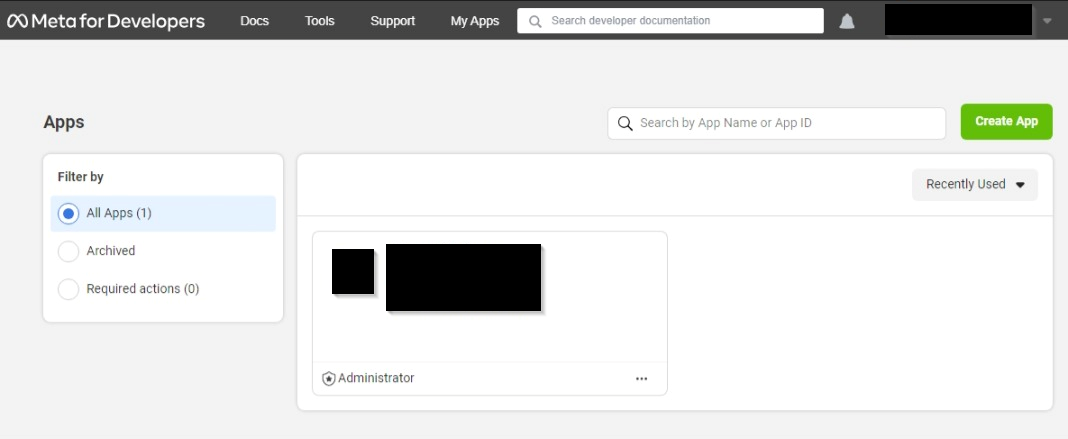
- Choose Other for the app template.
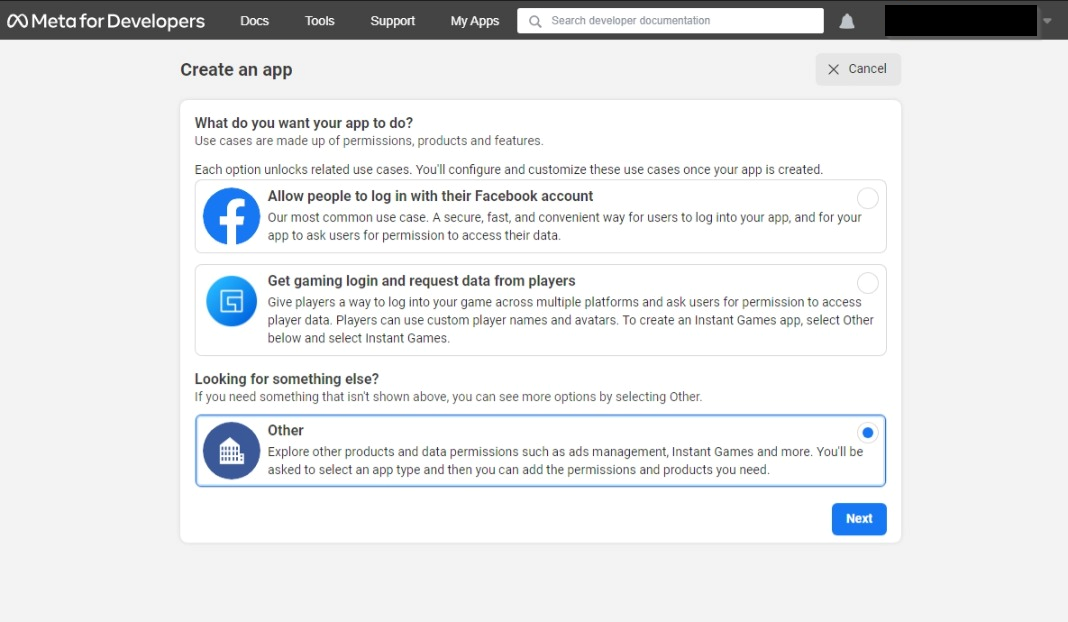
- Choose None for the app type.
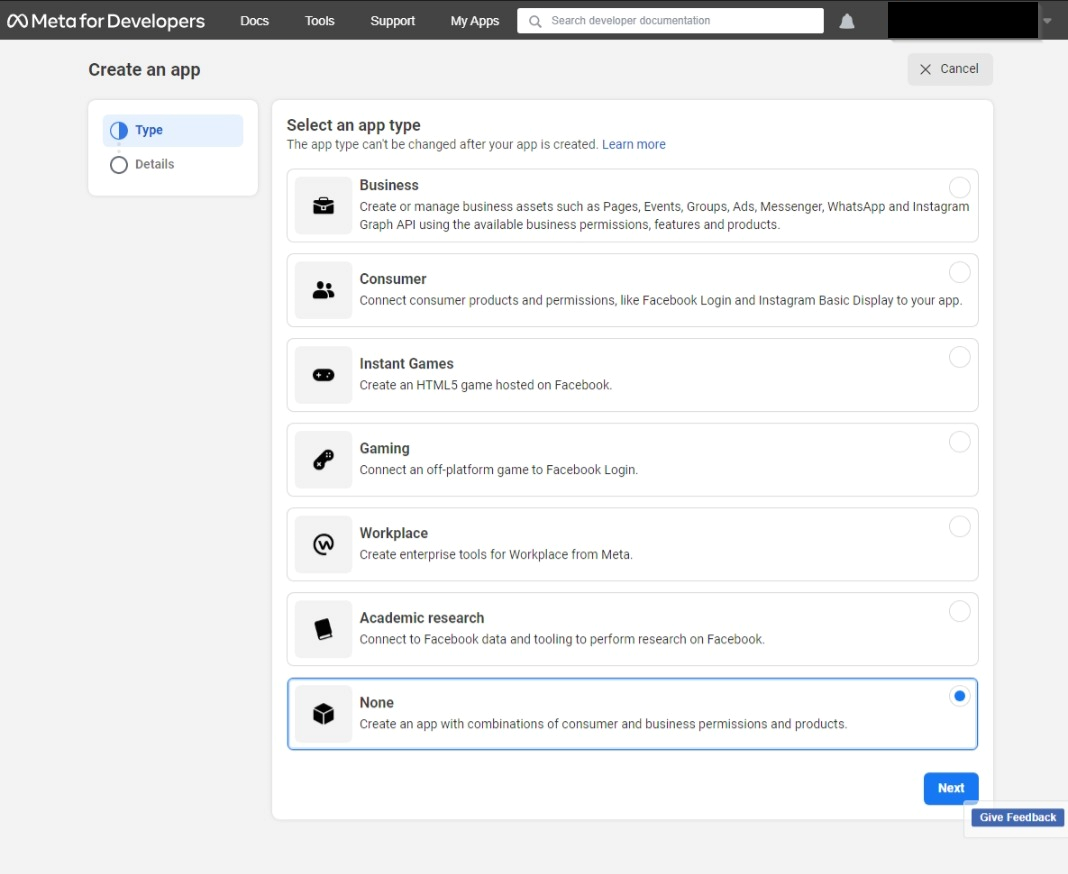
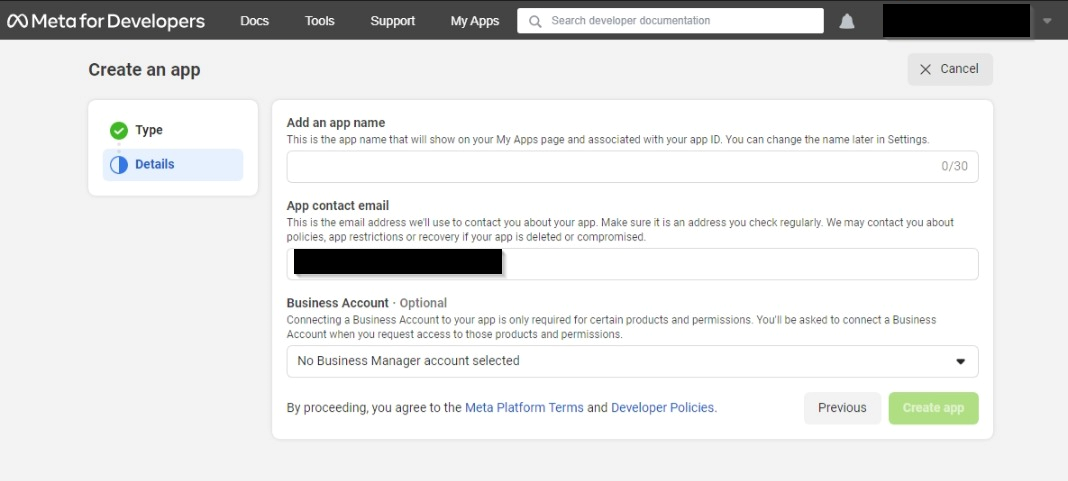
- Add a name for your app and set the contact email. When ready, select Create App.
- Go to your app settings and open the Basic Settings page. Set the remaining information, such as the Privacy Policy URL and app icon. Add your intranet domain name in the App domains field. Make a note of the App ID, which you need later for configuration.
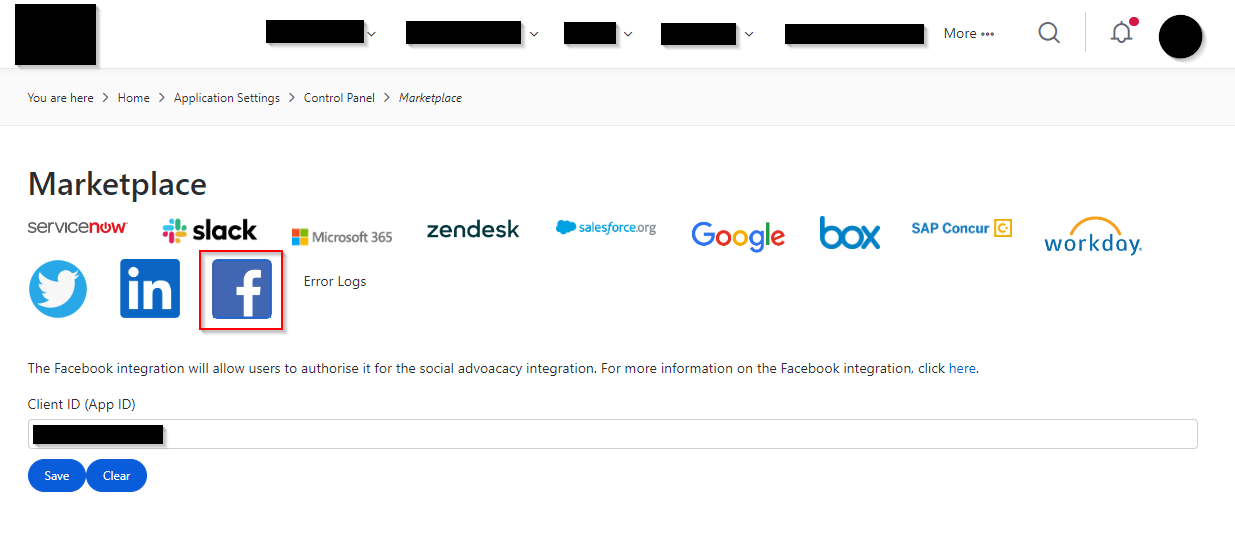
- In your intranet, go to Control Panel > Marketplace. Select the Facebook icon, enter the App ID noted earlier and save the page.
LinkedIn uses integrated authentication to let users share automatically through Interact. This requires setup in the LinkedIn Developer platform and corresponding setup in the Marketplace.
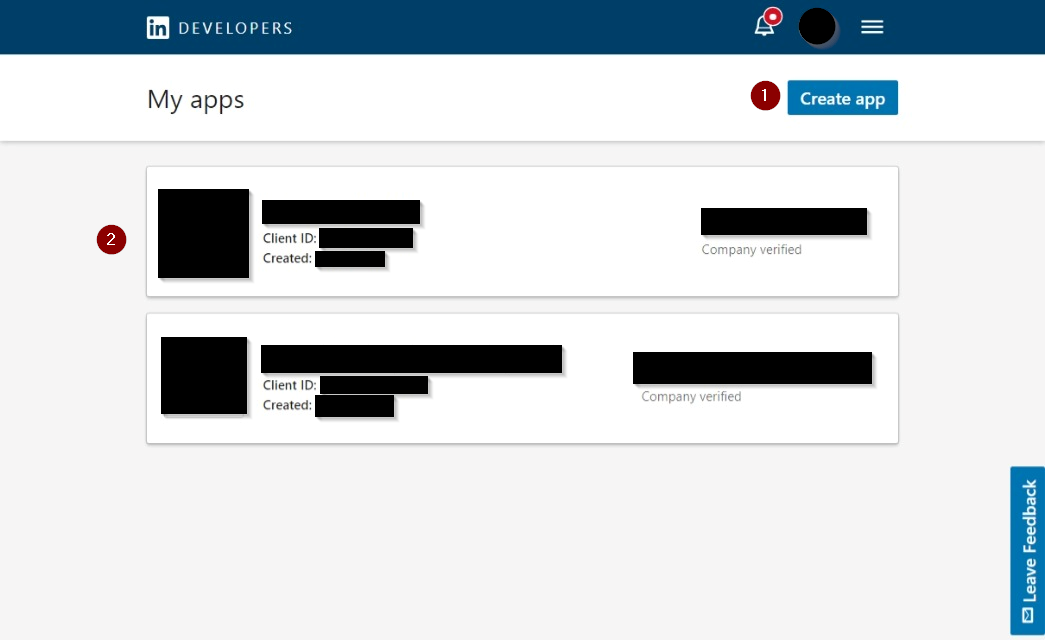
- Log in to your LinkedIn account and go to https://www.linkedin.com/developers/apps. This page lets you create new apps or view and edit existing apps. Select Create App.
- Enter the following details:
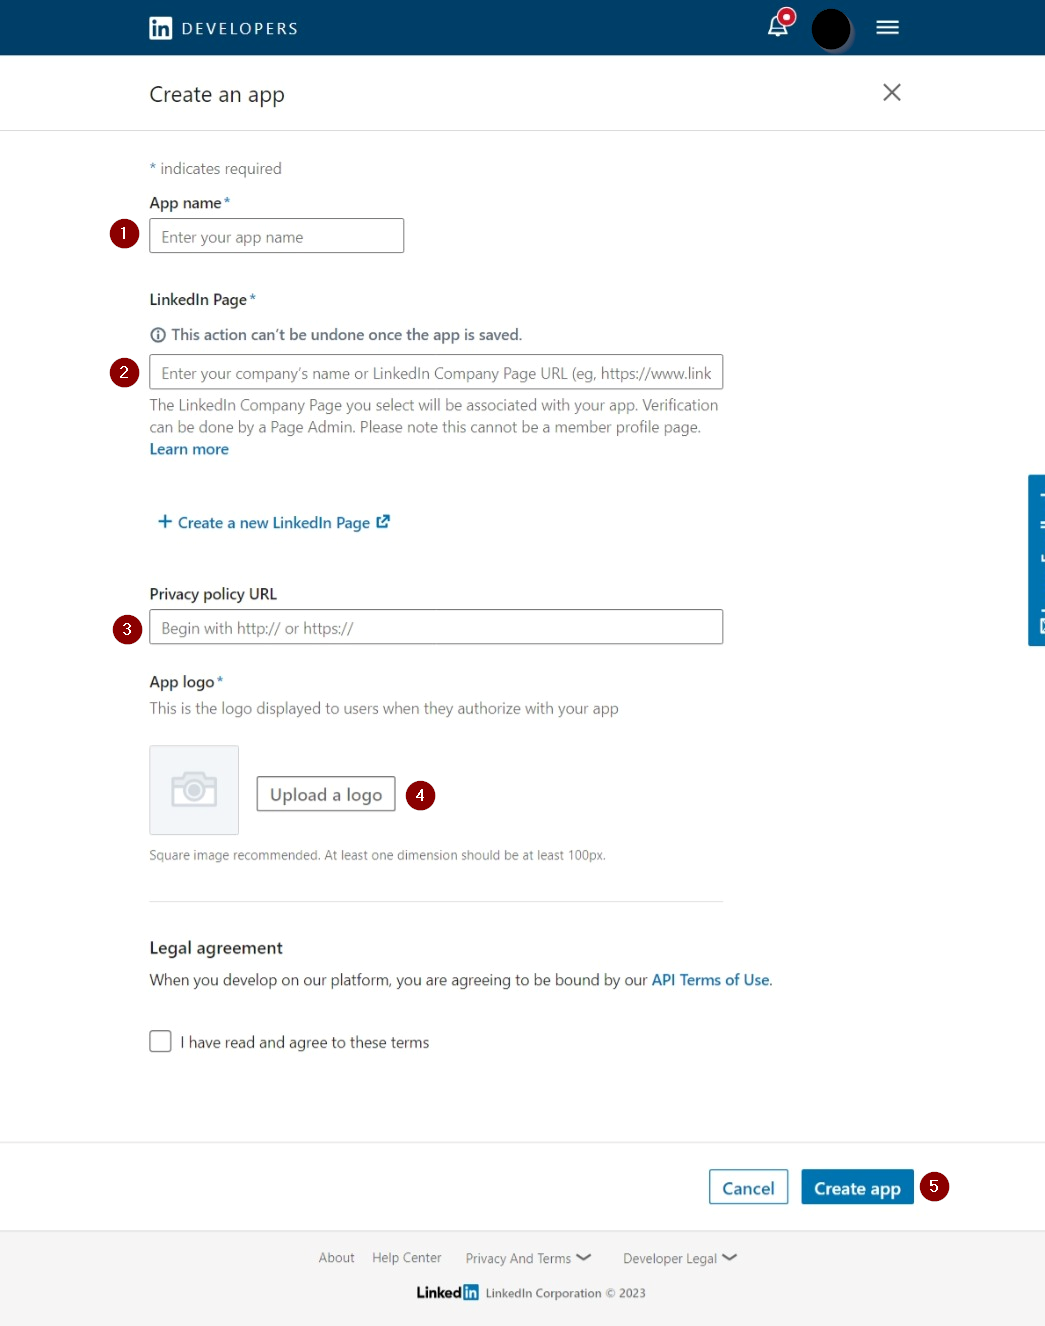
- App name — shown to users when they log into the LinkedIn integration on Interact.
- LinkedIn company page — the URL of the page on LinkedIn. For example, the Interact Software page is
https://www.linkedin.com/company/interactsoftware/. The admin of this page may need to verify your account and the app you are creating. - Privacy policy URL — a link to your app privacy policy.
- App logo — a logo for the app.
The app name, privacy policy URL and logo are shown to users when they log into LinkedIn on the intranet. Select Create App when ready, then go to the app settings page.
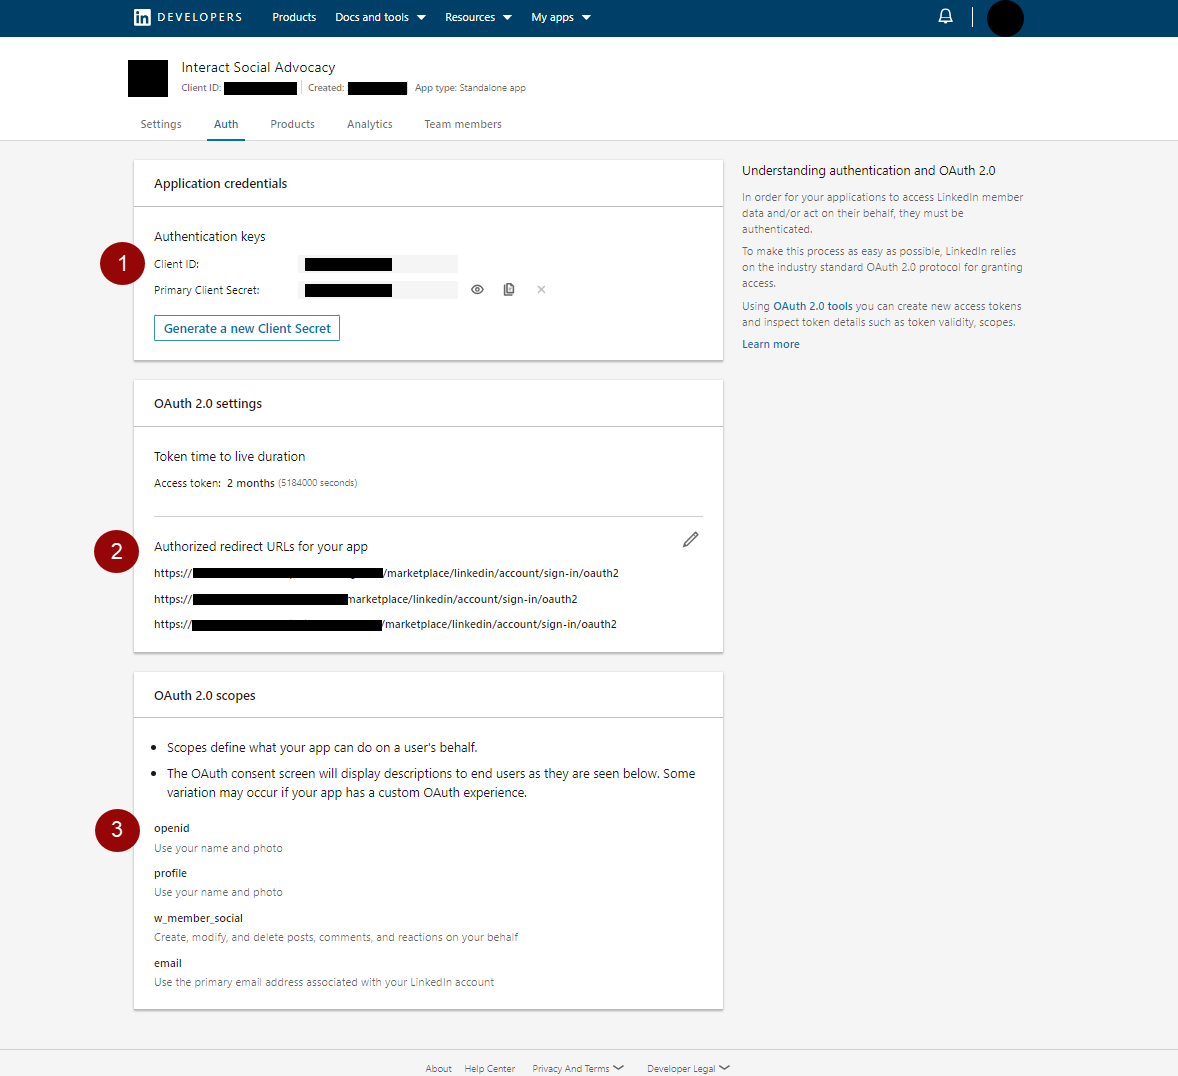
- Under the Auth tab, complete the following:
- Note down the Client ID and Client Secret. These are used for later configuration.
- Add an authorised redirect URL for the app, in the form
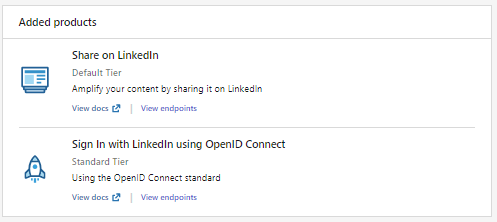
https://{{intranet_url}}/marketplace/linkedin/account/sign-in/oauth2. - Add the following auth scopes to the app by selecting the LinkedIn products:
openidprofilew_member_socialemail
- In your intranet, go to Control Panel > Marketplace.
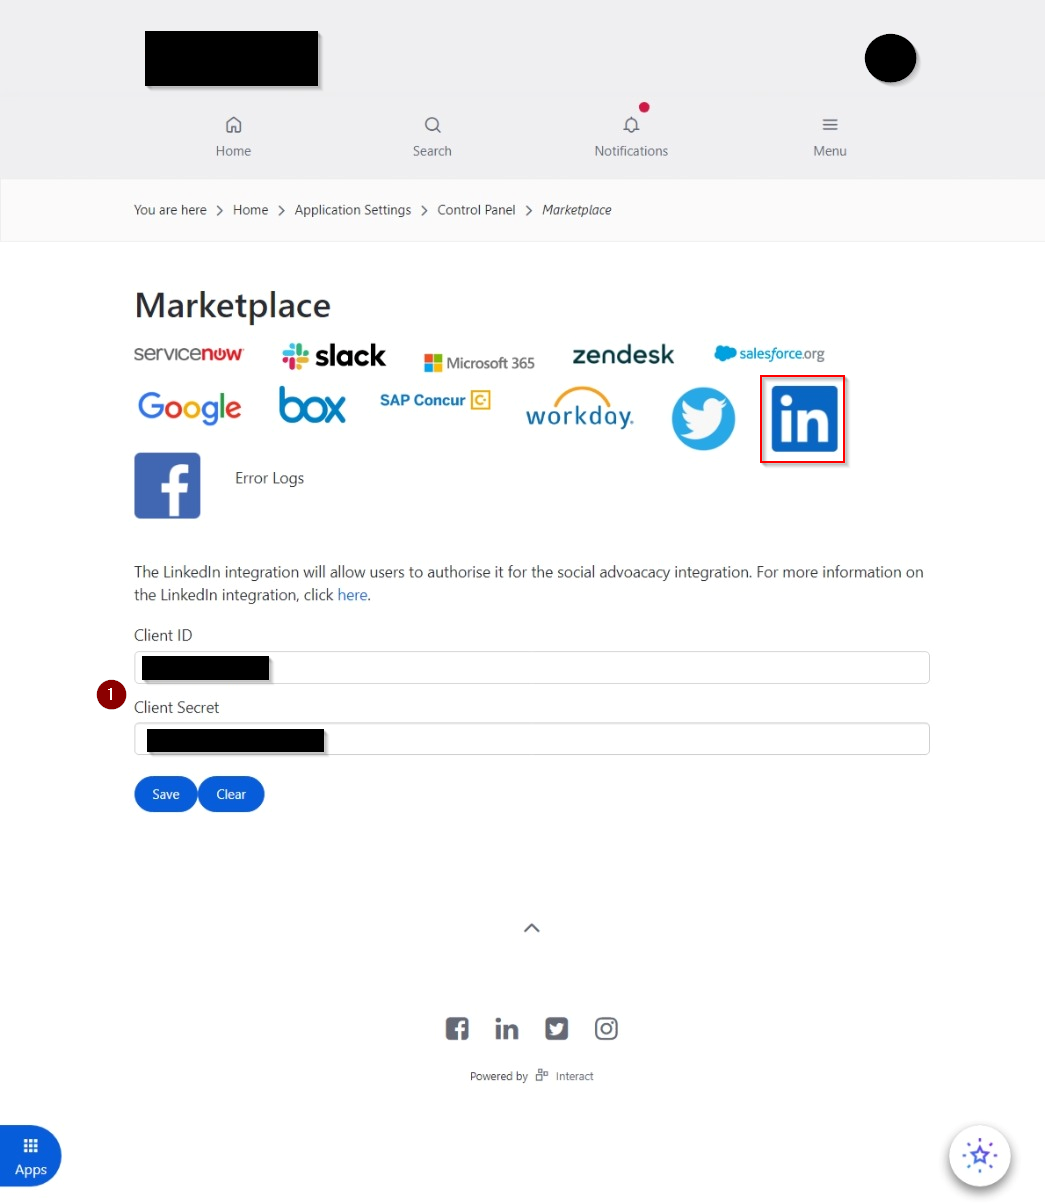
Select the LinkedIn icon, enter the values noted earlier in the appropriate text boxes and save your settings.
X (formerly Twitter)
To set up the X integration, first create an app on the developer portal at https://developer.x.com/en/portal/dashboard.
When you first create an account in the developer portal, you will likely have a default app created. You can edit this to have the correct settings, or create an additional app if you have a suitable account level.
- During app creation, you may be prompted to generate an authentication secret. Keep a note of this, as it is needed later. You can regenerate it later if required.
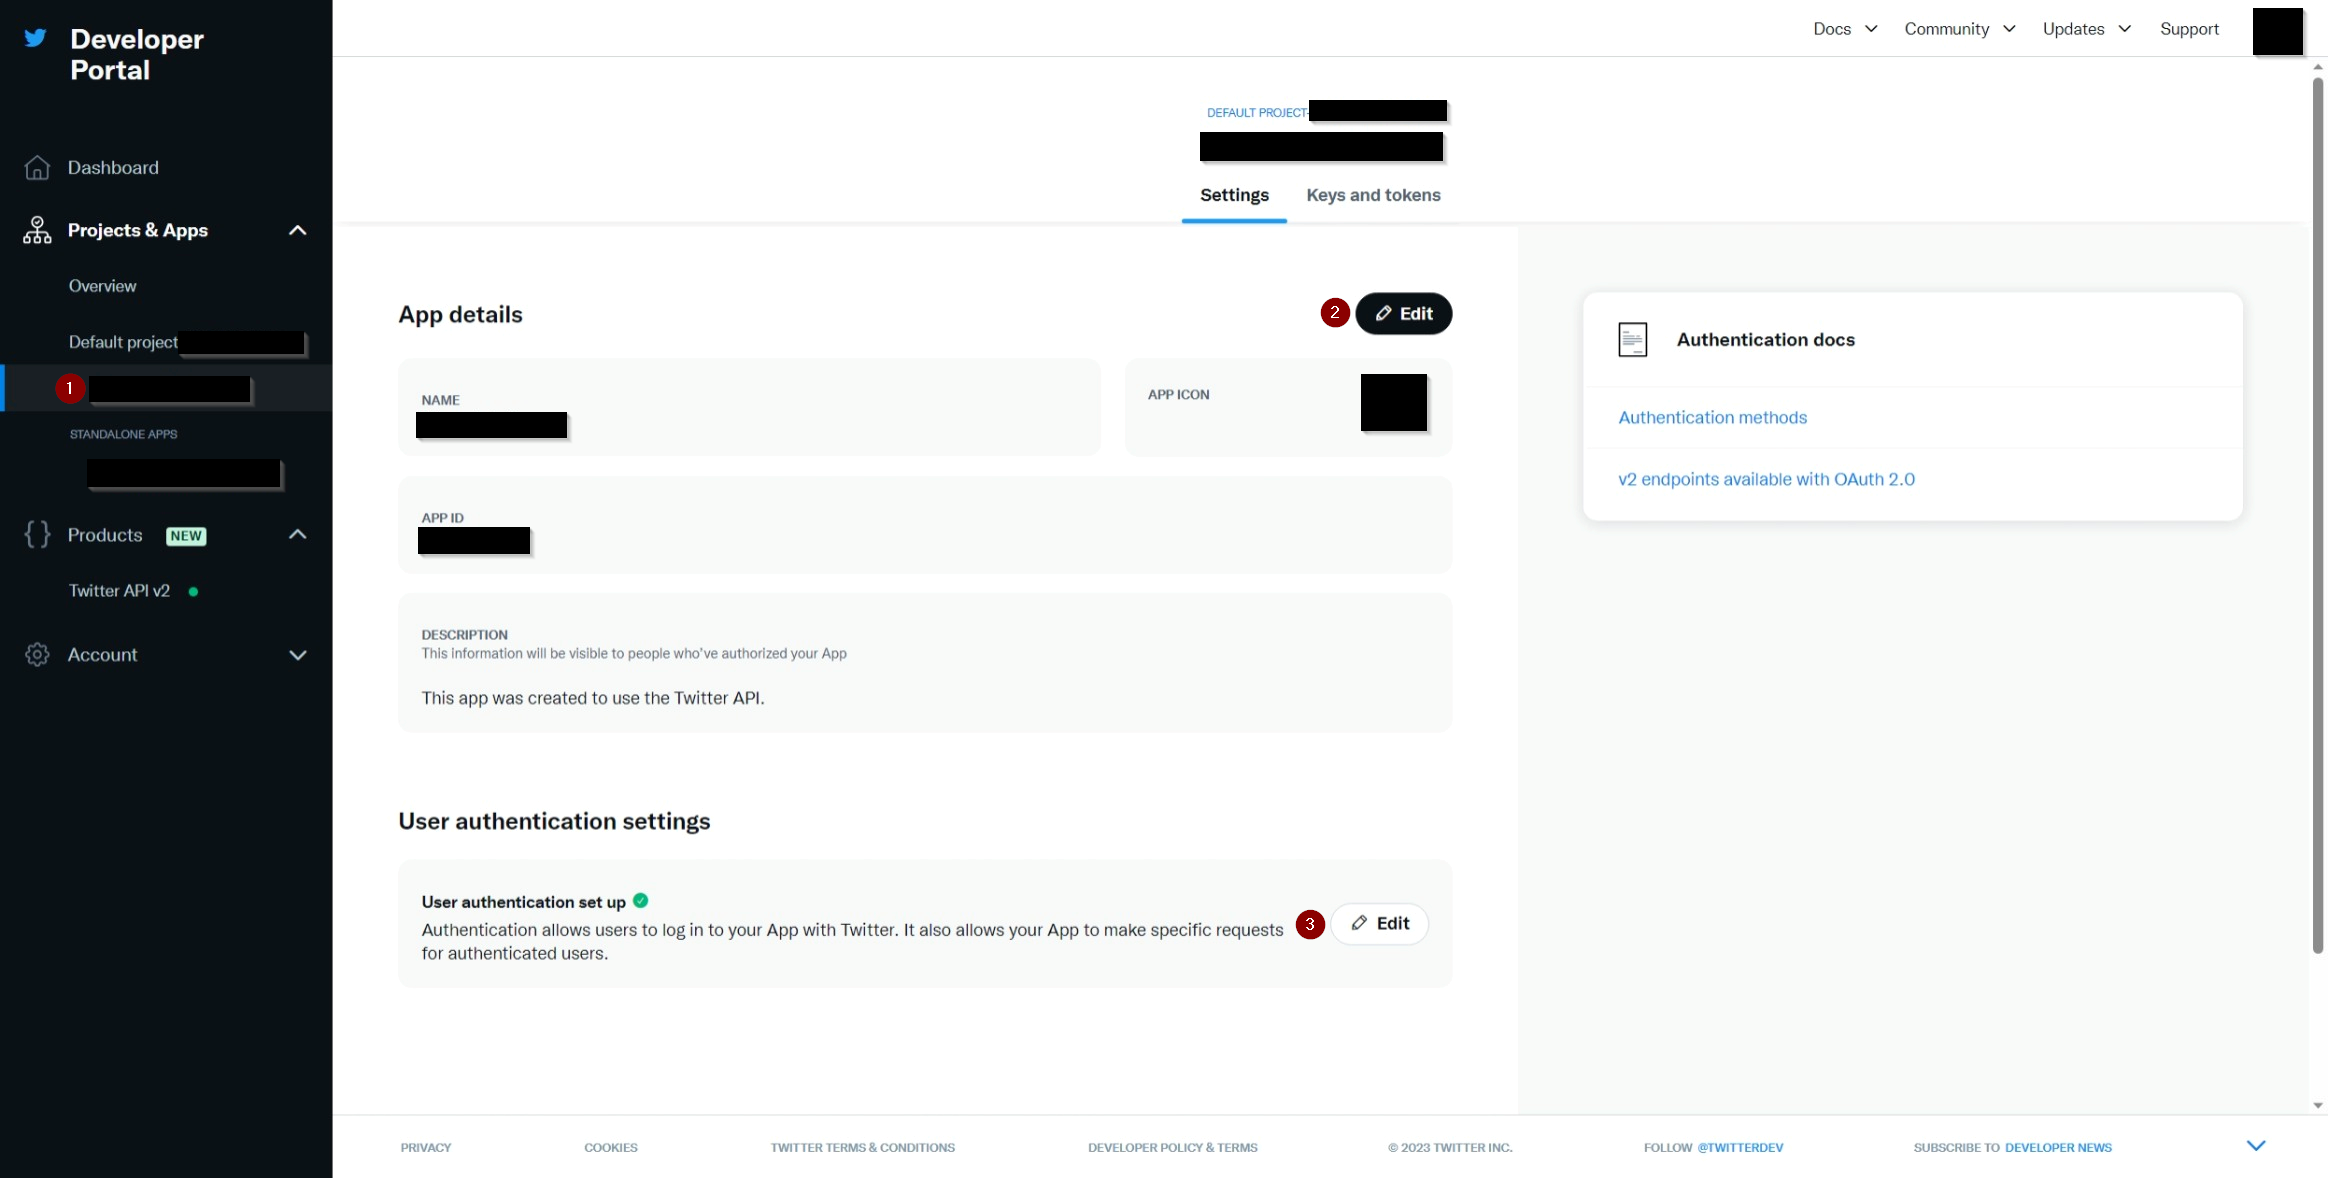
- Select your app within the project and edit it to set the required app name and icon. Then edit the User Authentication Settings.
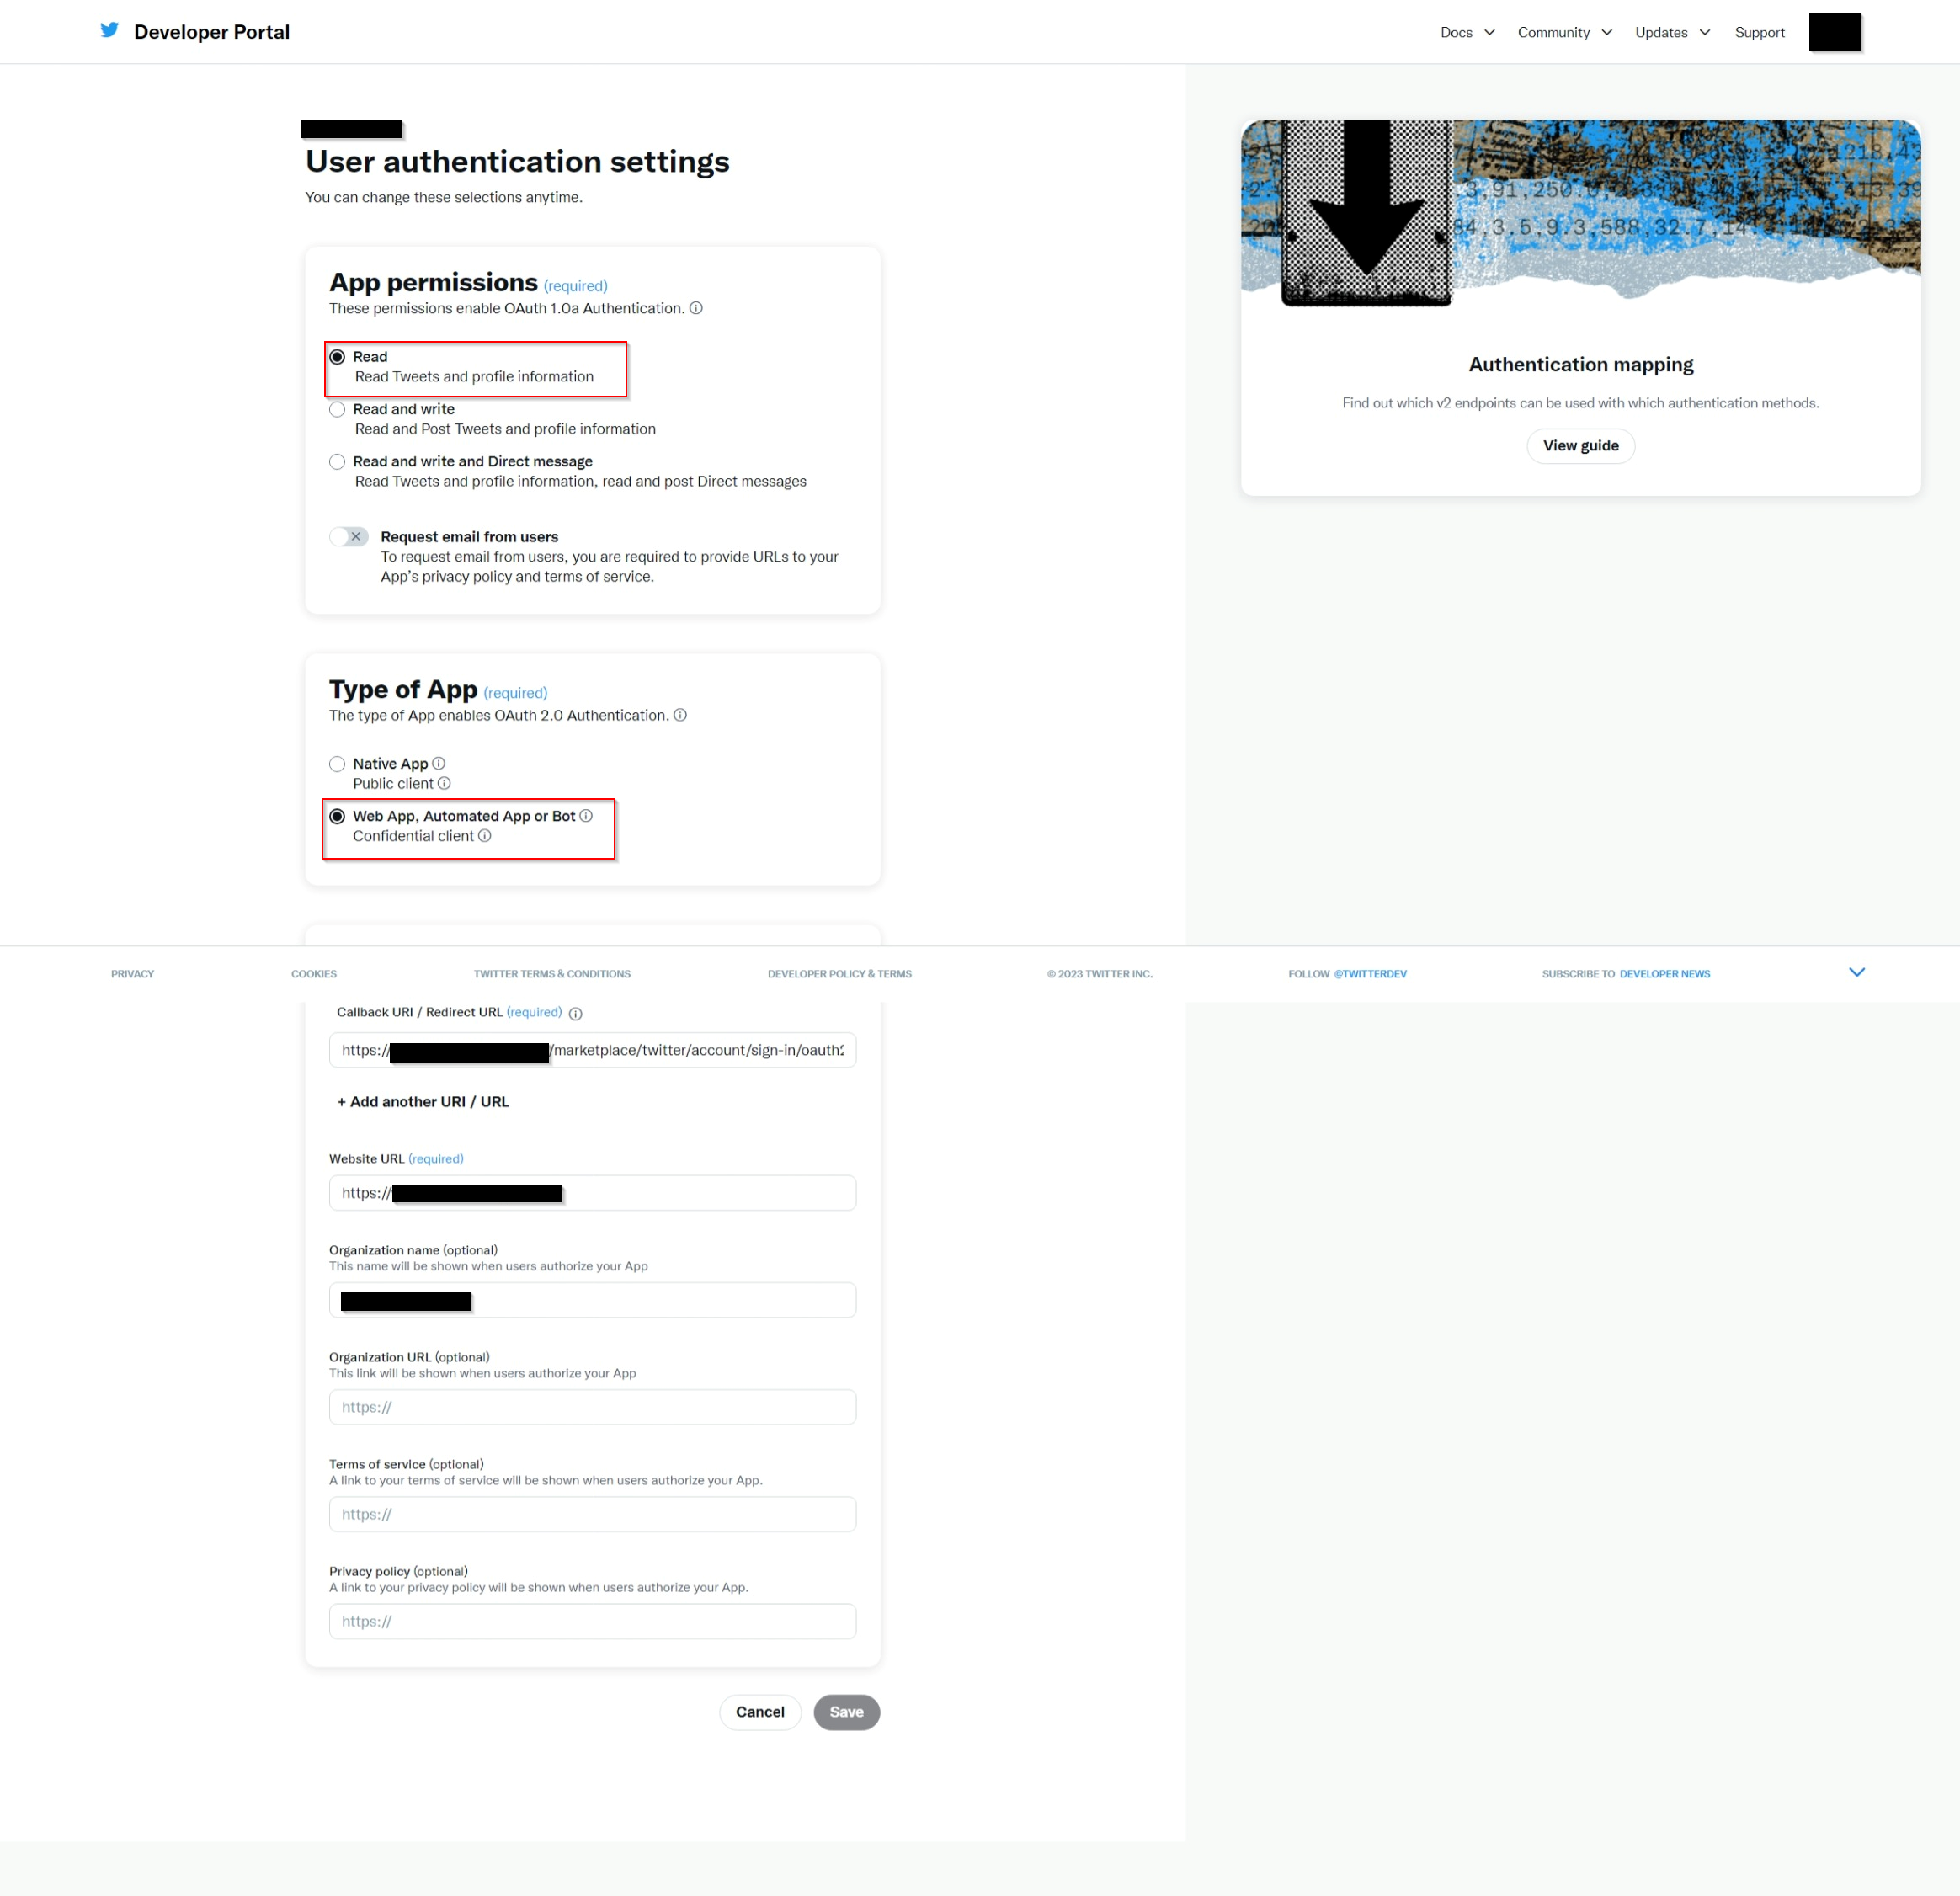
- Set the app permissions to Read and the type to Web App, Automated App or Bot.
- Add a redirect URL for the app, in the form
https://{{intranet_url}}/marketplace/twitter/account/sign-in/oauth2. - Add any optional settings as appropriate for your app. These are shown to users when they connect with X on the intranet, so they can help confirm the legitimacy of the integration.
- Save the settings, then go to the Keys and Tokens options.
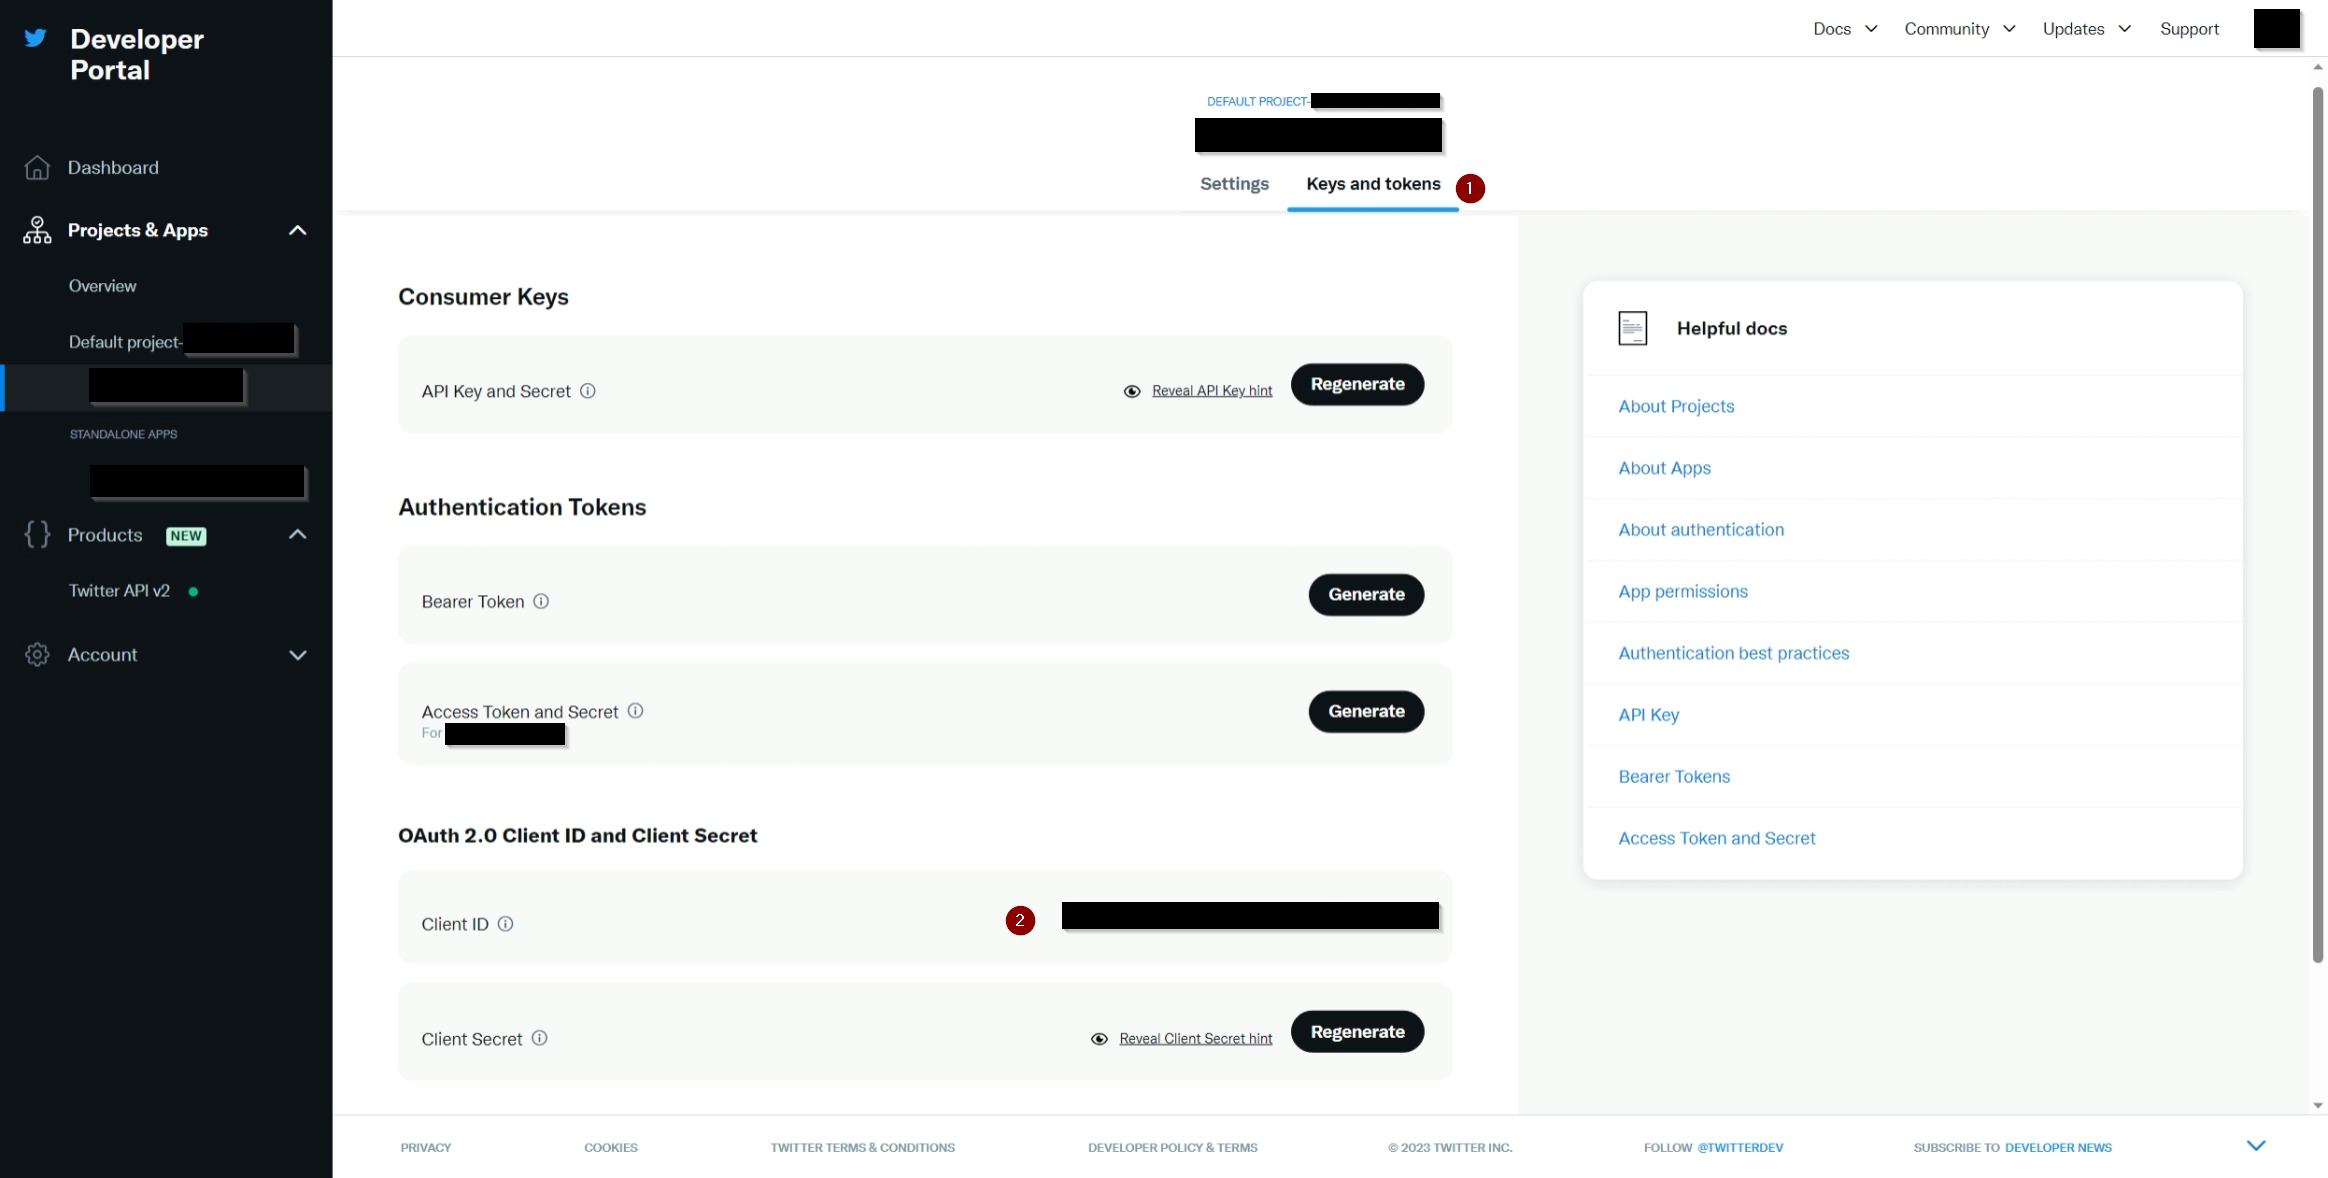
If you have not already noted the Client ID and Client Secret, regenerate these and keep a note of them. They are used in the next step. The secret is never shown again after generation, so if it is lost you will need to repeat this step and the following Marketplace configuration.
- In your intranet, go to Control Panel > Marketplace.
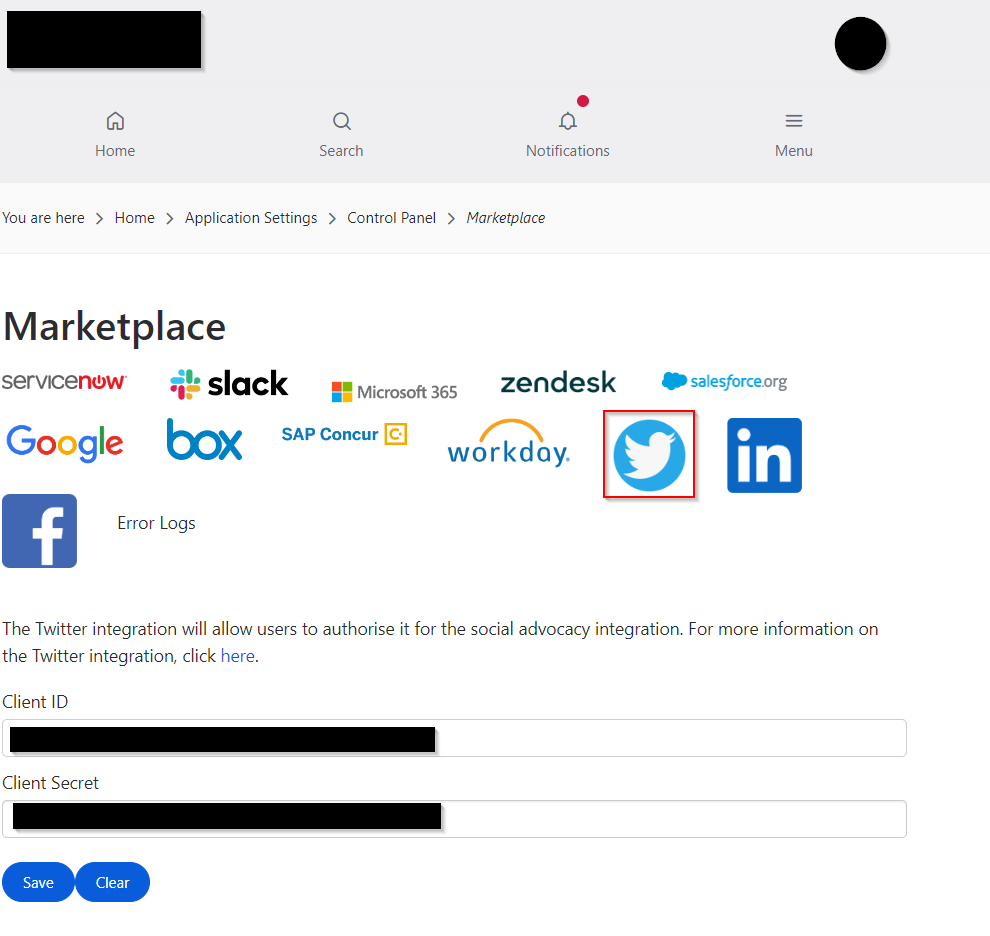
Teams
Teams does not require specific setup. People can log in with their existing Microsoft account on the share dialog opened when sharing to Teams.