Set up SSO with OneLogin
Before you start
- You need the Power User role to configure SAML authentication in Interact.
- You need administrator access to OneLogin.
- First, create the SAML authentication source within Interact. Follow the steps on the Configure SAML single sign-on page to create the initial SAML source within your Interact intranet.
Step 1: Add Interact to OneLogin
Log in to your OneLogin portal as an administrator. Select Apps > Company Apps, then select Add App.

On the apps page, search for Interact Intranet and select the SAML2.0 option that appears.

On the Add Interact Intranet page, specify the title and icon as you would like them to appear on your users' homepage, then select Save. Interact is now added and you see the page shown below.
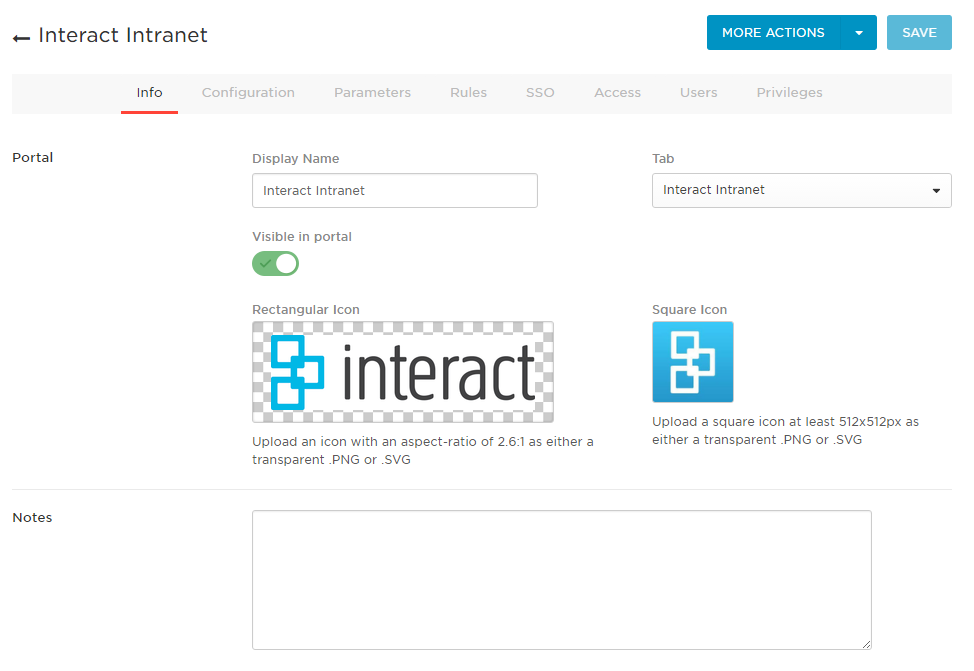
Step 2: Confirm SAML configuration in Interact
Ensure SAML has been pre-configured in Interact according to Configure SAML single sign-on.
Note: Make a note of the Entity ID (URN) in Interact.
Step 3: Configure OneLogin
To complete the integration, complete the following fields in OneLogin.
On the Configuration screen, enter the URL of your intranet and the URN from the service provider details on the Edit Service Provider page within Interact.
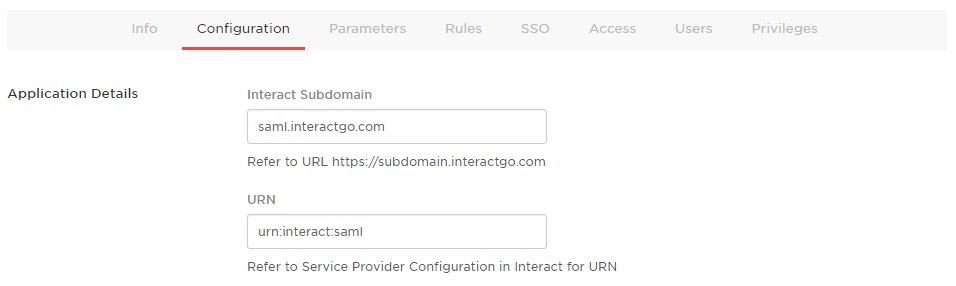
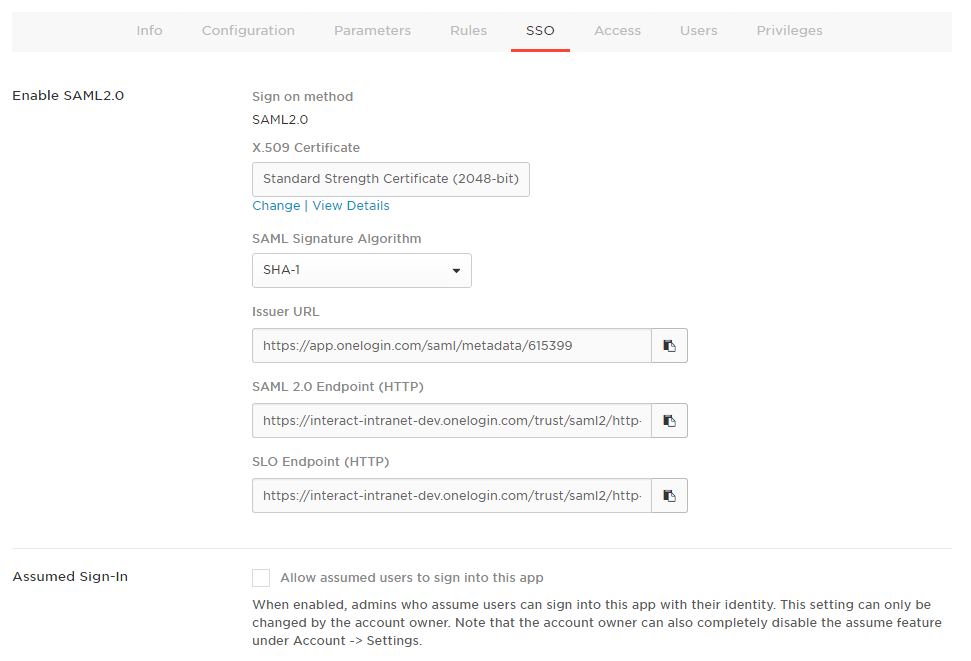
Next, copy the relevant information from OneLogin into Interact. These details are on the SSO tab within the OneLogin configuration, shown below.
Step 4: Import OneLogin details in Interact
Automated import
OneLogin provides a metadata URL that you can use to populate the identity provider details in Interact automatically.
Use OneLogin's Issuer URL and import it according to the "Automatic import" section of Configure SAML single sign-on.
Manual import
Copy the value from the Issuer URL box on OneLogin into the Identity Provider URN field in Interact. Copy the value from the SAML 2.0 Endpoint (HTTP) field from OneLogin into the Identity Login field in Interact. Ensure that the Authenticate Using field in Interact has Email Address selected, and set the checkbox options as required.
The final part of the configuration is to upload the certificate from OneLogin into Interact. Download the certificate from OneLogin by selecting the View Details link under the X.509 Certificate field. This takes you to the page shown below, with a download button.
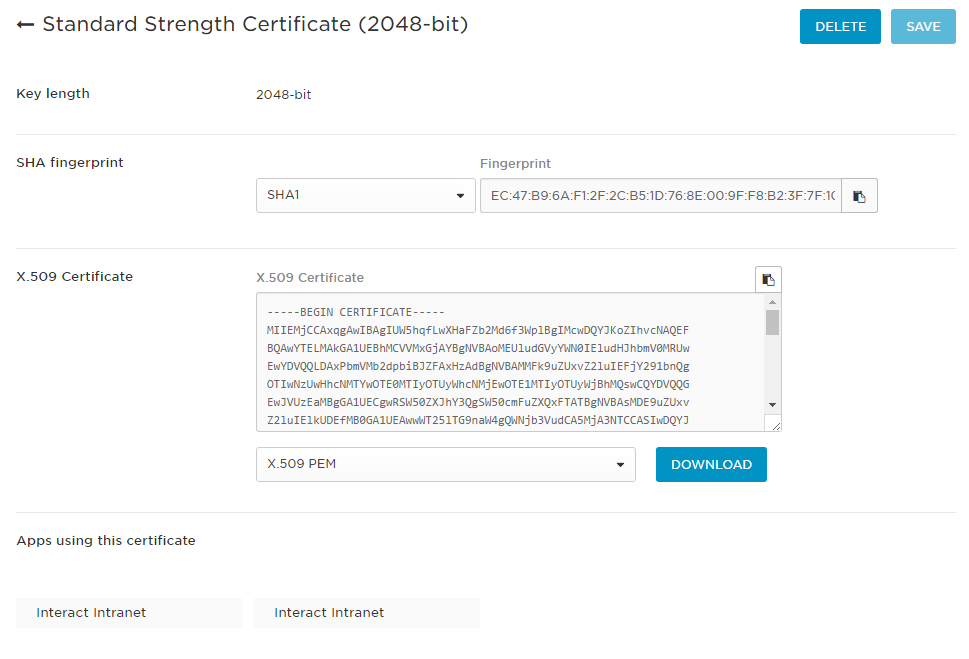
Download the certificate to your local machine by selecting the download button. This saves a file called onelogin.pem to your machine. Interact expects a .cer file, so before uploading, change the file extension to .cer.
Once the extension has been changed, upload the file to Interact by selecting Choose File in the Certificate section of the Edit Service Provider page in Interact. With this done, select Save to save the details in Interact. The integration is now complete.
Notes
For users to log in to Interact via OneLogin, the user account must be present in both OneLogin and Interact, and the user must be given access in OneLogin. To find out how to do this, consult the OneLogin documentation.
Note: If you make changes to the Edit Service Provider page after the SAML source was added, you may not see the changes immediately. The settings are cached to improve performance. Wait ten minutes before trying again.