Configure SAML single sign-on
SAML is one of the methods you can use to authenticate users logging in to your Interact intranet. With SAML, users log in once to one of your trusted systems and are then authenticated automatically in all of the others, reducing how often they have to enter their username and password.
Before you start
- You need the Power User role to manage SAML authentication.
- Your users must already be set up in the People Directory.
- Contact an identity provider or identity assertion provider first. They will supply some of the information you enter during setup, along with a digital certificate.
Important: SAML single sign-on is tied to your domain name. If your intranet is still being implemented, your core project team may select a custom URL for your site. If a custom URL is selected, configure SAML against both your interactgo domain and the custom URL, or wait until the custom URL is confirmed. Speak with your project team to agree the approach.
Step 1: Configure SAML SSO in Interact
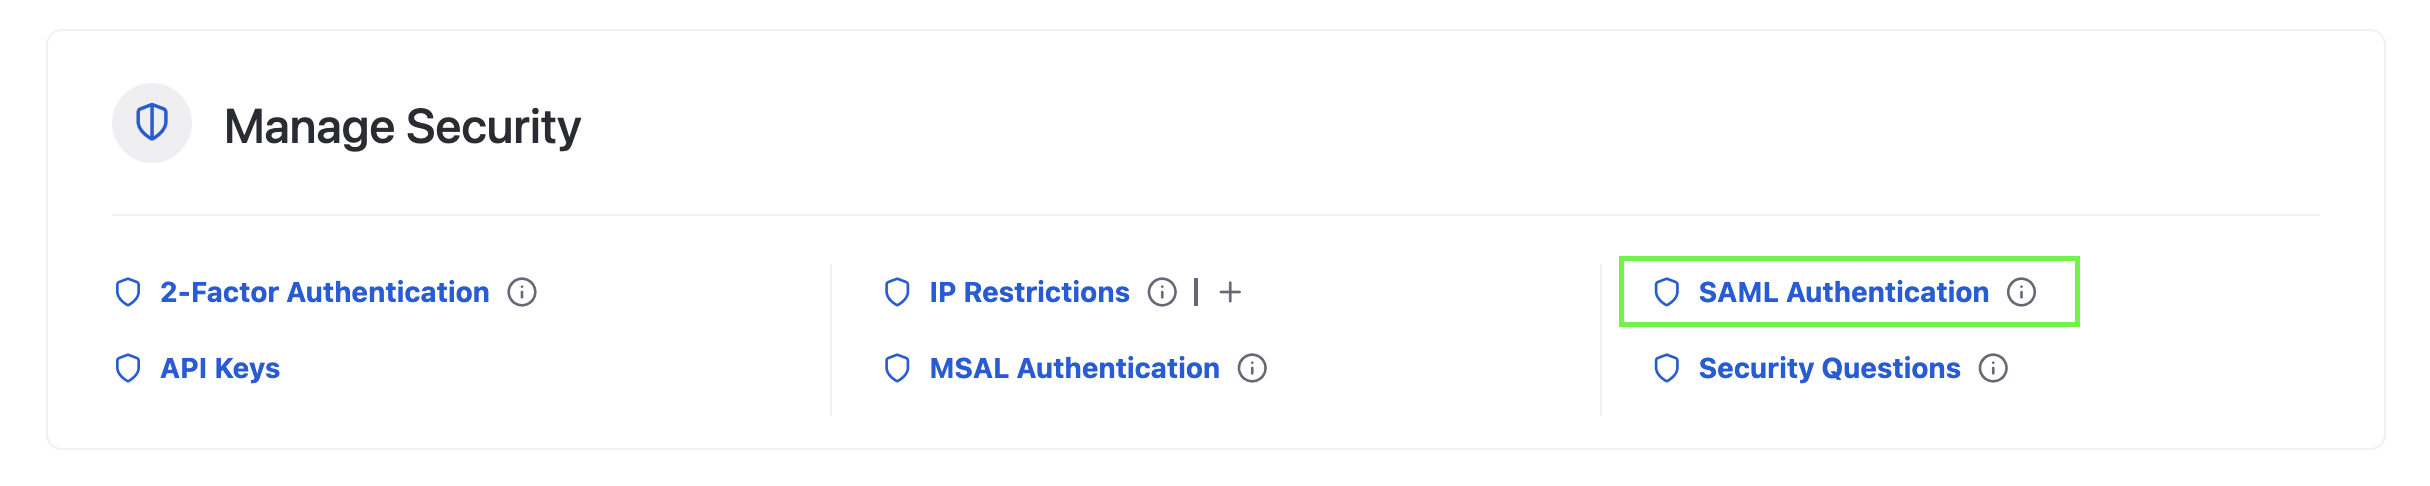
Navigate to Control Panel > SAML Authentication.
This page lists the domains available to your intranet. Each domain can act as a service provider with its own configuration for authentication. To begin setting up the service provider, select Setup Domain next to the relevant URL.
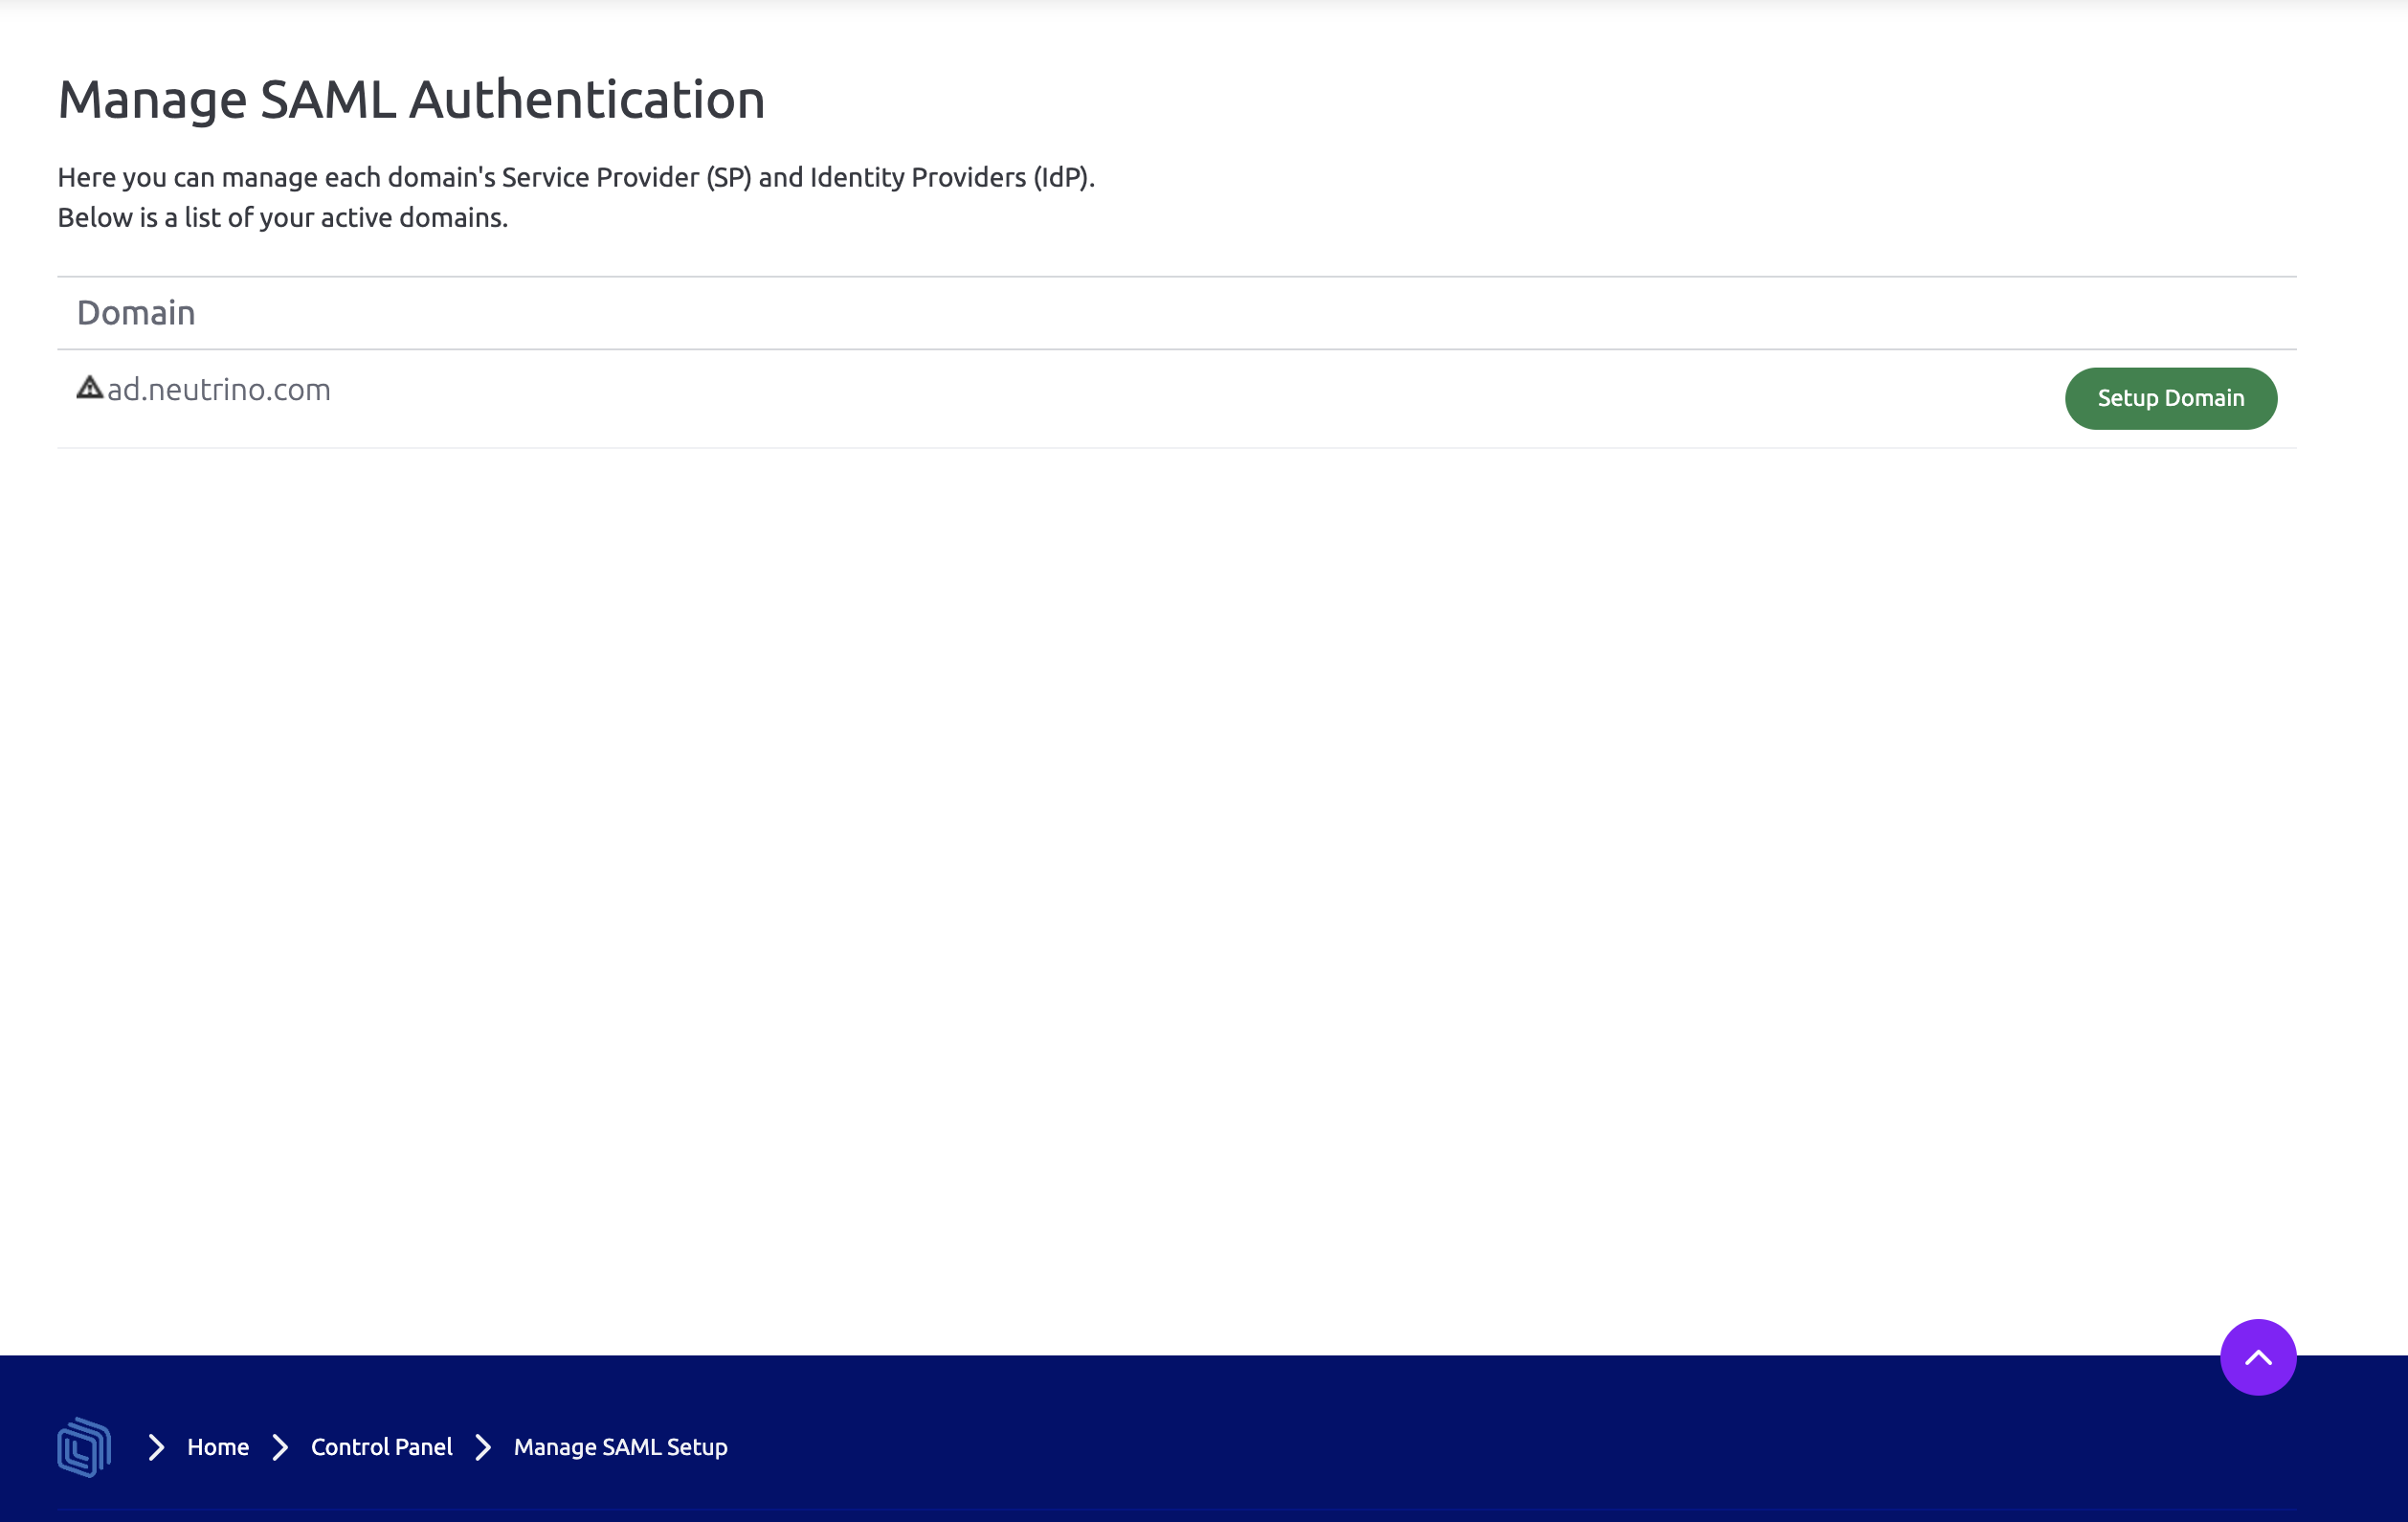
You should see the screen below.
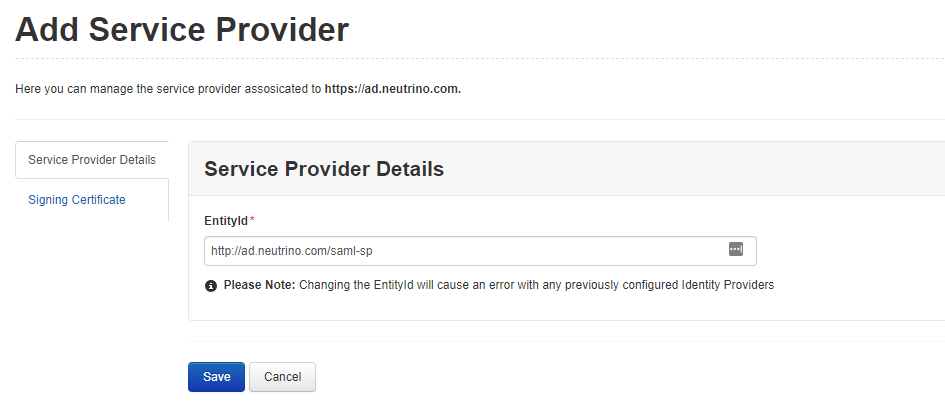
Important: Save this EntityID. Many identity providers need Interact's EntityID, so keep track of this value while you configure SSO. Some providers refer to it as a URN or URI.
The system populates these fields automatically. Select Save to generate the signing certificate and create the service provider details for the specified domain. Once the save process completes, you are returned to the Manage SAML Authentication page.
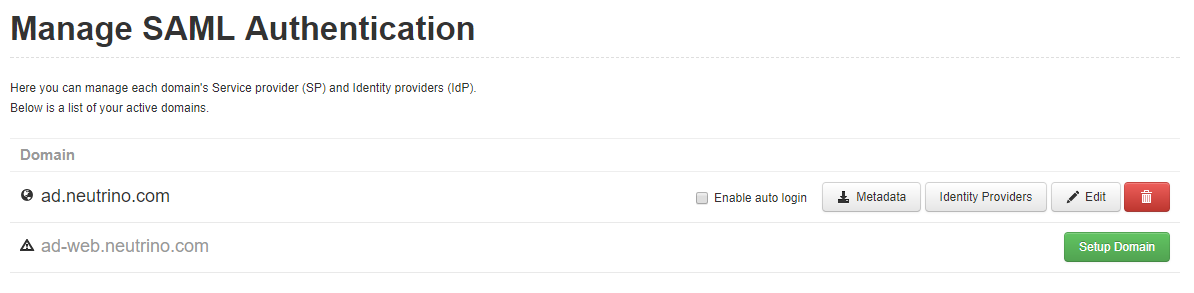
Now that the service provider has been created, you can view its metadata, enable auto-login, edit the service provider, or configure the identity providers.
Step 2: Configure your identity provider
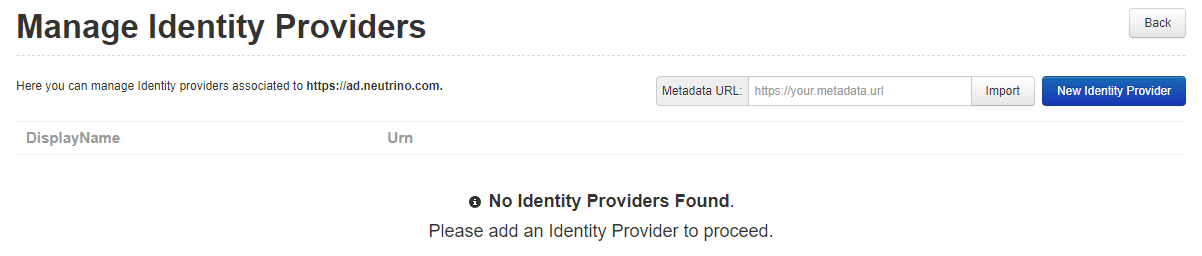
Select Identity Providers to display the screen shown below. On this page, you can either import an identity provider's metadata automatically (if available) or enter the provider's details manually.
Automatic import
If your chosen identity provider supports metadata, type the metadata URL from the identity provider into the Metadata URL text box and select Import. Interact reads the metadata from the specified URL and creates the relevant entries for the identity provider.
Exchanging metadata between the service provider (Interact) and the identity provider is the most reliable way to set up SAML authentication. The relevant data loads in both systems automatically, including the exchange of certificates and digital signatures.
Note: If your team authenticates users via a common identity provider such as Okta, OneLogin, ADFS, Microsoft Entra ID, or Google Workspace, refer to those pages for instructions specific to your provider.
Manual creation
If metadata is not available from the identity provider, configure it manually. Select New Identity Provider. You should see the screen below.
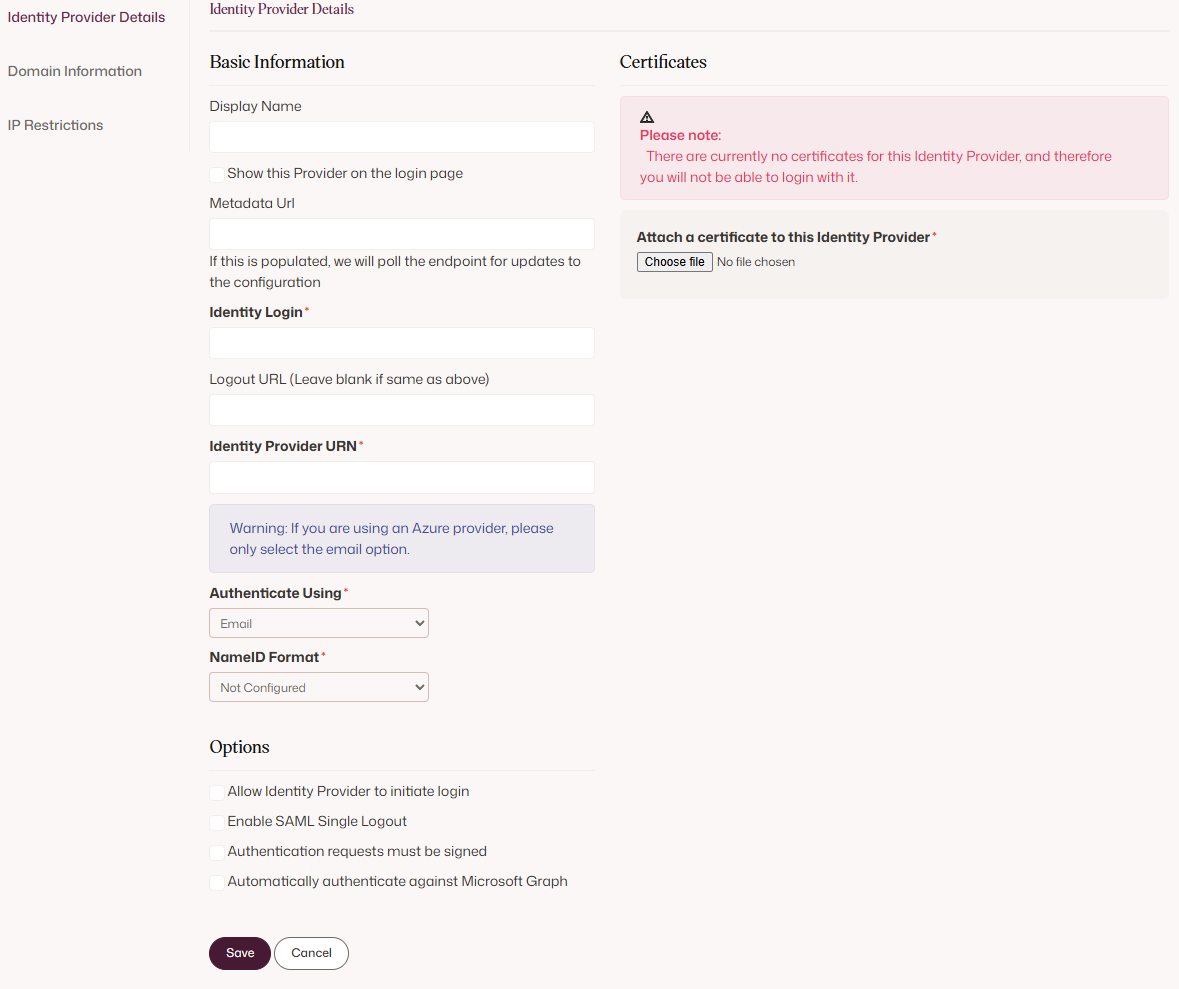
Enter the relevant information for each field. The information required for successful SAML authentication is shown in bold on screen and described below. The actual values are provided by the identity provider.
| Field | Description |
|---|---|
| Identity Login | The login URL for the identity provider. |
| Identity Provider URN | The URN supplied by the identity provider. This is sometimes referred to as the entity ID. |
| Authenticate Using | Tells Interact which field to use to identify the user once authentication is approved. This must match the field sent by the identity provider. |
| Attach a certificate to this Identity Provider | Upload a certificate from the identity provider, used to encrypt portions of the SAML assertion. If you use metadata, this is populated and updated automatically by Interact. |
The following optional fields provide additional functionality.
| Field | Description |
|---|---|
| Display Name | A name for the identity provider that makes sense to your users. |
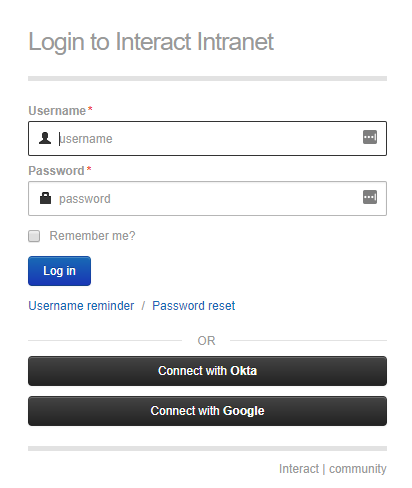
| Show this Provider on the login page | If ticked, a button is displayed on the login page allowing users to initiate the SAML flow manually. A screenshot is included below. |
| Metadata Url | If metadata is used to transfer the relevant SAML fields, this is displayed here. |
| Logout URL (Leave blank if same as above) | Interact supports SAML single logoff, allowing federated log off as well as federated login. This URL identifies the URL on the identity provider that triggers the single logoff request. |
| Allow Identity Provider to initiate login | If checked, Interact allows authentication initiated by the identity provider rather than the service provider. |
| Enable SAML Single Logout | If checked, users can log off Interact and perform a SAML single logoff to also log off the identity provider and any other systems controlled by the identity provider. |
Related
- Set up SSO with Okta
- Set up SSO with OneLogin
- Set up SSO with ADFS
- Set up SSO with Microsoft Entra ID
- Set up SSO with Google Workspace
- SAML metadata