SCIM with Microsoft Entra ID
Before you start
- You need to be a Power User in Interact to create a SCIM profile source and generate a secret token. See SCIM v2.0.
- You need administrative access to your Microsoft Entra ID (formerly Azure AD) tenant to create an enterprise application.
Overview
Microsoft Entra ID supports user and group provisioning via SCIM v2.0 for Entra enterprise applications. This page walks through creating the enterprise application, configuring the connection and attribute mappings, choosing which users and groups to synchronise, and enabling provisioning.
Microsoft also offers detailed documentation on this topic. See User provisioning with Microsoft Entra ID.
Step 1: Create the enterprise application
Create an Enterprise Application Registration in your Entra ID tenant.

Select New application.
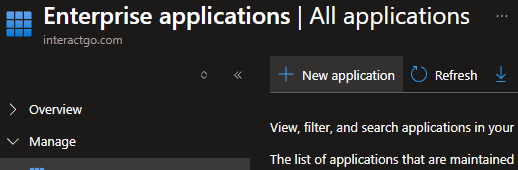
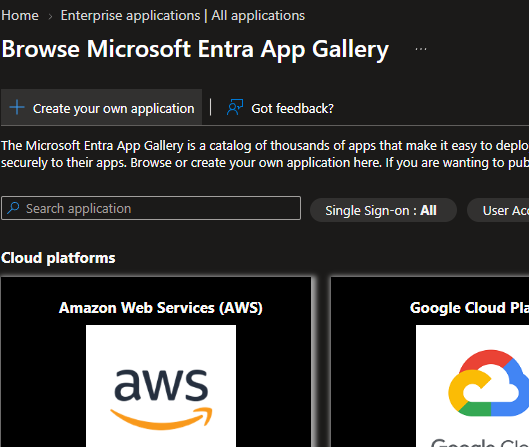
Select Create your own application.
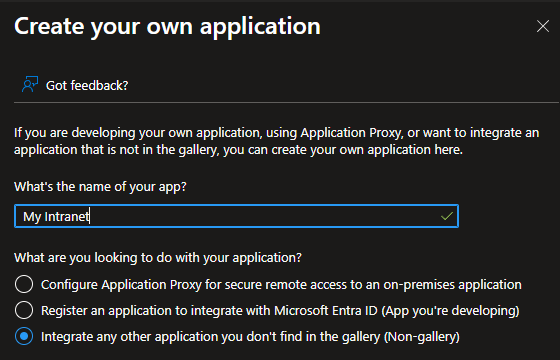
Give the application a name such as intranet.acme.com - SCIM Provisioning, select Integrate any other application you don't find in the gallery (Non-gallery), then select Create.
Wait for the application to create.
Step 2: Configure the connection
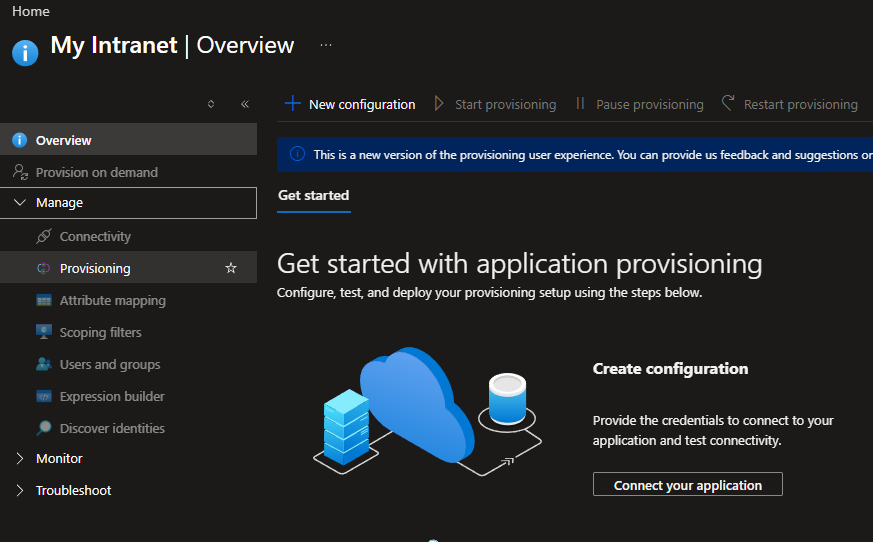
Select Provisioning, then select Connect your application.
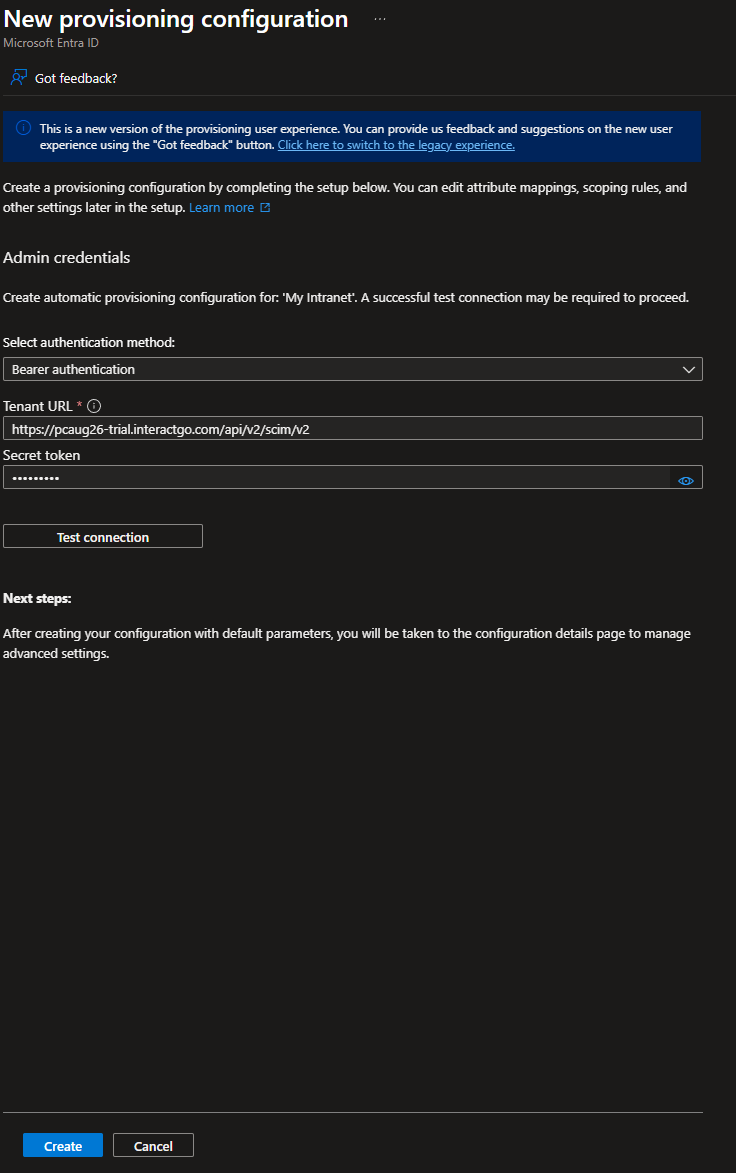
Select Automatic, fill in the form, then select Test Connection.
- Tenant URL:
https://{{intranet_url}}/api/v2/scim/v2 - Secret Token: This is the SCIM authentication token. Generate it under Control Panel > Profile Sources.
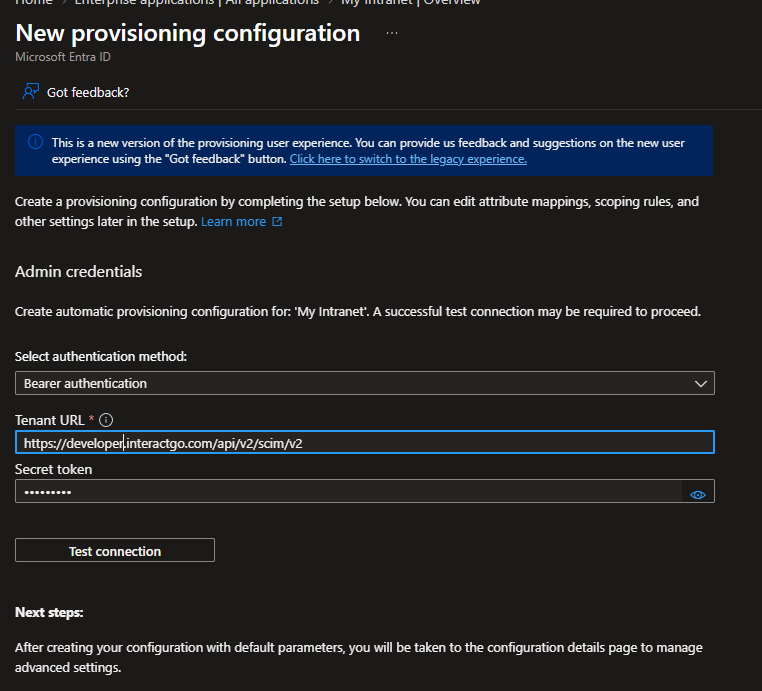
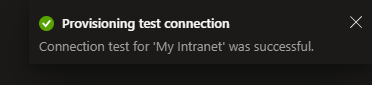
Wait for the connection test to finish. You receive a notification telling you whether the connection worked.
A successful connection means Entra ID can communicate with Interact's SCIM service.
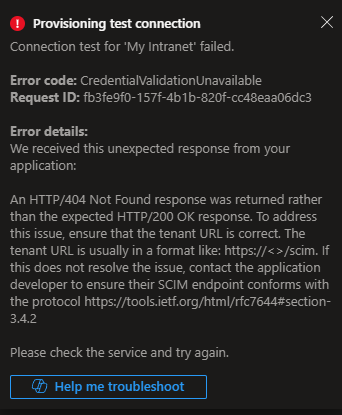
If the connection is unsuccessful, check that the domain and path are correct, and check that the secret token value is correct.
Once the connection is successful, select Create.
You now see two more sections: Mappings and Settings.
- Mappings: you adjust these in the next steps.
- Settings: add an email address where you want provisioning failure notifications from Entra ID. This is recommended.
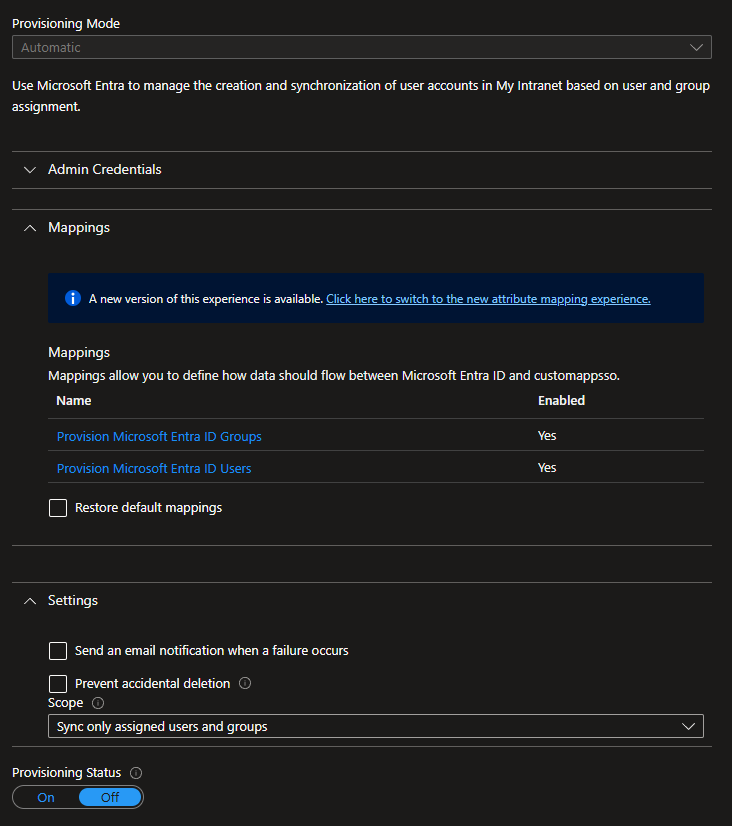
Select Save. You adjust the mappings in a later step.
Step 3: Configure group mappings
You need to add a few attributes so the provisioning requests contain all the information Interact requires. Start with groups.
Note: If the Mappings panel is greyed out, give it a minute to load. It loads asynchronously and can be slow to enable.
Select Provision Microsoft Entra ID Groups.
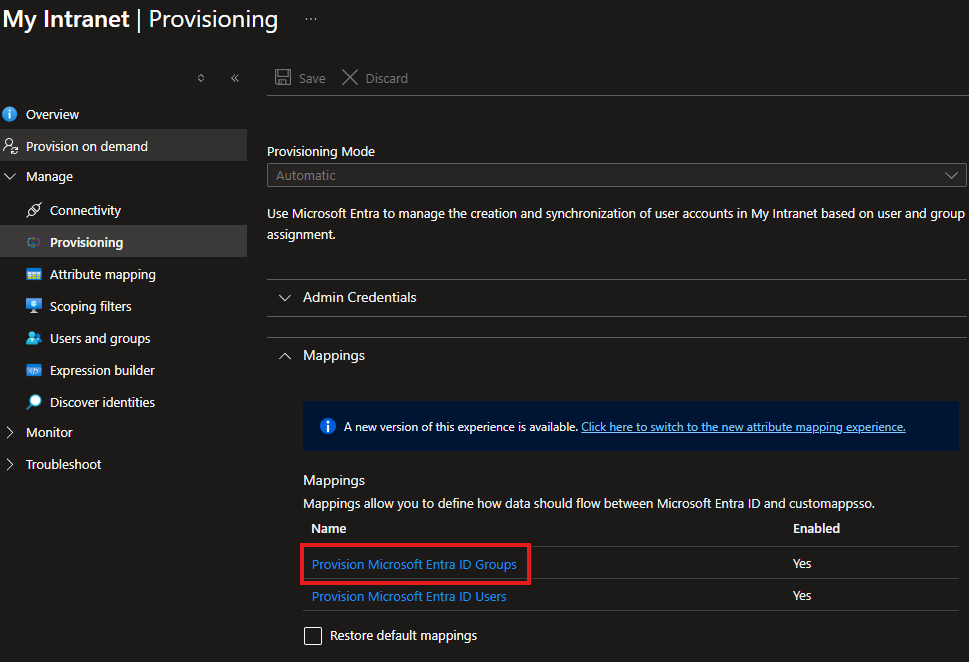
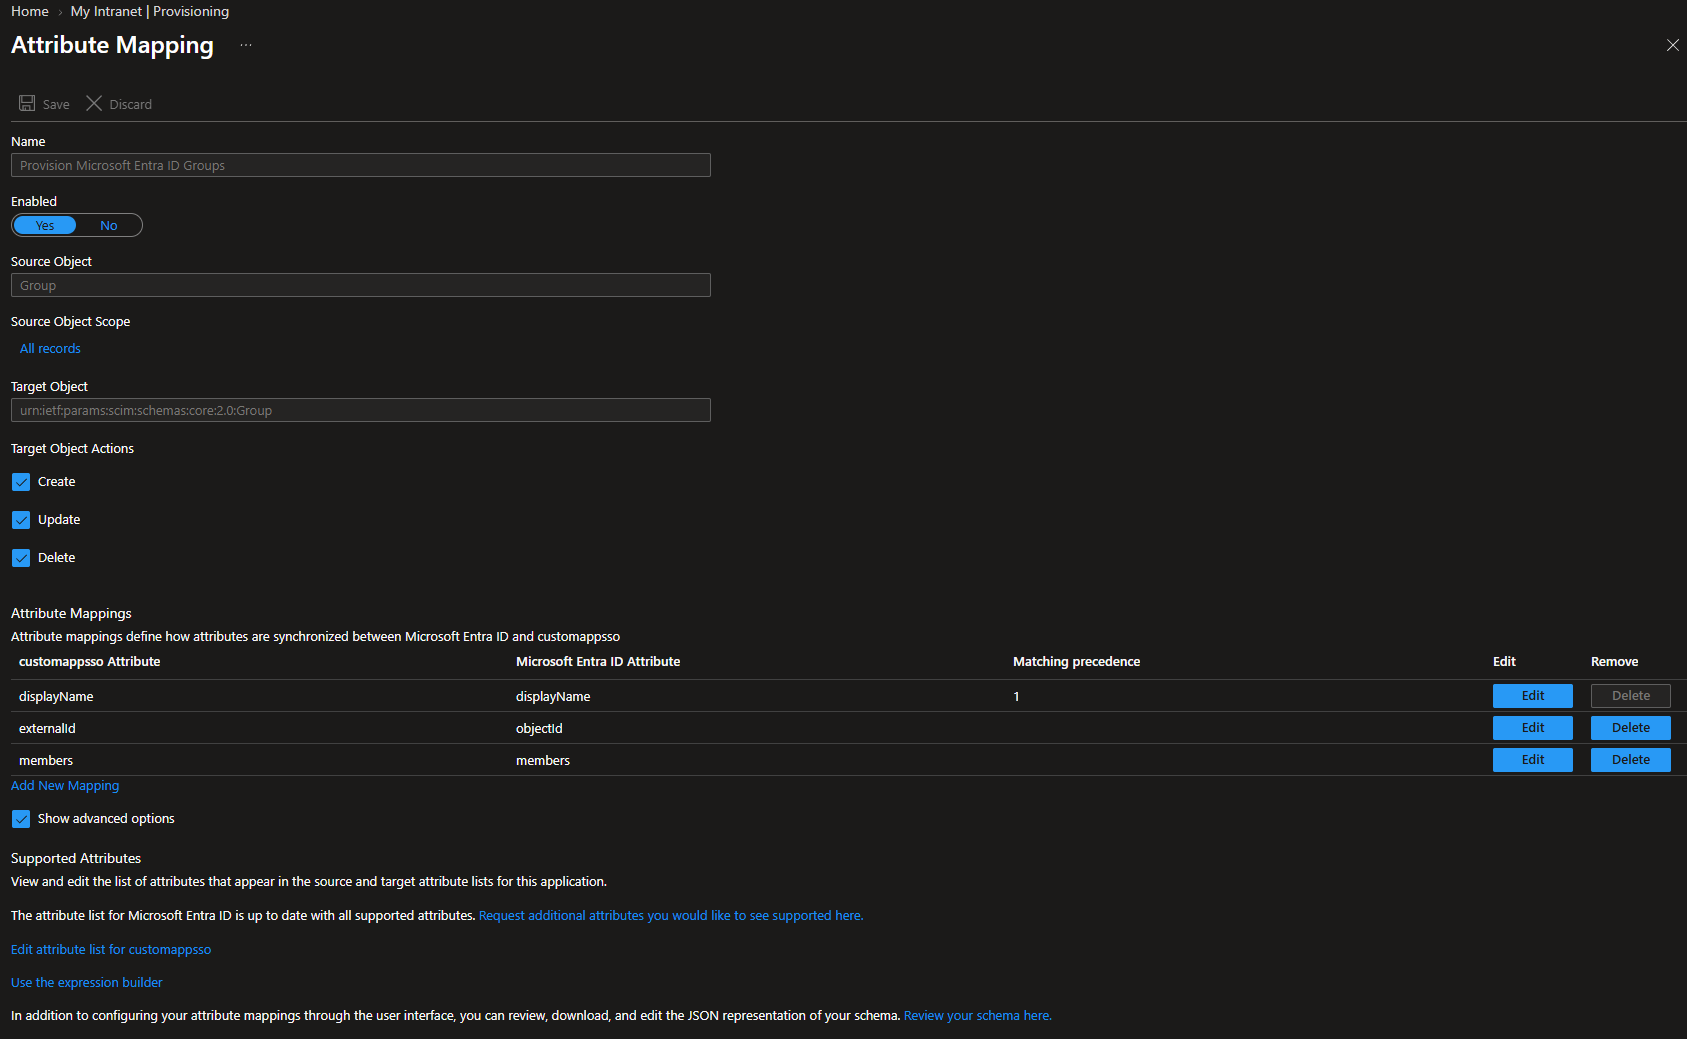
You see several options related to provisioning Entra ID groups into an external system.
- Target Object Actions control whether you send Create, Update and Delete events to the target system. For example, if you want groups synchronised to your intranet but do not want them deleted from the intranet when a group is deleted in Entra ID, clear the Delete option.
- Attribute Mappings shows the mapping table that maps group properties in Entra ID to the SCIM schema. You can use expressions to transform your data before it is sent to your intranet.
- Supported Attributes is where you control which attributes you can map to. Interact supports several Interact-specific SCIM extension schemas. This is where you define the extra fields you want Entra ID to populate when provisioning your objects.
Tip: If you are testing, turn off the Delete capability initially.
Select Edit attribute list for customappsso.
Add a new attribute with the following details:
- Name:
urn:ietf:params:scim:schemas:extension:interactsoftware:2.0:Group:groupType - Type:
String - Required:
Yes
This attribute is part of an Interact custom SCIM schema and is required for groups to be provisioned successfully.
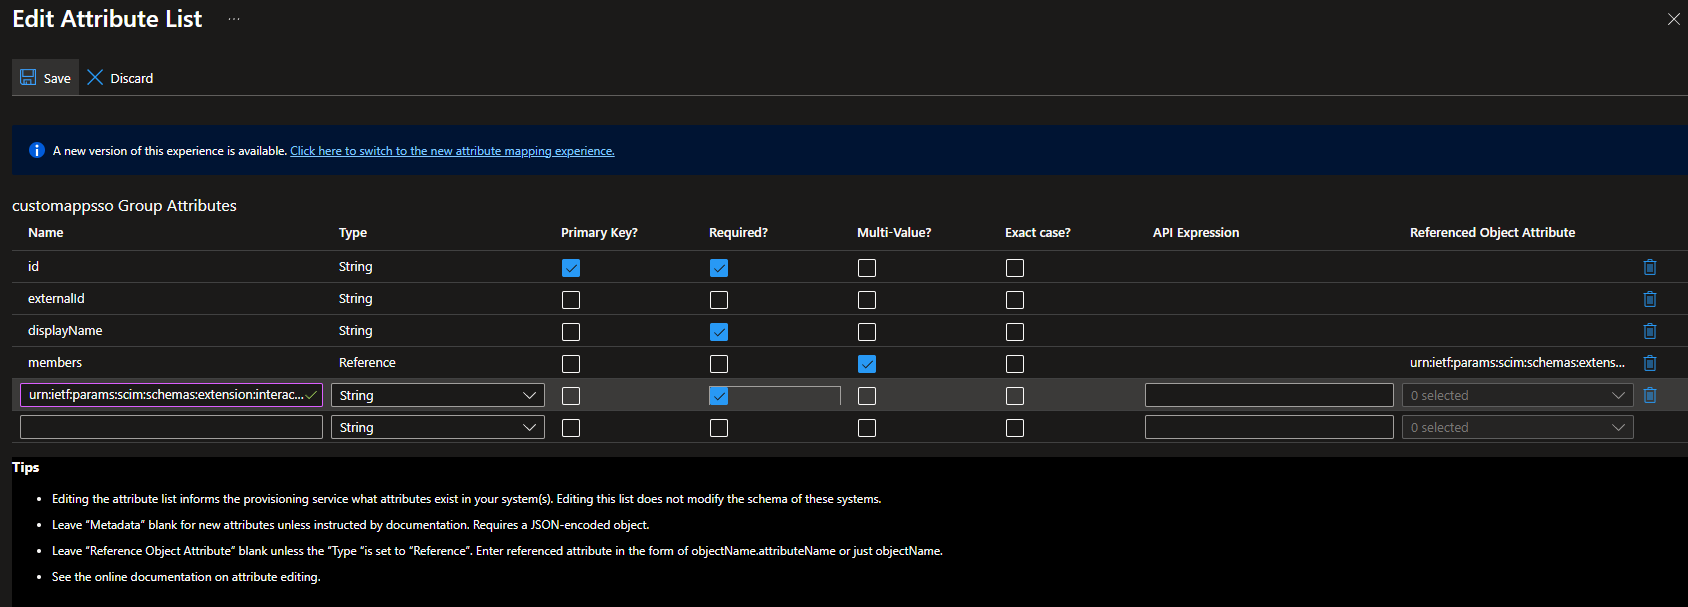
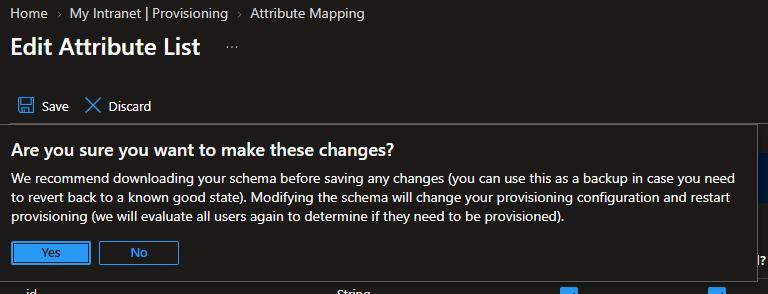
Select Save, then confirm the prompt by selecting Yes.
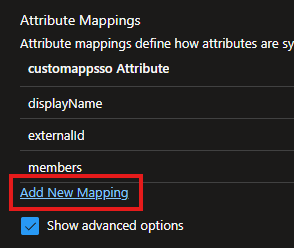
Add a new mapping to the attribute you just defined. Select Add New Mapping.
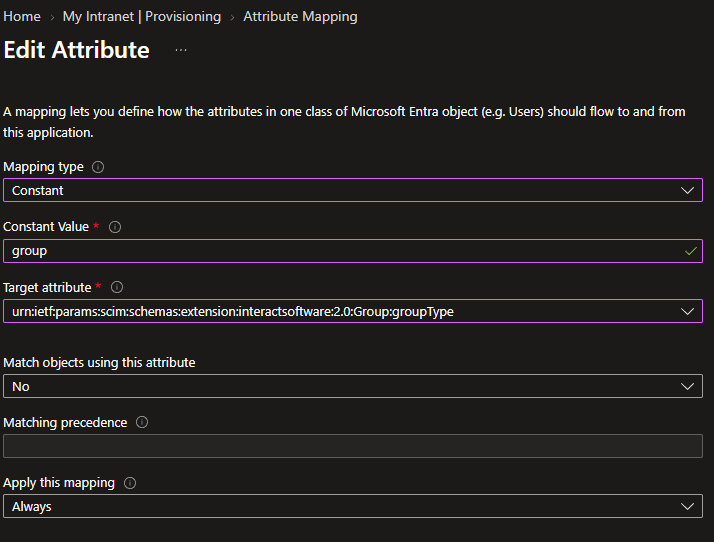
Specify how you want to populate this value. The simplest option is:
- Mapping type:
Constant. Use an Expression instead if you want to make the group type dynamic. The expression must yield one of the SCIM values in the table below (lower case). - Constant Value:
group - Target attribute:
urn:ietf:params:scim:schemas:extension:interactsoftware:2.0:Group:groupType
| Group type | Expected SCIM value |
|---|---|
| Company | company |
| Department | department |
| Location | location |
| Security Group | group |
You should see your new mapping in the table. Select OK, then confirm the prompt by selecting Yes.
Go back to the Provisioning screen.
Step 4: Configure user mappings
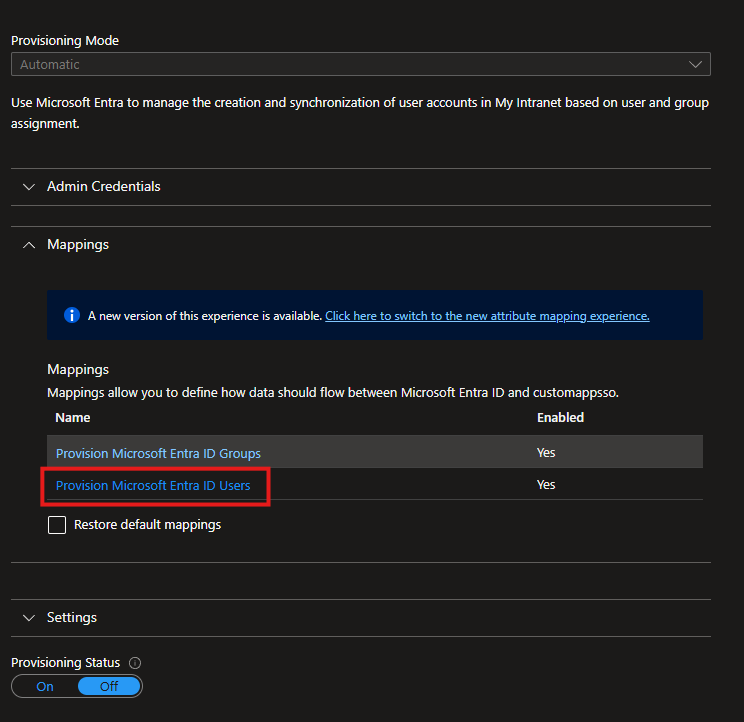
Select Provision Microsoft Entra ID Users.
This is the default mapping set proposed by Entra ID. Remove the following attribute mappings from the table (customappsso attribute column names), because they are not supported in Interact's schema:
displayNamename.formattedaddresses[type eq "work"].streetAddressaddresses[type eq "work"].localityaddresses[type eq "work"].regionaddresses[type eq "work"].postalCodeaddresses[type eq "work"].countryphoneNumbers[type eq "fax"].valueurn:ietf:params:scim:schemas:extension:enterprise:2.0:User:employeeNumber
Tip: Use the granular address fields to concatenate the full address into a single value that goes into
addresses[type eq "work"].formatted, so that the full address reaches Interact upon provisioning.
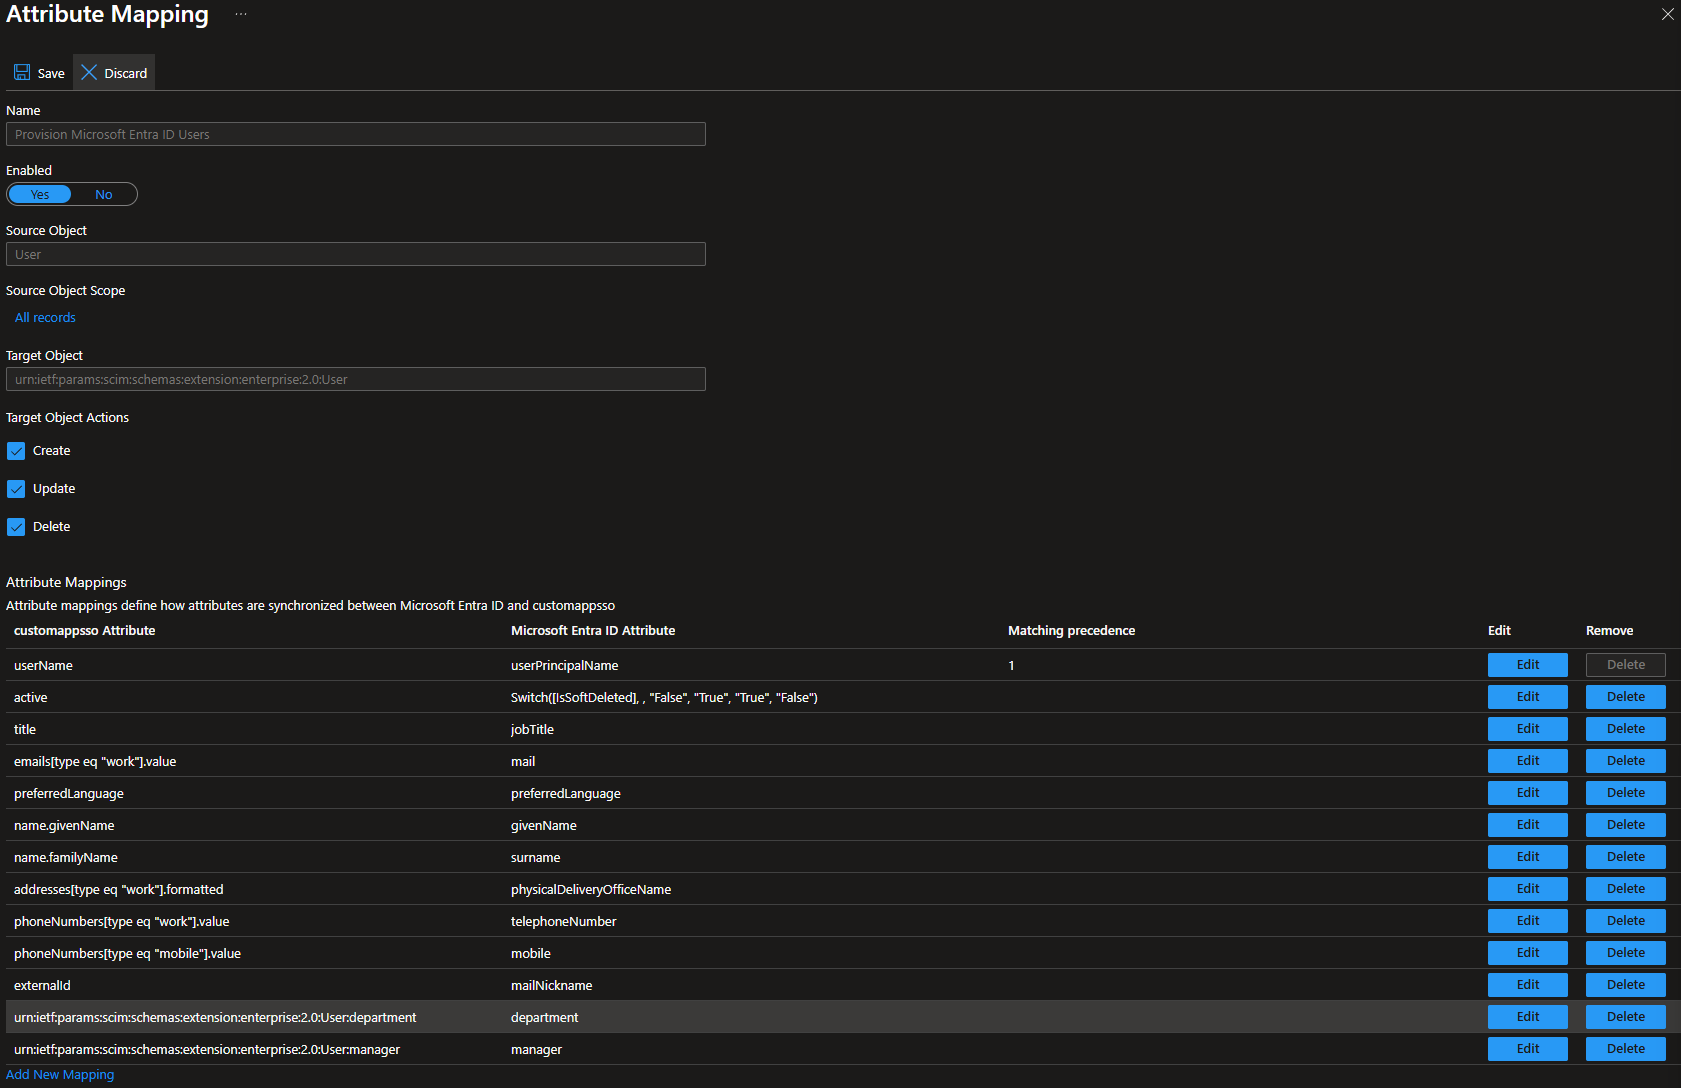
After the deletions, set the matching precedence on two fields:
- For the
emails[type eq "work"].valuefield, set Matching precedence to 2. - For the
mailNickname/externalIDfield, set Matching precedence to 3.
This makes Interact check the username, UID and primary email address before creating a new user.
Now add the missing required Interact attributes. Select Edit attribute list for customappsso.
Add the following new attributes:
| Name | Type |
|---|---|
urn:ietf:params:scim:schemas:extension:interactsoftware:2.0:User:location |
String |
urn:ietf:params:scim:schemas:extension:interactsoftware:2.0:User:loginType |
String |
Important: Remove any leading or trailing white space from the attribute names.
Select Save, then confirm the changes by selecting Yes.
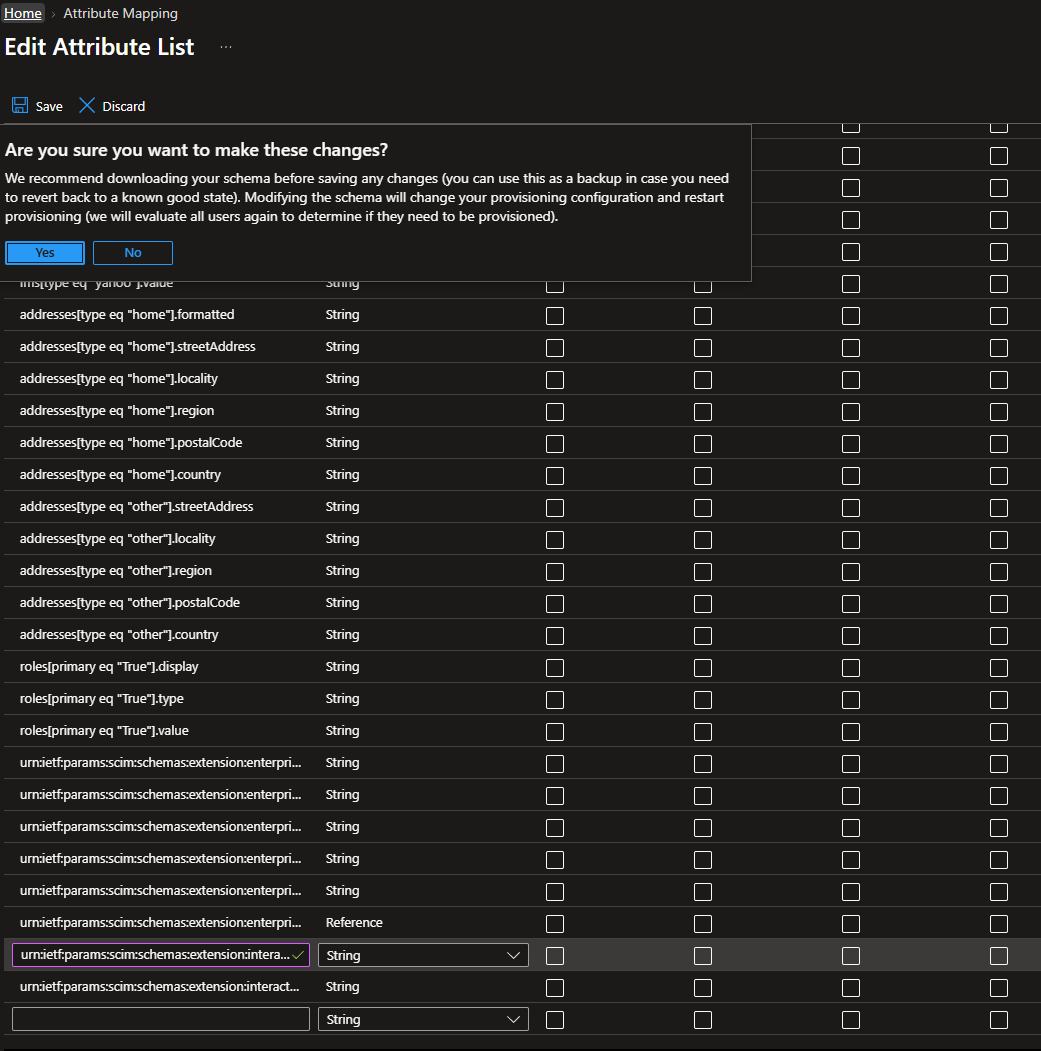
Select Add New Mapping.
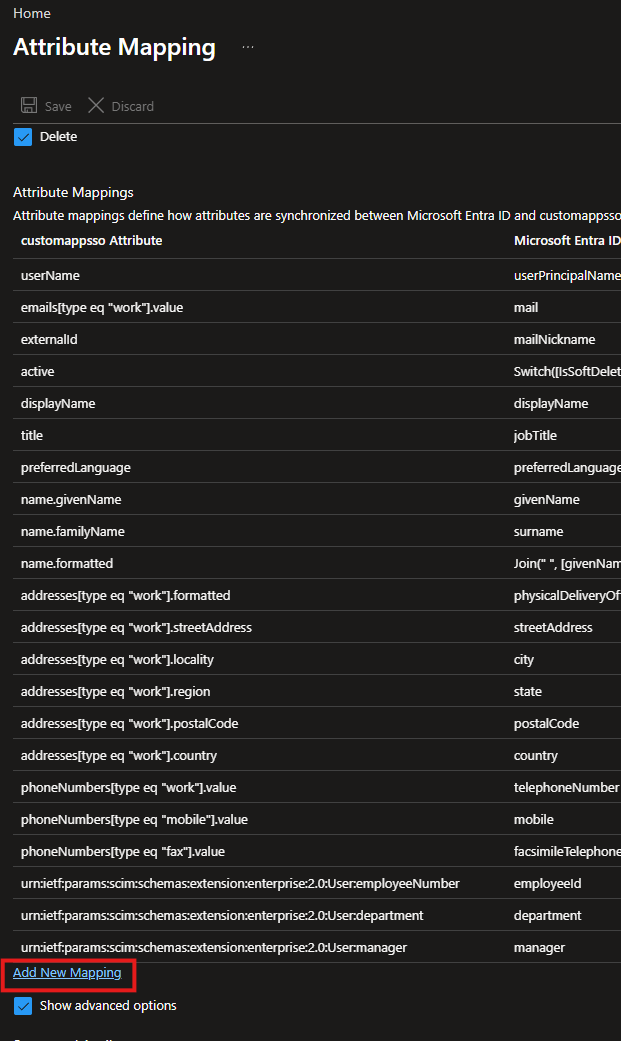
Add the following three mappings:
| Mapping type | Constant value / source attribute | Target attribute |
|---|---|---|
| Constant (or use a Direct mapping or expression to load this value from another field) | ACME (your organisation name) |
urn:ietf:params:scim:schemas:extension:enterprise:2.0:User:organization |
| Direct (or use an expression to load this value from another field) | Source attribute: city (use a more appropriate field for your organisation) |
urn:ietf:params:scim:schemas:extension:interactsoftware:2.0:User:location |
| Constant (or use a Direct mapping or expression) | SAML (other valid options are Local Login and Windows Login) |
urn:ietf:params:scim:schemas:extension:interactsoftware:2.0:User:loginType |
Select Save, then select Yes to confirm the changes.
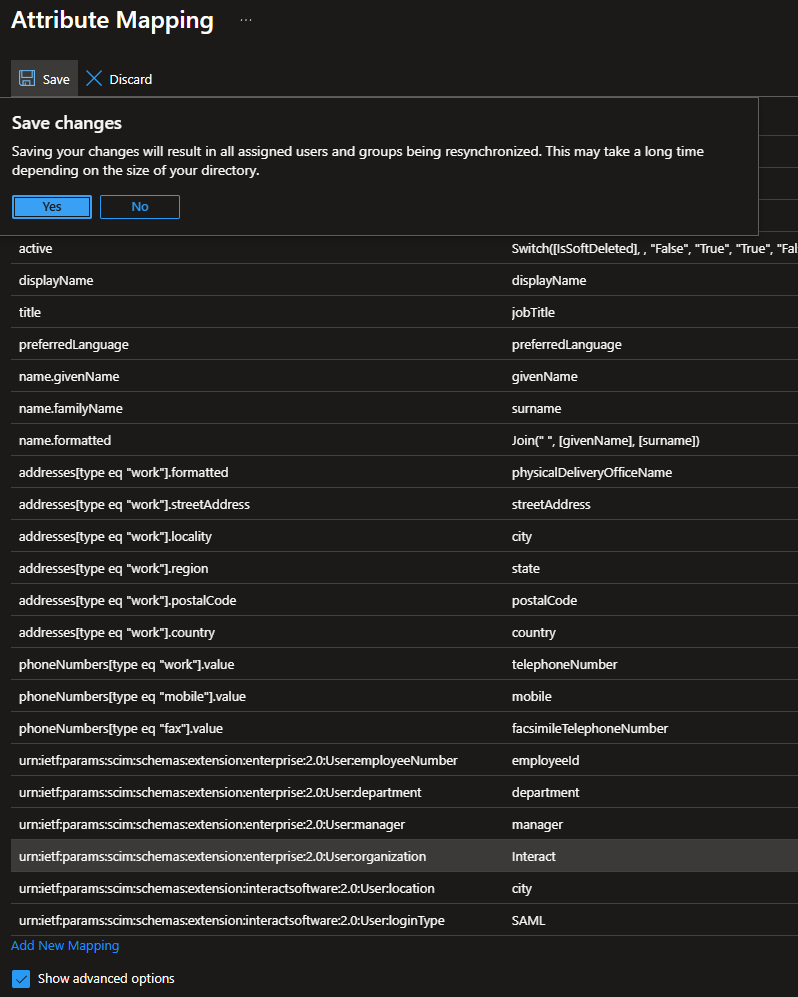
Note: This is also the process for adding further Interact fields beyond the minimal mapping required for provisioning to work, including the extended list of profile fields supported by Interact and additional fields you declare within your Interact instance. Load the full list of fields supported on your Interact site using the schema discovery endpoint. Entra ID provisioning does not support automatic schema discovery, so you must enter new supported attributes manually.
Important: Ensure the Department and Location fields have values, as these are required from an Interact perspective. One way to ensure this is to set a default value in the field mapping, such as
Default.
Go back to the application page.
Step 5: Select users and groups to synchronise
There are two ways to specify which users and groups synchronise to your intranet:
- All users and groups
- Assigned users and groups only
Synchronise all users and groups
Select Provisioning and expand the Settings section.
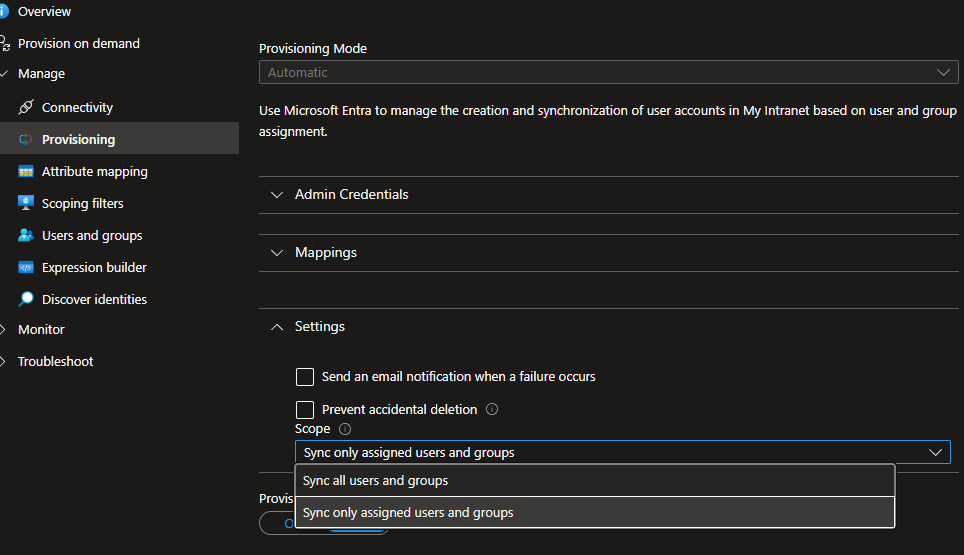
Change the Scope to Sync all users and groups. Select Save, then go back to the application page.
Note: If the dropdown is missing, give it a minute until the Mappings panel loads. The two options load asynchronously and may seem delayed.
Synchronise assigned users and groups only
Select Users and Groups, then select Add user/group.
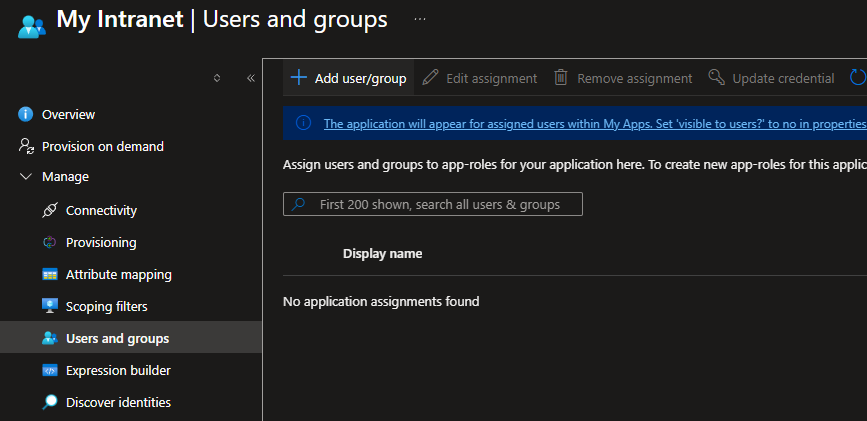
Use the search function to find the users and groups you want, select them, then select Select.
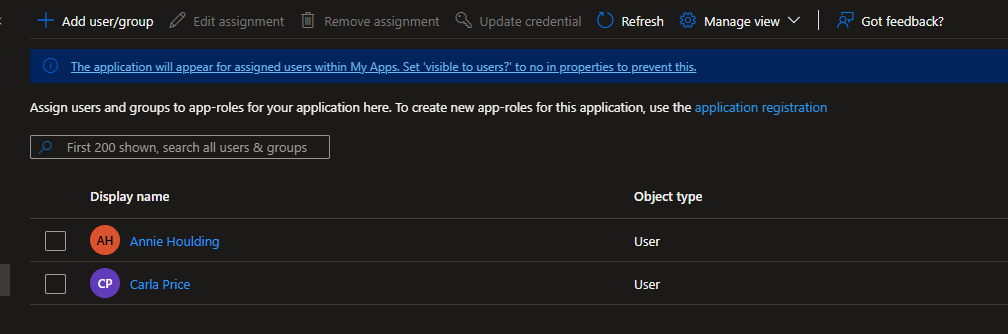
Select Assign.
You now see your users and groups assigned in the Users and groups table.
Step 6: Enable provisioning
On the Provisioning page of the application, toggle the Provisioning Status and select Save.
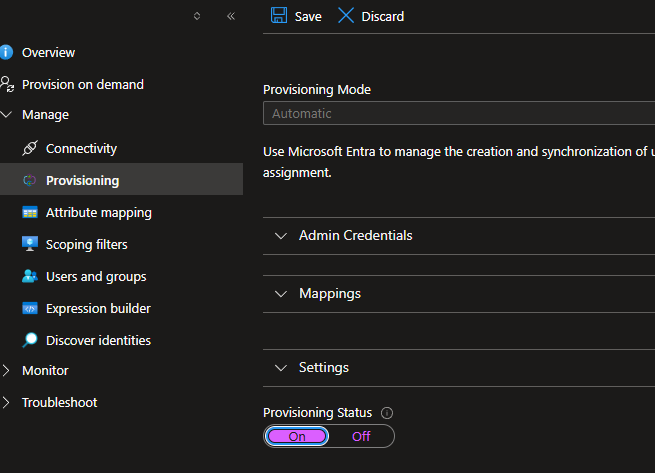
Once provisioning completes, you see the status and any errors on the Provisioning page.
Troubleshooting
- Use the Provisioning Logs provided by Entra ID.
- Interact's SCIM implementation is verbose and provides context with all errors, to help you resolve issues.
- Check whether the SCIM service is functional by opening your browser at
https://{{intranet_url}}/api/v2/scim/v2/health. Check this if you receive errors such as:Error Code: SystemForCrossDomainIdentityManagementCredentialValidationUnavailable— an HTTP 404 Not Found response was returned rather than the expected HTTP 200 OK response. - Errors mention issues with specific attributes, for example: bad value type for attribute X, missing attribute Y, or a value in attribute Z that does not comply with a required format.
- If the manager sync functionality is not working during testing, ensure that the manager is part of the users being synced in Entra ID. The reconciliation of manager information happens on the Entra ID side, not within Interact, so the manager must be part of the Entra ID provisioning.
Known limitations of Entra ID SCIM support
Provisioning
- Groups: With an Entra ID Premium licence plan, you can use groups to assign access to a SaaS application. When the provisioning scope is set to synchronise only assigned users and groups, the provisioning service provisions or de-provisions users based on whether they are members of a group assigned to the application. The group object itself is not provisioned unless the application supports group objects. Ensure that groups assigned to your application have the property
SecurityEnabledset toTrue. - Dynamic groups: The provisioning service can read and provision users in dynamic groups, with these caveats. Dynamic groups can affect the performance of end-to-end provisioning. How fast a user in a dynamic group is provisioned or de-provisioned depends on how fast the dynamic group can evaluate membership changes. When a user loses membership in a dynamic group, it is treated as a de-provisioning event. Consider this when creating rules for dynamic groups.
- Nested groups: The provisioning service cannot read or provision users in nested groups. It can only read and provision users that are immediate members of an explicitly assigned group. Instead, directly assign or scope in the groups that contain the users who need to be provisioned.
- Additional fields: You cannot have an additional field inside Interact with a question mark (
?) in the field name, or the process fails. You receive an Error 500 when trying to perform any SCIM activity until the issue is resolved. Remove the field completely and recreate it without a question mark.
Additional configuration options
- Null values: Entra ID does not push an item to Interact if it is null, so it uses logic similar to Interact's "ApplyBlank" logic for all fields. The default value field only works on the initial sync, which causes an issue with required fields. To force a field not to be blank, or to force it to sync despite a null value, switch from a Direct field mapping type to Expression and use, for example,
Coalesce([otherMails], " "). See the Entra ID articles on customising application data and known issues. - Power User permissions being removed: For the
emails[type eq "work"].valuefield, set Match objects using this attribute to yes and Matching precedence to 2. If you already ran a sync and wiped Power User access, you must manually re-add the permission for your users. - Migrating from the Profile Sources connector to SCIM: If you have existing users in Interact that you do not want to delete or alter incorrectly, first gather this information from Entra ID:
mailNickName,userPrincipalName,mail,givenName,surname, andEntityID(or UID). Compare it with these Interact fields: UserName, UID, Email, First Name and Last Name. To avoid disruption, map the correct values from Entra ID to the Interact fields before performing the first sync. - Constants: Be careful with the Constant mapping type. If you map a constant to a field like Organization, it sets the value as intended, but if you allow users to update their Organization manually and then ever restart provisioning, the constant is pushed again and you could lose the manual adjustments. Use the mapping type None and set a default value instead. Microsoft describes None as: "the target attribute is left unmodified. However, if the target attribute is ever empty, it's populated with the Default value that you specify." This is usually what you want, especially when migrating from UMI to SCIM with existing users.
- Only During Object Creation: There is a field mapping option to apply a mapping only during object creation. This maps a field when a user is created, then lets the user adjust the field in their Interact profile without Entra ID overwriting it on a subsequent sync. This is useful for fields like Language, Culture and primary Company, Department and Location.
- Date formats: When you map to the
jobStartDatefield, your data is typically not in the RFC 3339 format Interact expects. For example, your Entra ID field may beM/d/yyyyorMM/dd/yyyy, but Interact needsyyyy-MM-ddTHH:mm:ssZ. Handle it with:FormatDateTime([extensionAttribute8], , "M/d/yyyy", "yyyy-MM-ddTHH:mm:ssZ"). Adjust the input format as needed. Leading zeroes matter, so confirm whether single-digit months or days have a leading zero. - Preferred name logic: Use
IIF(IsNullOrEmpty([preferredname]),[givenname],[preferredname]). - Concatenating values: Many expressions are available to format data. See functions for customising application data. To concatenate values, use the
Joincommand with a separator of"".
De-provisioning
- If a user previously managed by the provisioning service is unassigned from an app, or from a group assigned to an app, Entra ID sends a disable request. At that point the user is no longer managed by the service, and a delete request is not sent when they are deleted from the directory.
- Provisioning a user that is disabled in Entra ID is not supported. The user must be active in Entra ID before they are provisioned.
- When a user goes from soft-deleted to active, the provisioning service activates the user in the target app but does not automatically restore the group memberships. The target application should maintain the group memberships for the user in an inactive state. If it does not, restart provisioning to update the group memberships. See How provisioning works.
Microsoft describes SCIM de-provisioning as follows:
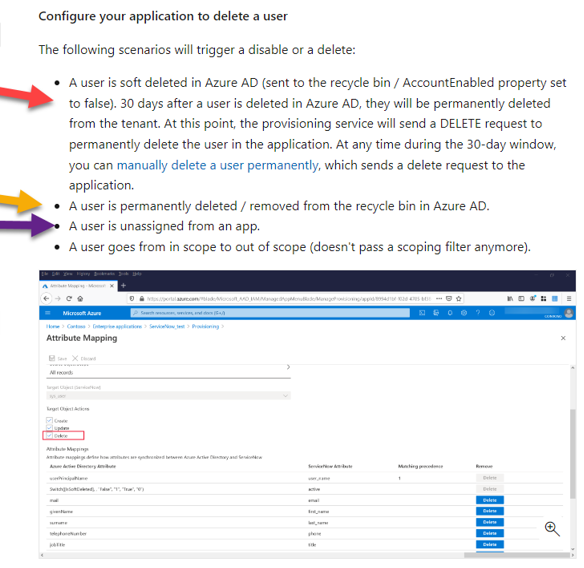
- Soft delete (30-day delay): If you soft delete, Entra ID does not send Interact a notification for 30 days. In the meantime, the user cannot log in because the SSO app no longer supports that user. After 30 days, the Interact licence is freed when Entra ID sends Interact the DELETE command and the user is deactivated. This addresses the licensing concern and prevents login, but some customers dislike waiting 30 days for removal.
- Direct removal from the app: Removing a user directly from the Entra ID SCIM app sends the DELETE command, so the user is removed from Interact immediately.
- Removal from an assigned group: Most companies register a group (such as an Everyone group or Interact Users group) in the Entra ID SCIM app rather than individual users. Removing a user from a group that is part of the SCIM app does not fire the DELETE command.
Note: If you are concerned about how de-provisioning works, file a ticket with Microsoft. More information on bugs and known issues is available in the Entra ID known issues documentation.