Microsoft Entra ID connector
Tip: For new integrations, use SCIM v2.0. It provides real-time provisioning and richer field mapping than the native connector.
Before you start
You need:
- A Power User account in Interact with access to Control Panel > Profile Sources.
- Permission to register an application in the Microsoft Entra ID (formerly Azure AD) portal.
Overview
First you register your Interact instance as an application within Entra ID, then you configure Entra ID as a profile source within Interact.
Configure Microsoft Entra ID
Step 1: Register a new app
In your Entra ID portal, select Microsoft Entra ID from the left-hand menu, then select App registrations and New registration.
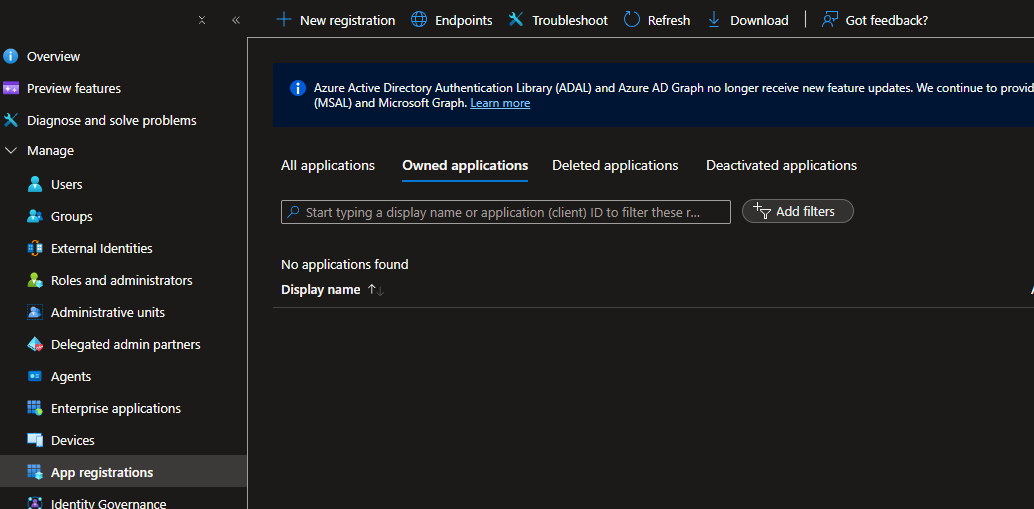
You are presented with a form titled Register an application.
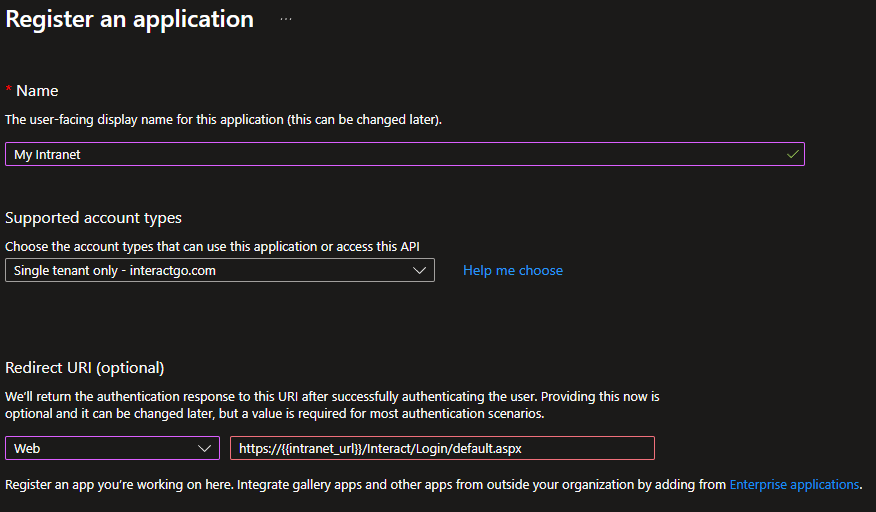
Give the registration a name, set the supported account type to organizational directory only, and fill out the Redirect URI.
Important: Your Redirect URI always matches the pattern
https://{{intranet_url}}/Interact/Login/default.aspx.
Select Register to continue.
Step 2: Add a new client secret
From the sub-menu, select Certificates & secrets, then New client secret.
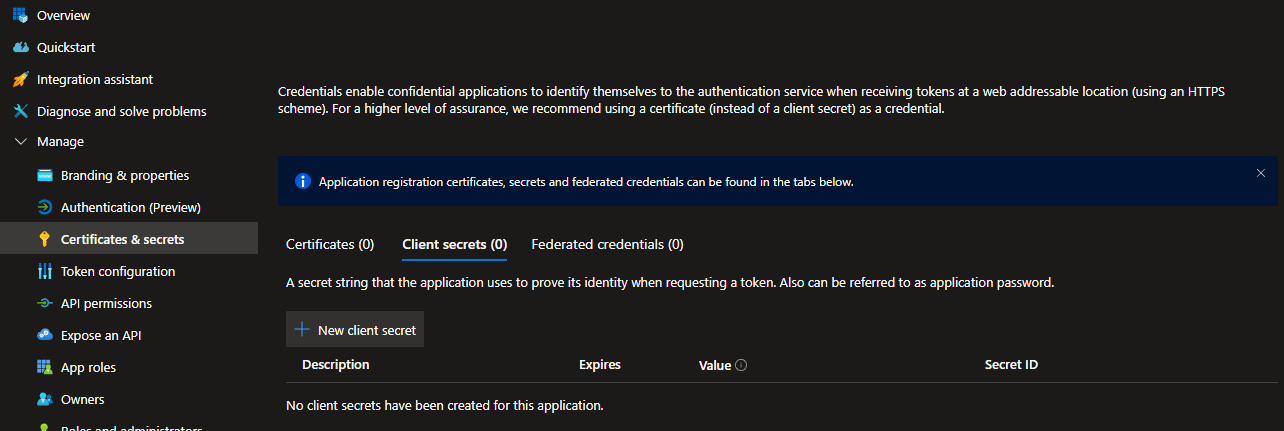
Give the client secret a name, select how long you want it to be valid, then select Add.
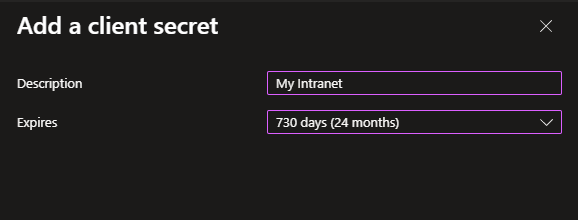
The new client secret appears at the bottom of the window.
Warning: Make a note of the client secret now, because it will not remain visible.

Step 3: Add permissions
Select API permissions from the side menu, then Add permission.
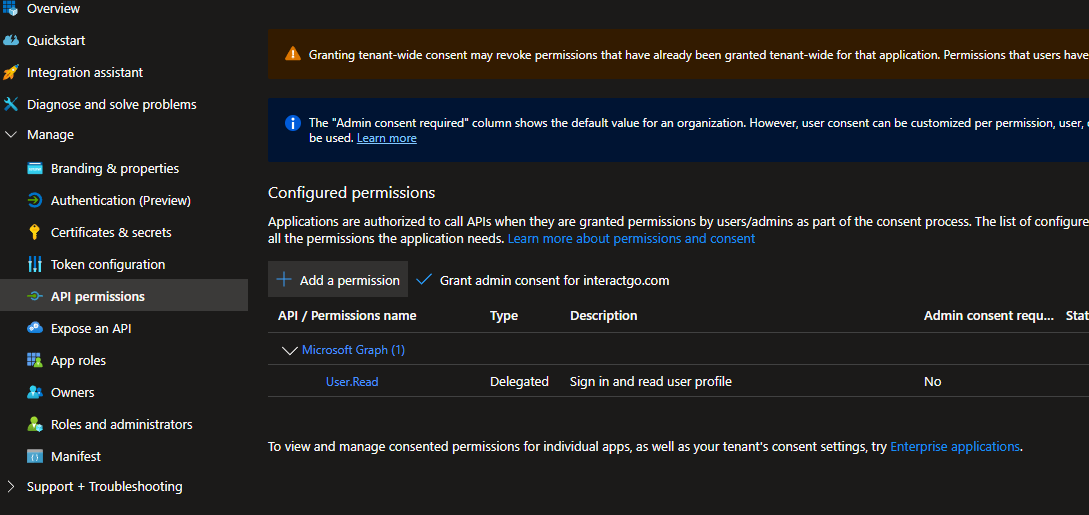
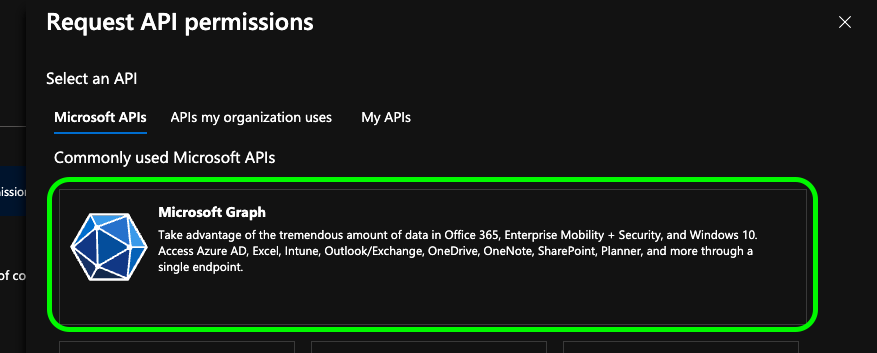
In the Request API permissions pane, on the Microsoft APIs tab, select Microsoft Graph.
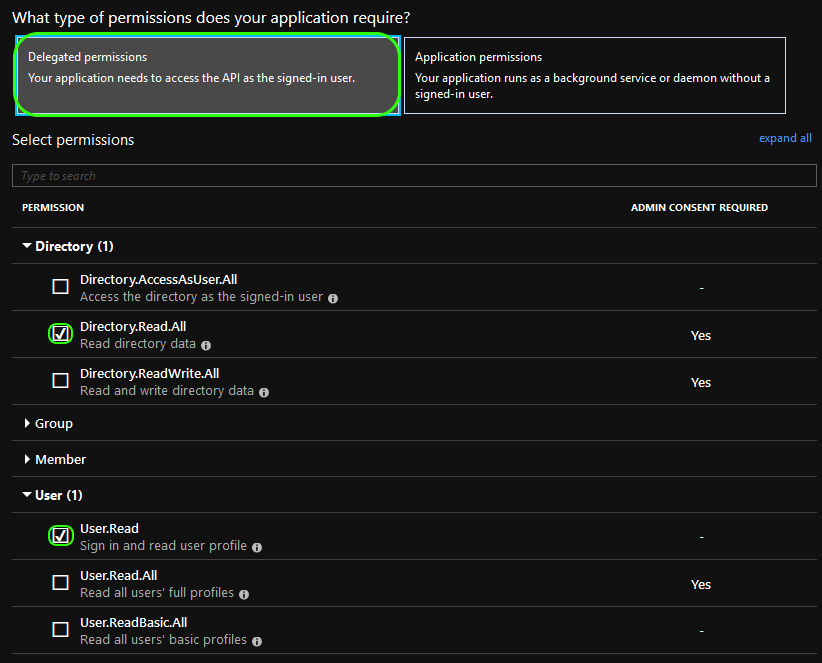
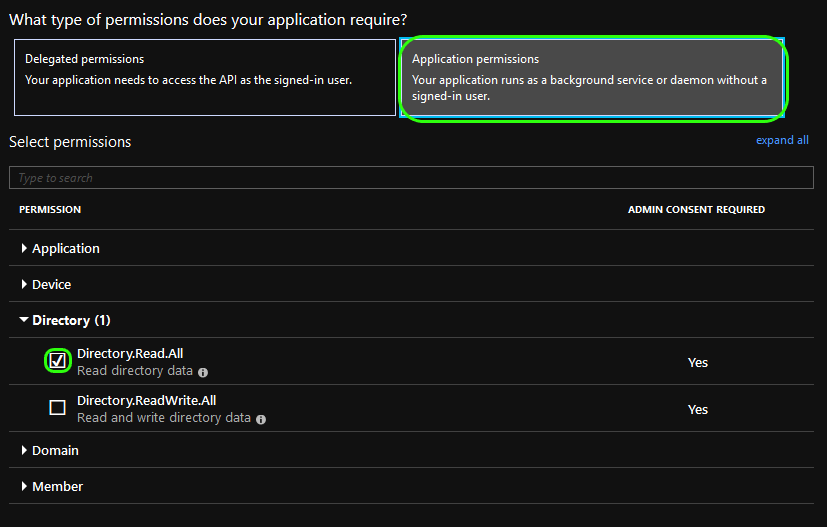
Select Delegated permissions. Expand Directory and select Directory.Read.All, then expand User and select User.Read.
Select Application permissions. Expand Directory and select Directory.Read.All.
At the bottom of the window, select Add permissions to close.
Step 4: Grant permissions
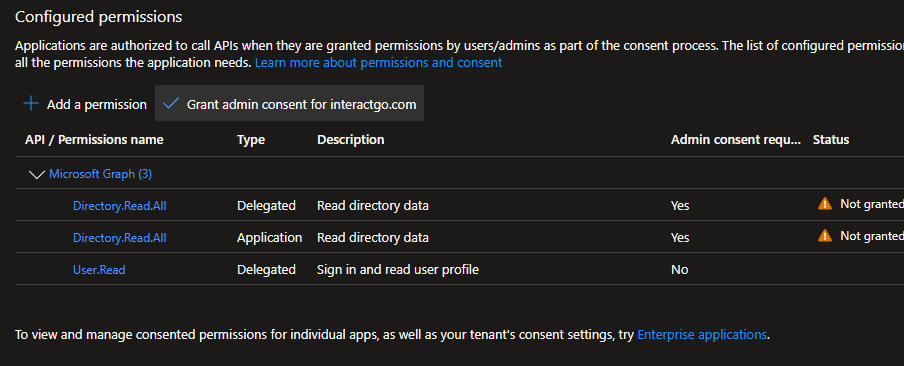
You are presented with a list of your selected permissions. Select Grant admin consent to apply them.
Select Yes to confirm.

Step 5: Obtain the EntityId
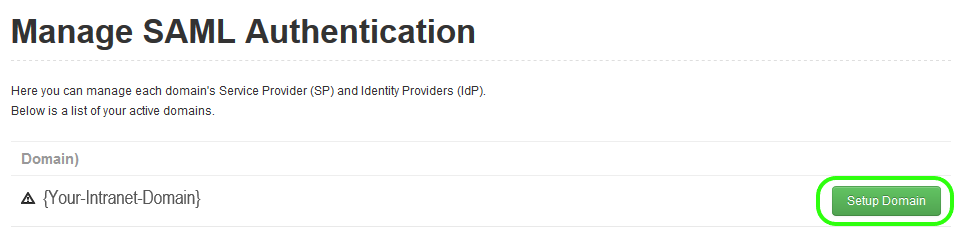
Log into your Interact intranet and go to Control Panel > SAML Authentication.
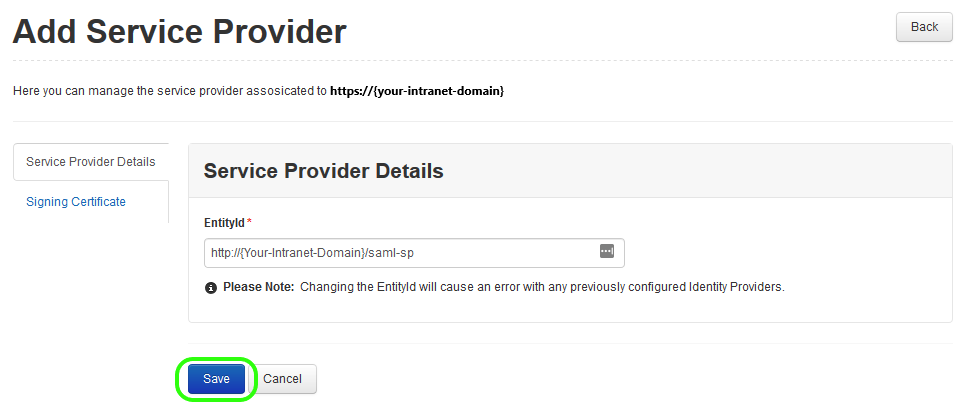
If your domain is not currently set up, select Setup Domain. Otherwise, skip the next two steps.
On the next page, select Save.
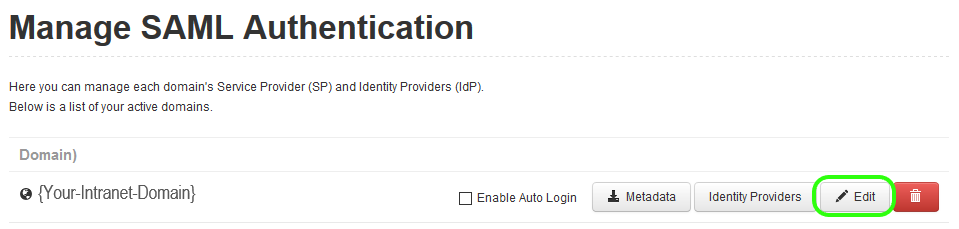
Select Edit for the domain you are working against.
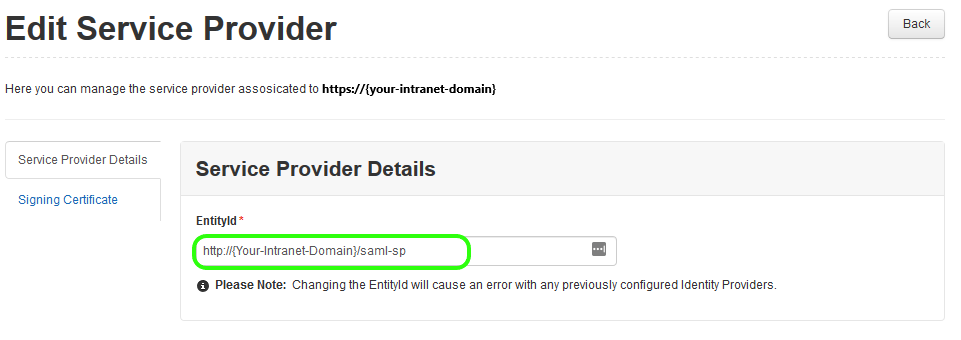
On the next screen, copy the text of the EntityId.
Switch back to your Entra ID portal. From the side sub-menu, select Expose an API, then select Add to set the Application ID URI.
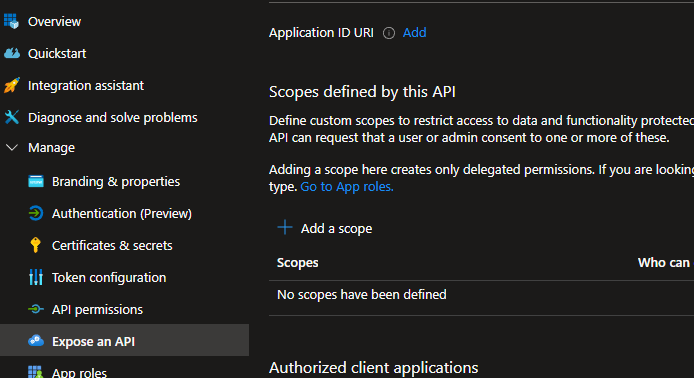
Paste the EntityId copied from your Interact settings into the Application ID URI.
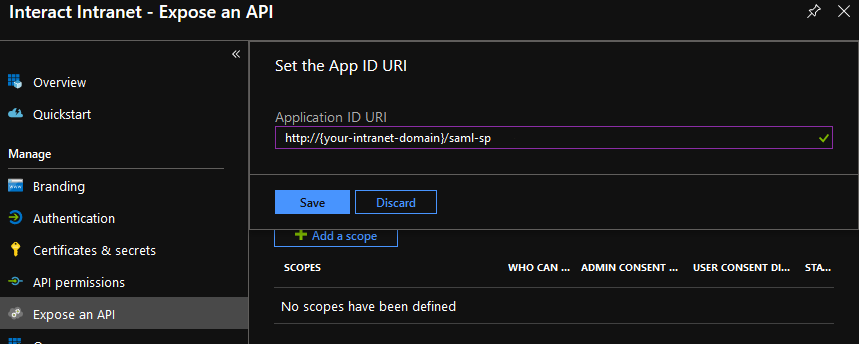
Select Save.
Step 6: Collect the required IDs
The Entra ID configuration is complete. Before continuing, you need:
- The secret you created in Step 2.
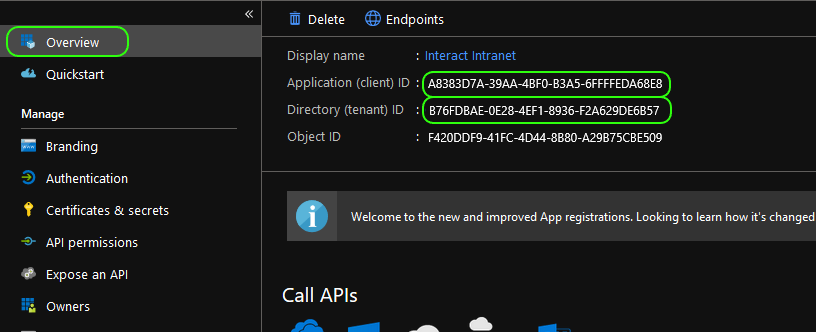
- The Application ID and Directory ID, found by selecting Overview from the side menu.
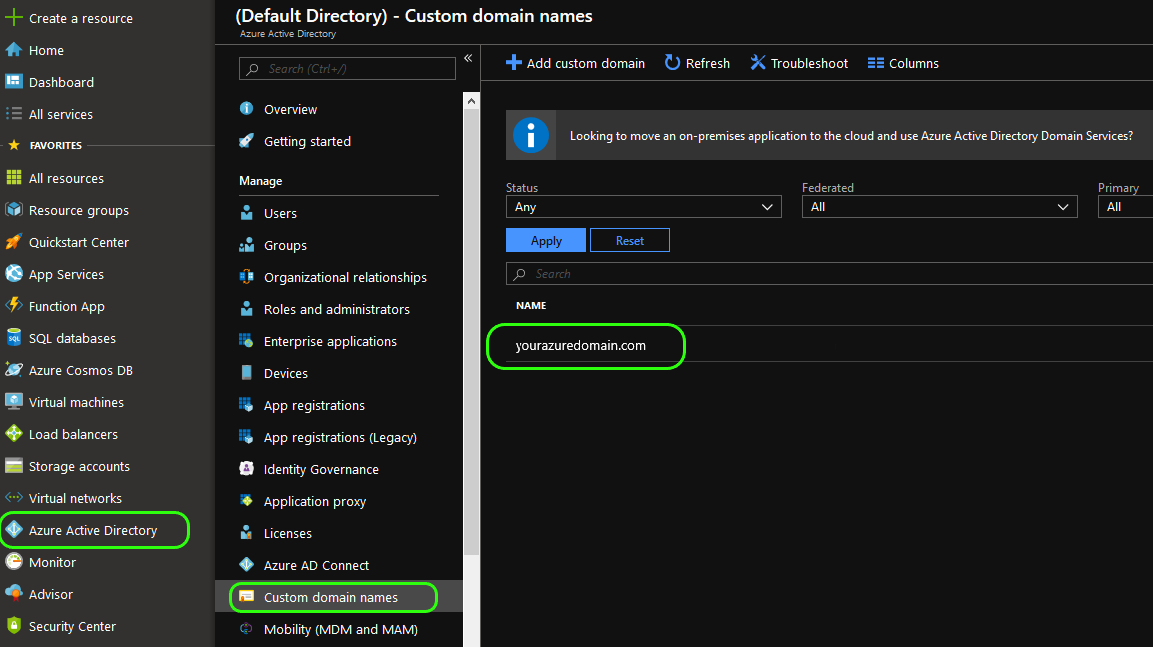
- Your Entra ID domain name, found by selecting Microsoft Entra ID from the main side menu, then Custom domain names from the sub-menu. Your domain name is in the pane on the right.
Configure Interact
Step 1: Add a profile source
In Interact, go to Control Panel > Profile Sources.
You should see an option for Microsoft Azure. If not, contact Interact Technical Support.
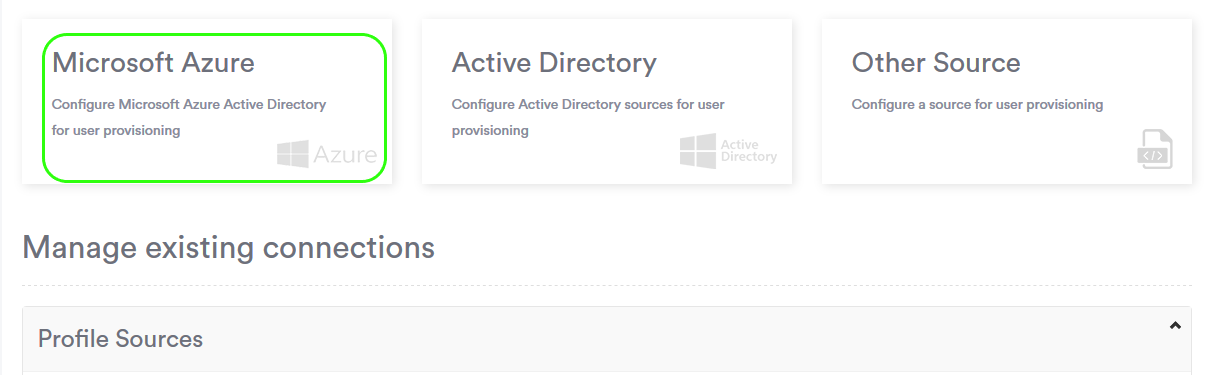
Note: This window may look different depending on any customisations made to your instance.
Select Microsoft Azure.
Step 2: Enter the IDs from Entra ID
Enter the Application ID, Secret and Directory ID you copied from the Entra ID configuration.
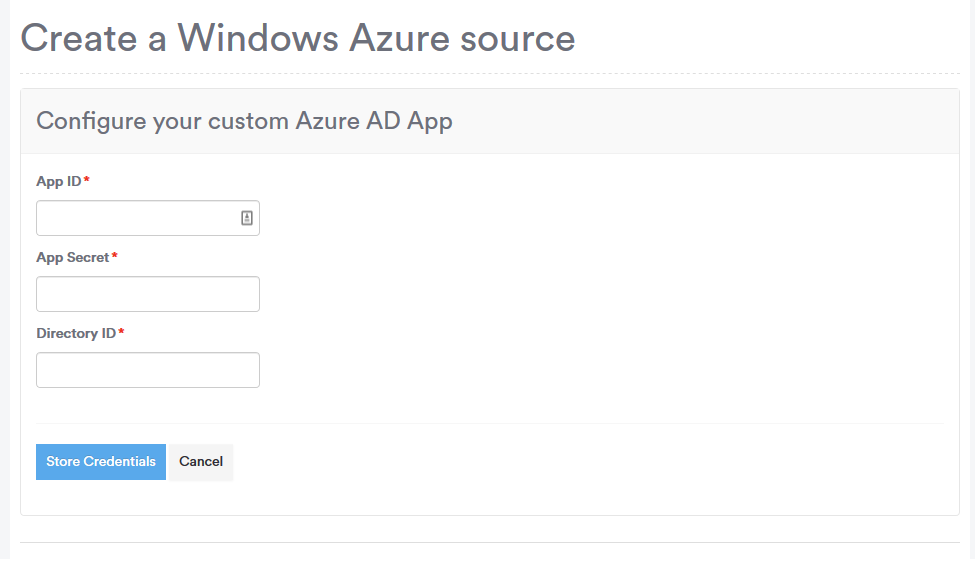
Select Store Credentials.
Step 3: Enter the domain details
Enter your Entra ID domain and the name you want to give the SAML configuration. Only fields marked with a red asterisk (*) are required.
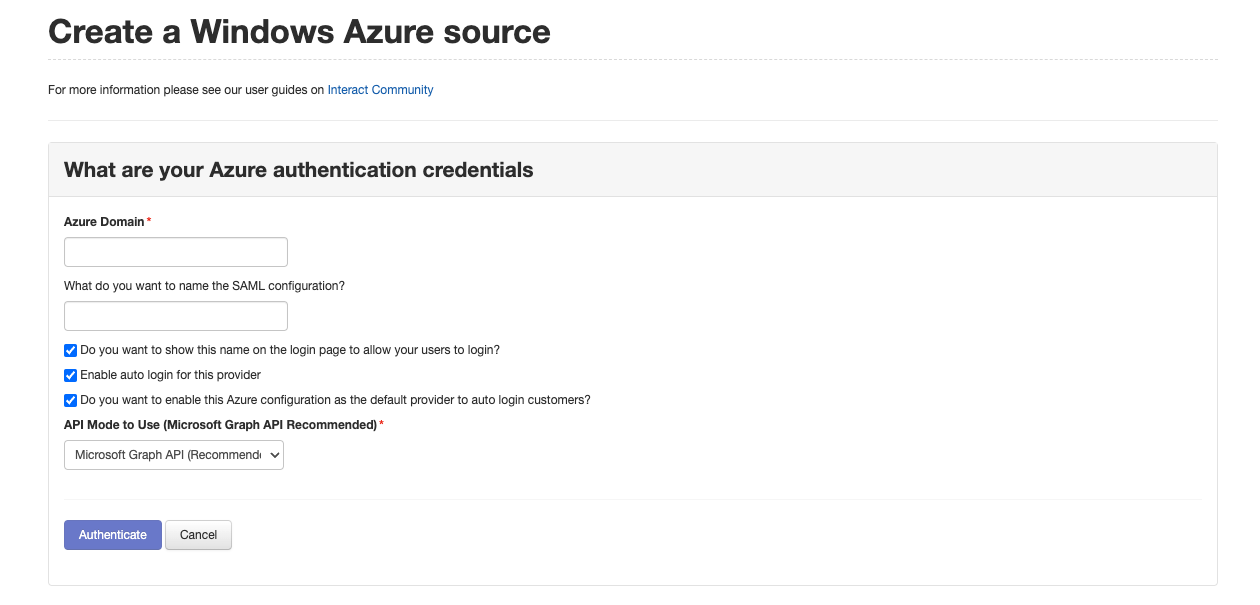
- What do you want to name the SAML configuration? — used within the SAML configuration area in Interact, and shown if Show provider on login screen is selected.
- Do you want to show this name on the login page to allow your users to log in? — shows the name above to users if they use the Interact login page.
- Enable auto login for this provider — sets this configuration to auto-log users in. If enabled at this stage, users wanting to log in must be in Entra ID. Leave this unchecked until the Entra ID setup is complete.
- Do you want to enable this Azure configuration as the default provider to auto login users? — replaces any pre-configured SAML configurations with this one as the default. You can change this later from the SAML configuration screens.
- API Mode to Use — leave this set to Microsoft Graph API.
Important: Azure AD Graph API is available only for legacy configurations and has been deprecated. All profile sources should use the Microsoft Graph API.
Select Authenticate once complete.
Step 4: Configure field mappings
Once authenticated, choose how to map fields from Entra ID to fields in Interact. All defaults are set within the dropdown fields, but you can update them to match your Entra ID configuration. Mark fields that are not required for synchronisation as Do not map to ignore any field set in Entra ID.
Note: Some fields you have in Entra ID may be missing here. Currently you cannot use fields other than those listed, including Entra ID's additional fields. Raise a request in the Product Enhancement forum if you need additional fields.
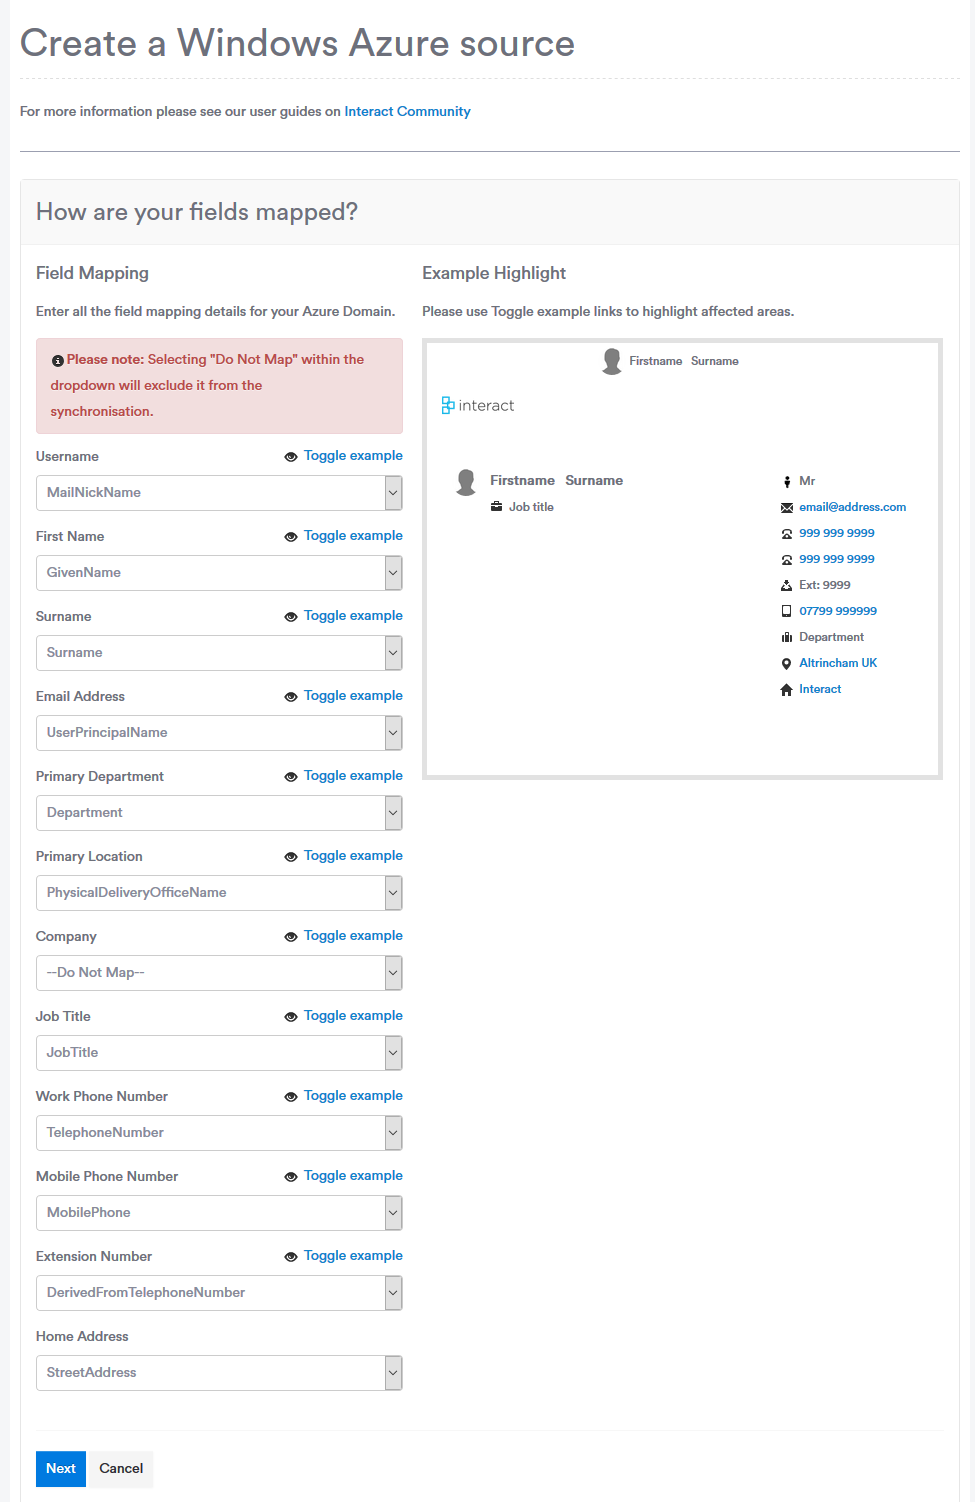
Select Next.
Step 5: Configure sync options
Select which options you want to sync from Entra ID to Interact. Choose which default values to use if one is not supplied for a user in Entra ID.
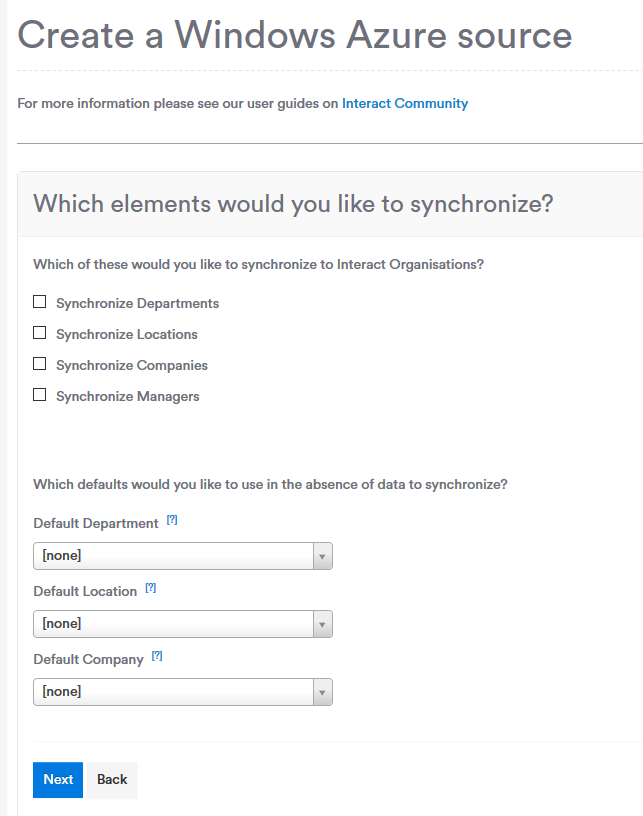
Select Next.
Step 6: Define missing user options
Select how Interact should handle users that are no longer in Entra ID or whose accounts are set to inactive in Entra ID.
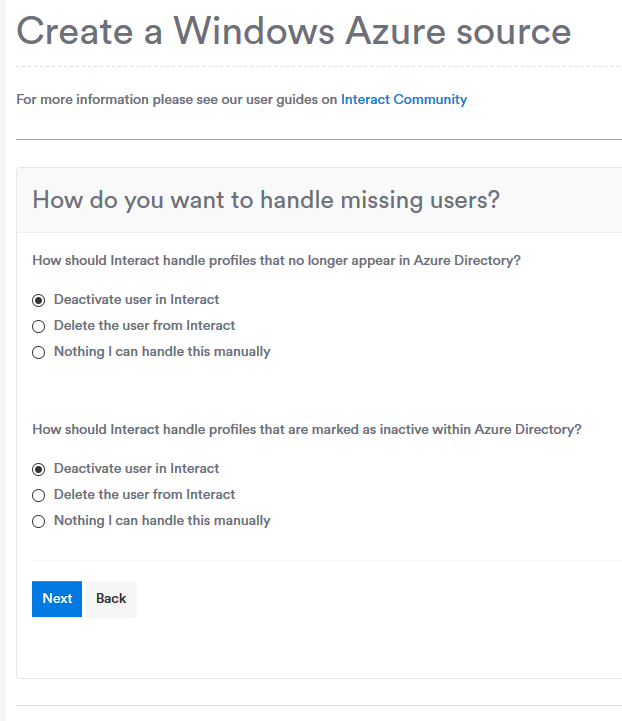
Select Next.
Step 7: Select groups
Select which security groups of users you want to sync into Interact. Users must exist within at least one security group to be synced. Distribution groups cannot be targeted for sync.
Note: When using the search feature, groups with 0 users do not appear in the results.
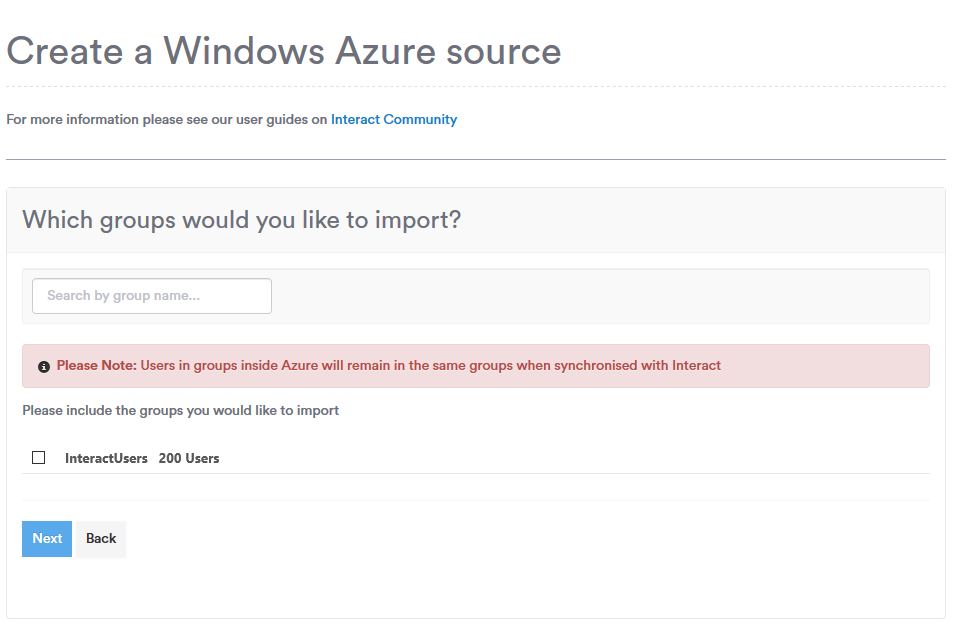
Select Next.
Step 8: Schedule the sync
Set the frequency at which you want to pull your user profile data.
Note: The scheduled time must be saved in UTC 24-hour format.
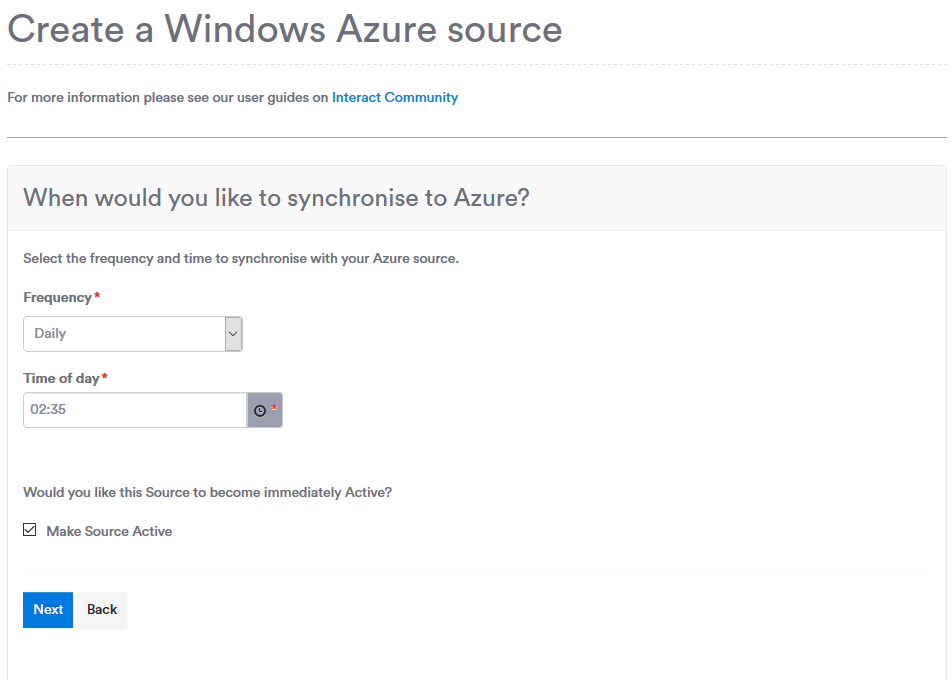
If you are ready to make this profile source active now, select Make Source Active. You can change this later. Select Next.
Step 9: Review the configuration
Review your configuration, then select Save. If you need to change anything, select Back.
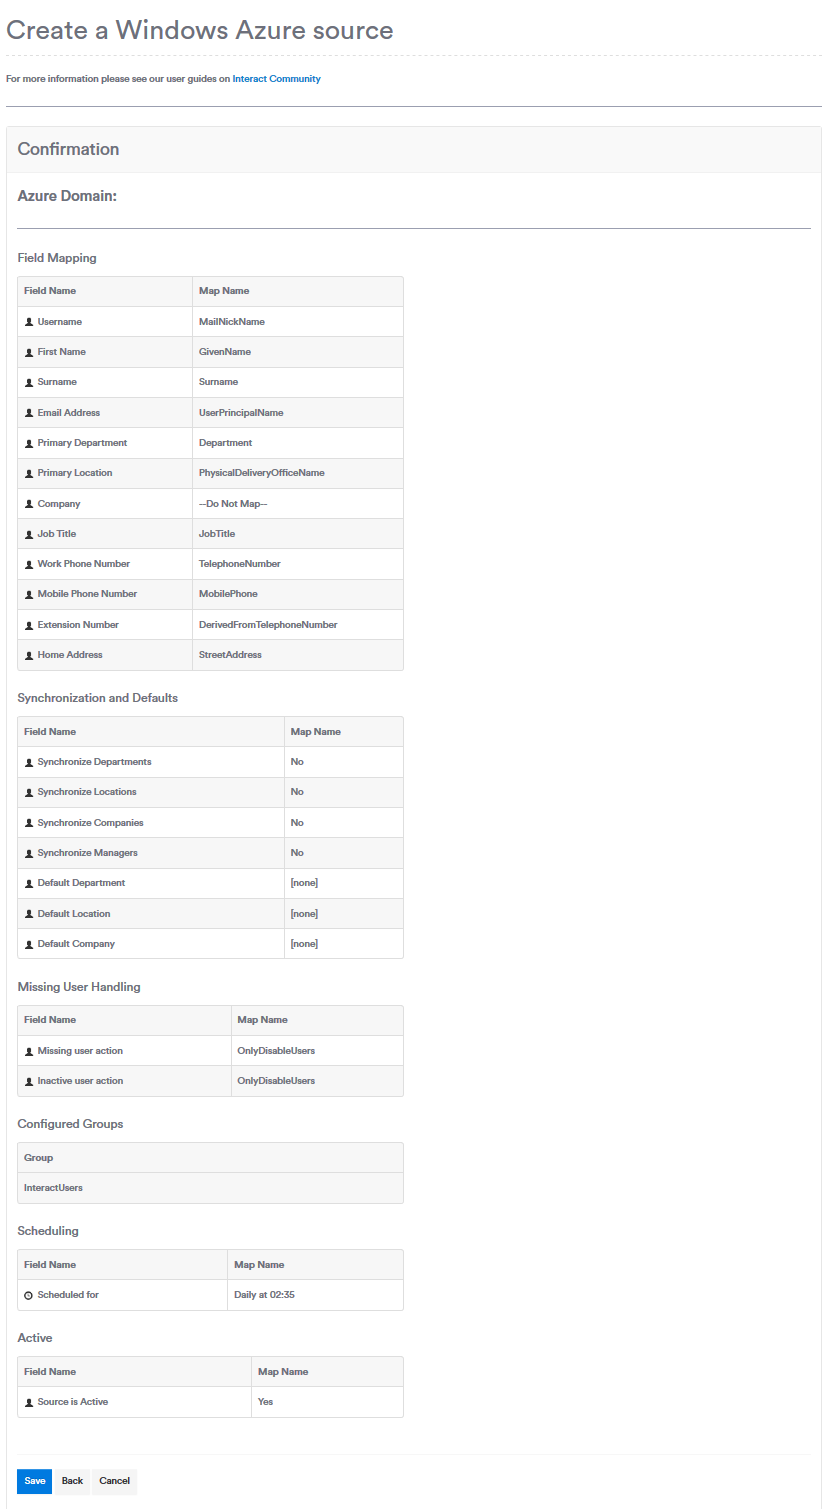
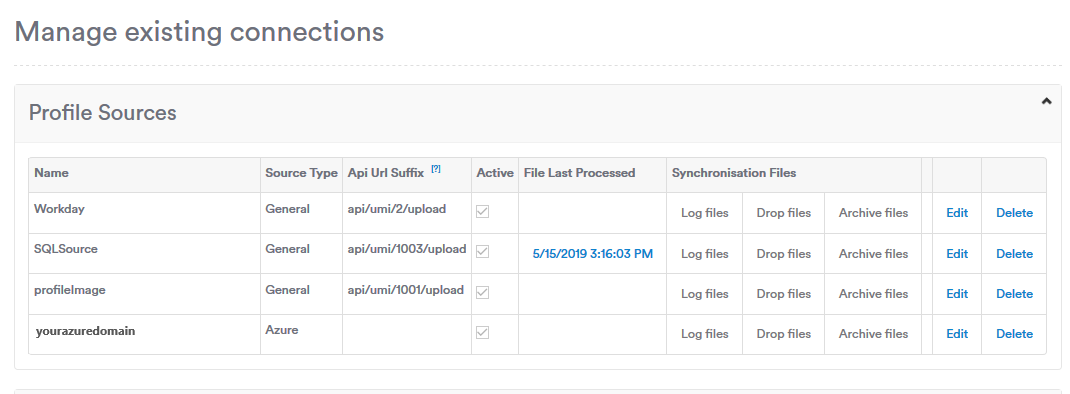
Your Entra ID profile source is now configured. It appears under the list of existing profile sources.
Edit an existing profile source
To edit the Entra ID configuration, go to Control Panel > Profile Sources, then select Edit for the source you want to adjust.