Tableau (JDBC)
Before you start
To connect Tableau to Interact Advanced Analytics, you need:
- Tableau Desktop, with a valid subscription or trial
- The AWS Athena JDBC driver
- An
athena.propertiesconfiguration file - Your Interact Advanced Analytics credentials and configuration details
Interact Advanced Analytics uses AWS Data Lake technologies for data querying, analysis and retrieval.
Step 1: Install Tableau Desktop
Install a version of Tableau Desktop with a valid subscription or trial. Download it from the Tableau releases page.
Step 2: Install the AWS Athena JDBC driver
Download the latest JDBC driver from the AWS Athena JDBC driver page.
If you need an older version, see the previous JDBC driver versions.
Once downloaded, place the driver in the following location:
- macOS:
~/Library/Tableau/Drivers - Windows:
C:\Program Files\Tableau\Drivers
The complete Tableau configuration guide is on the Tableau drivers page, under the AWS Athena section.
Step 3: Create the athena.properties file
Interact Advanced Analytics provides a separate Workgroup for each customer. You must specify the Workgroup when connecting to Interact Advanced Analytics.
For AWS Athena JDBC with Tableau, set this with a key-value pair in the athena.properties file.
Create a file called athena.properties at:
~/My Tableau Repository/Datasources
If the workgroup name provided to you was Inc_Ltd, the file contents should be:
workgroup=Inc_Ltd
Full documentation on the AWS Athena JDBC configuration is in the Simba Athena JDBC driver install and configuration guide. The workgroup setting is on page 104.
Step 4: Gather your Advanced Analytics configuration
Your Interact Advanced Analytics configuration details are provided during technical onboarding and include:
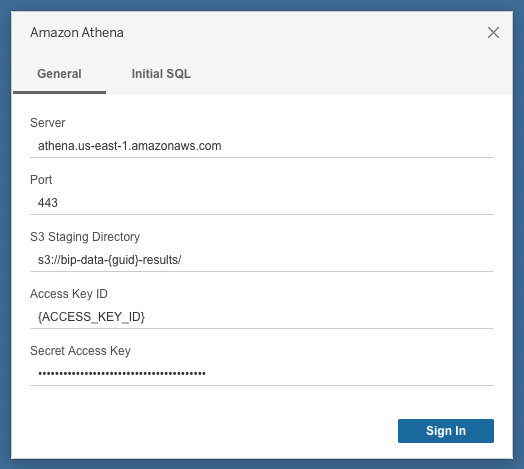
- Server: for example, athena.eu-west-1.amazonaws.com (can be retrieved from the AWS Athena endpoints page, and can change over time)
- S3 Staging Directory: s3://{{my_bucket}}-results/ (where the query results are saved)
- Access Key ID: equivalent to the username
- Secret Access Key: equivalent to the password
- Workgroup: cannot be set in the Tableau UI. Set it by creating the file at
~/My Tableau Repository/Datasources/athena.propertieswith the contentsworkgroup=Inc_Ltd(using the workgroup name provided to you). - Database: the Athena database where your analytics data is located
- Table Name: the Athena table where your analytics data is located
Step 5: Connect via Tableau
Once you have completed the above steps, you can connect to Interact Advanced Analytics through the Tableau interface.
Select the Amazon Athena data source.
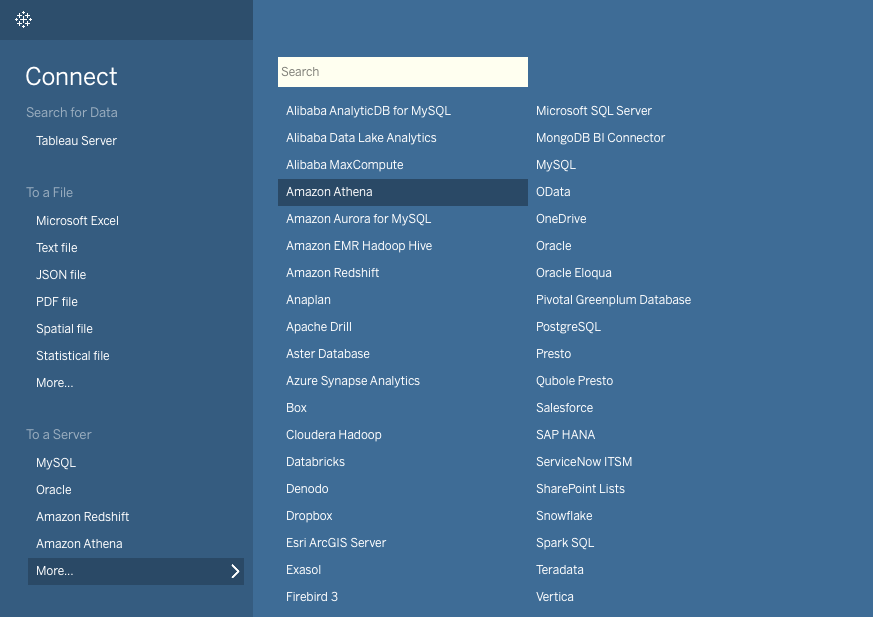
You are asked for credentials. The text box names map exactly onto the Interact Advanced Analytics configuration field names.
Once logged in, select the database and the appropriate table on the left, based on the database and table name provided by Interact.
Note: No other databases or tables are visible. Tableau may display an empty default database, which is a Tableau bug.
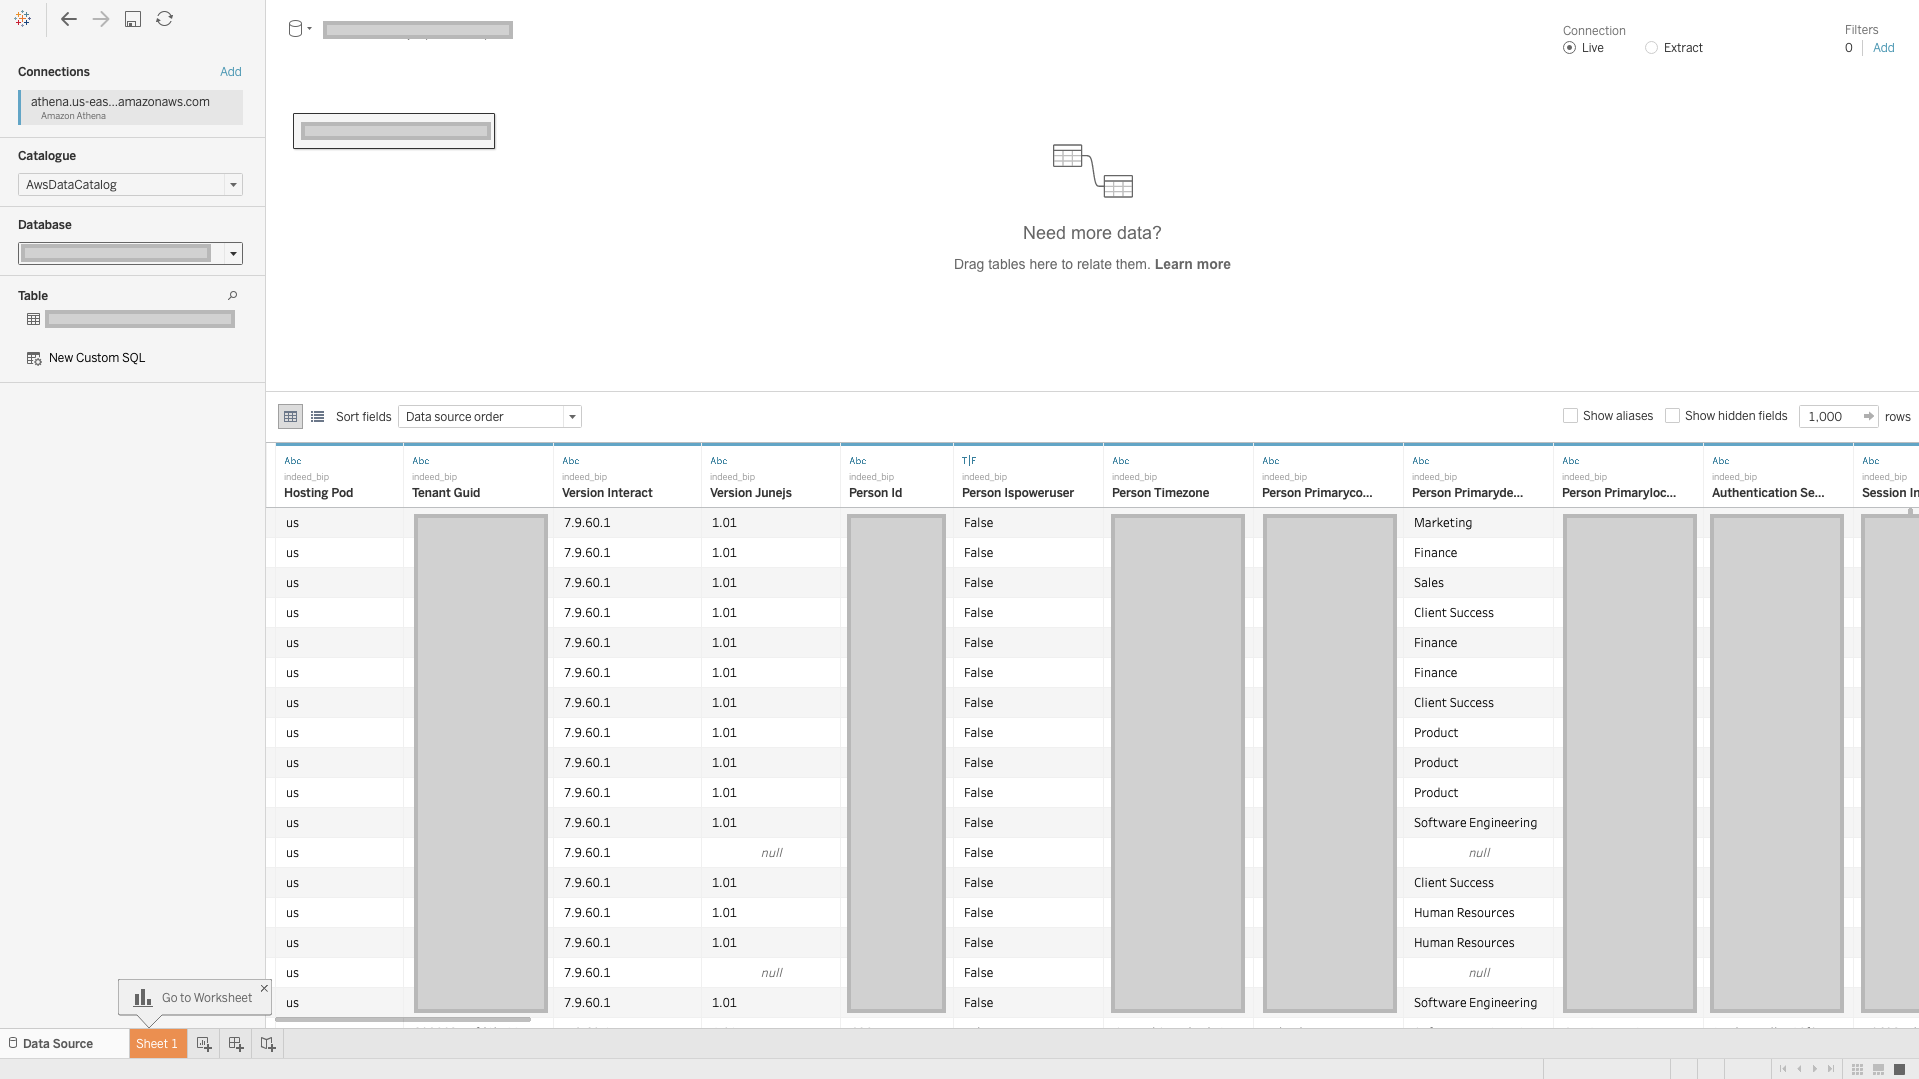
You are now ready to analyse the Interact Advanced Analytics data in Tableau.
Ports
Port 443 is used to communicate with the Data Lake, and port 444 is used to stream query results back from the Data Lake to the BI tool. Both ports must be open. See the Athena JDBC driver documentation.