Set up SSO with Google Workspace
Before you start
- You need the Power User role to configure SAML authentication in Interact.
- You need administrator access to Google Workspace.
- First, create the SAML authentication source within Interact. Follow the steps on the Configure SAML single sign-on page to create the initial SAML source within your Interact intranet.
Step 1: Add a custom SAML app in Google Workspace
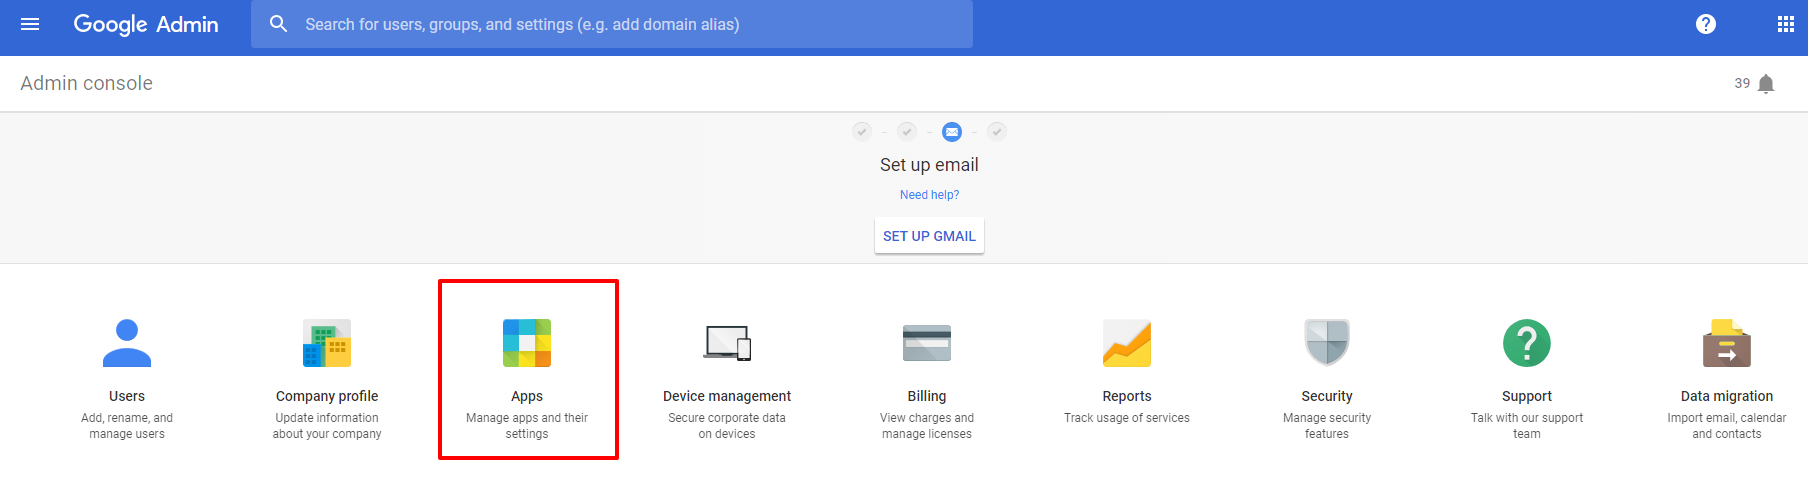
Log in to Google Workspace as an administrator and select Apps.
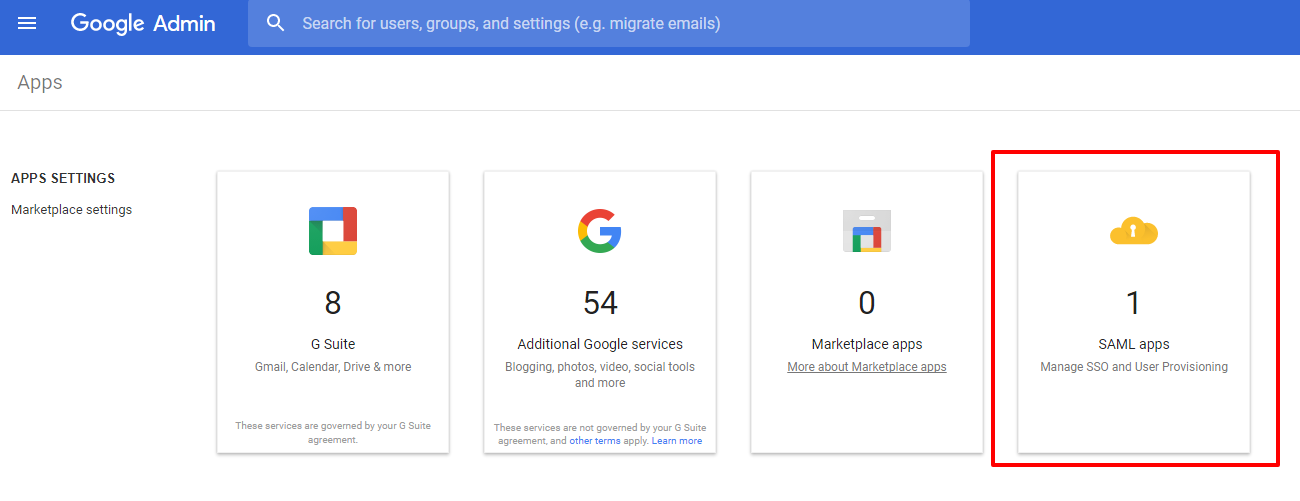
Select which type of app to add. For SAML, select SAML Apps.
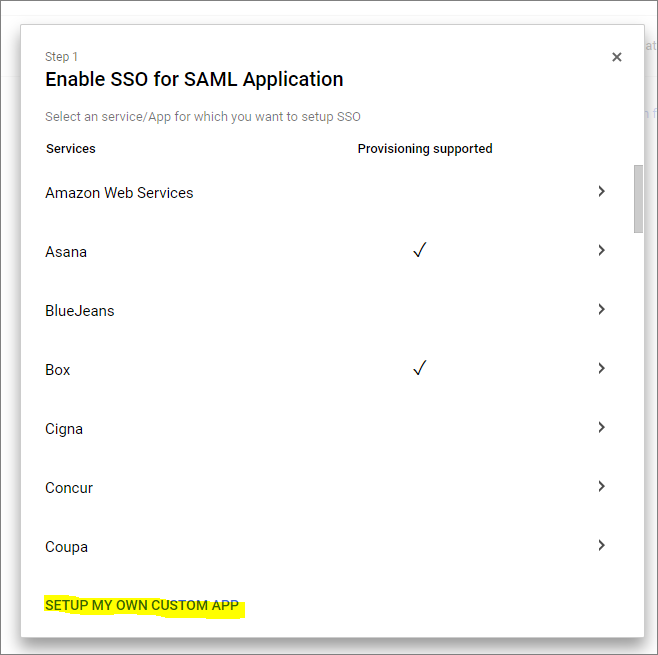
Select Setup my own custom App, as Interact is not in the list as a predefined configuration.
Step 2: Copy the IdP details into Interact
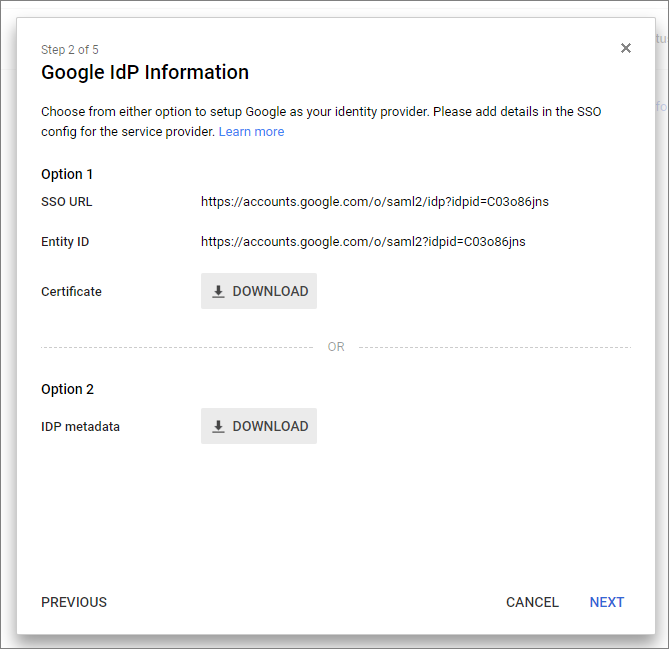
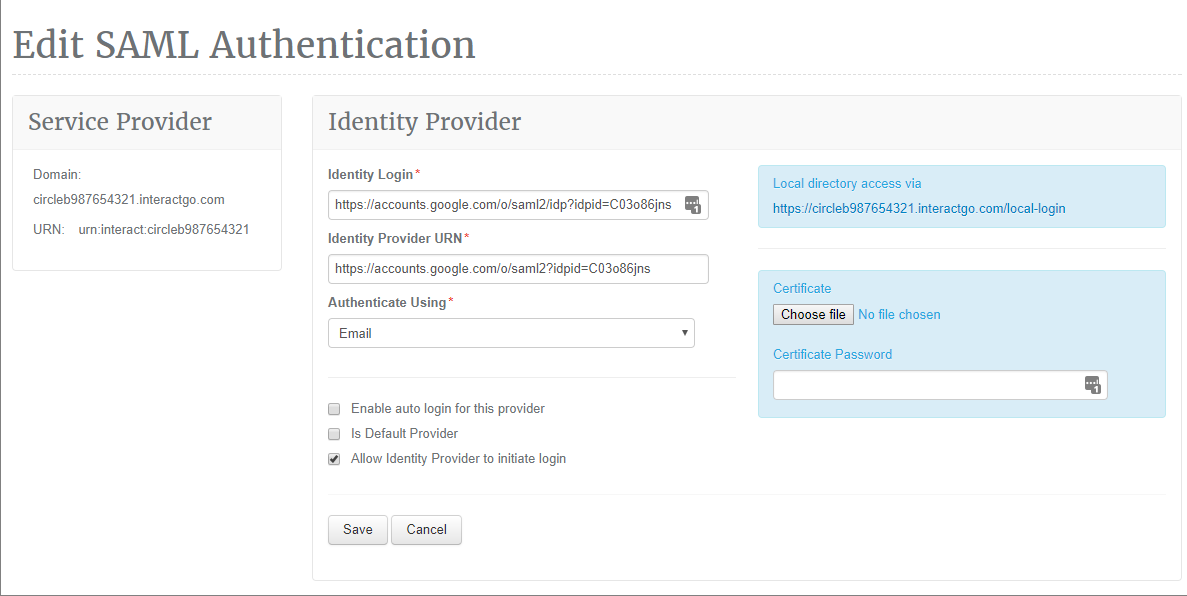
You are now presented with the fields required for use within Interact.
- Copy the SSO URL and enter it into the Identity Login field within Interact.
- Copy the Entity ID and enter it into the Identity Provider URN field within Interact.
- Download the certificate and upload it to Interact.
Note: The certificate should have a
.certextension. If it does not, change the extension before uploading.
Step 3: Name the app and configure the service provider
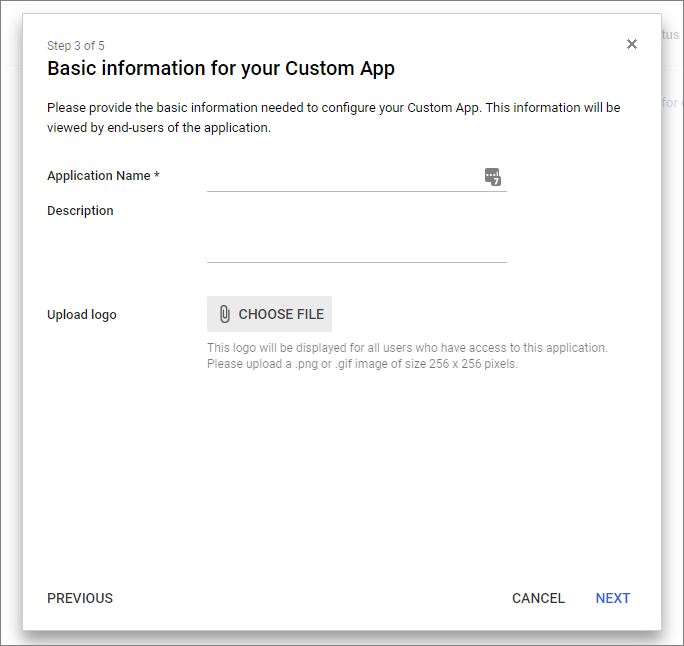
Name the app. In this example it is named Interact. Add a description and a logo.
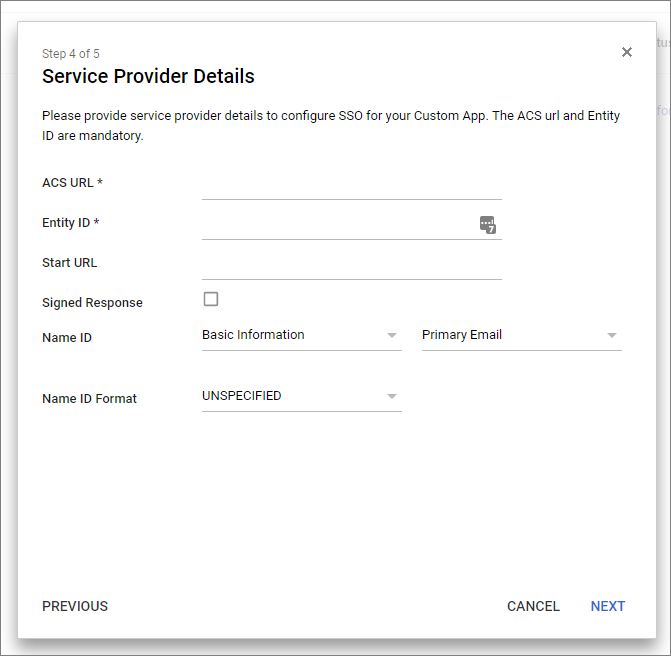
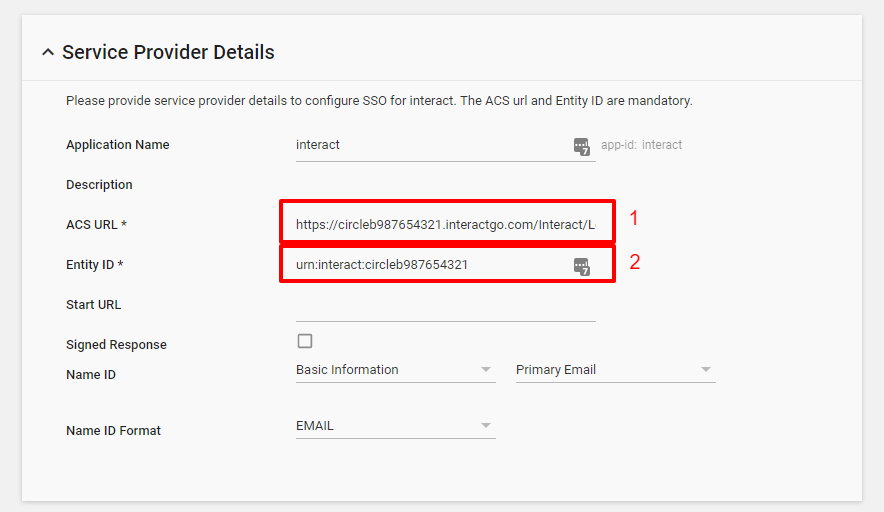
This step requires information from the Interact screen.
The ACS URL is:
https://{{your_intranet_domain}}/Interact/Login/default.aspx
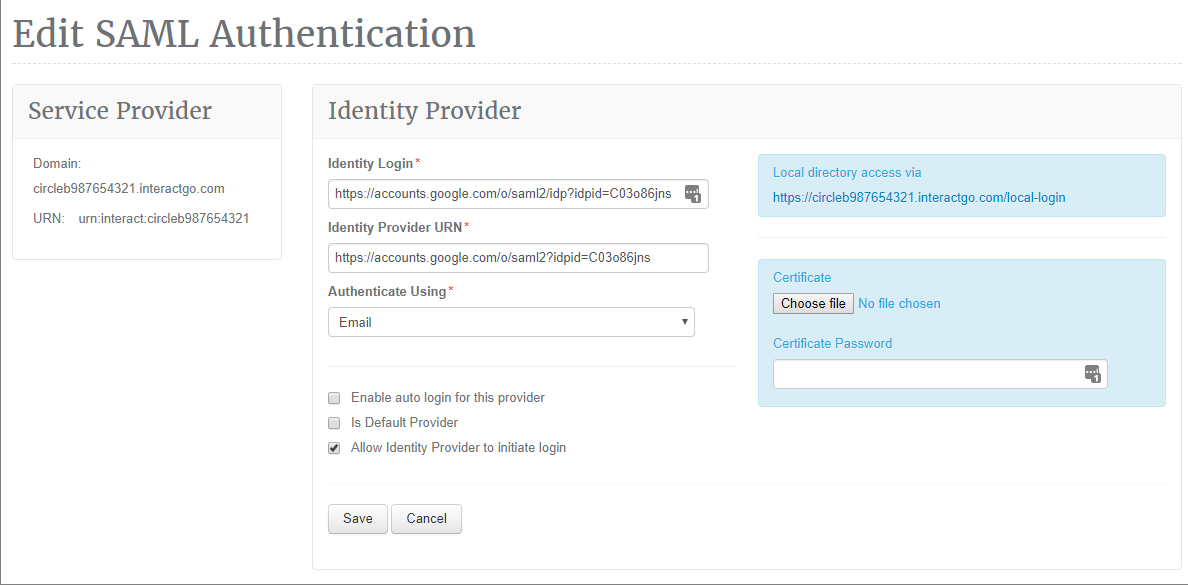
The entity ID is the field within the SAML Authentication screen within Interact that begins with urn. In the example below it is urn:interact:circleb987654321.
Do not tick Signed Response.
Check that the Name ID matches how your users are identified within Interact, then update the Name ID format.
Once configured, you may have to wait up to 24 hours initially, as specified by Google.
You should now be set up to authenticate using Google as your authentication provider.