Set up SSO with Okta
Before you start
- You need the Power User role to configure SAML authentication in Interact.
- You need administrator access to Okta.
- Each user must exist in the People Directory inside Interact.
Step 1: Configure SAML SSO in Interact
First, create the SAML authentication source within Interact. Follow the steps on the Configure SAML single sign-on page to create the initial SAML source within your Interact intranet.
Step 2: Add Interact in Okta
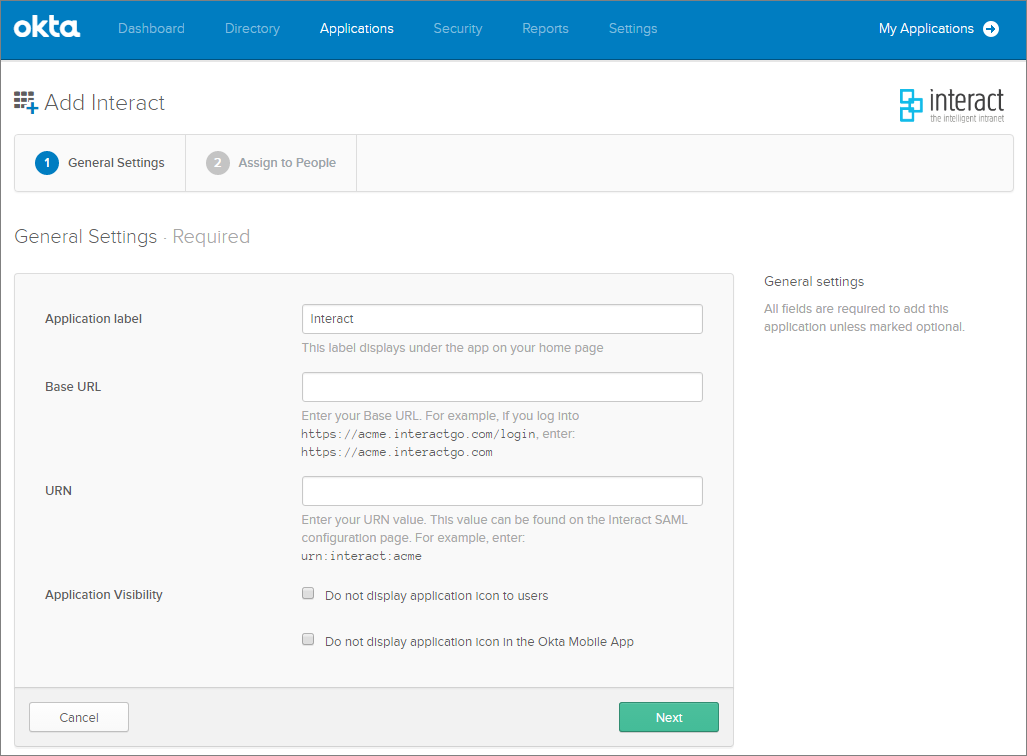
In Okta, add the Interact application. You are prompted with the General Settings screen to add your Interact URL and the URN. The domain is your Interact domain. The URN is displayed on the SAML management page when you view the service provider details, where it is marked as the EntityId.
Step 3: Assign users in Okta
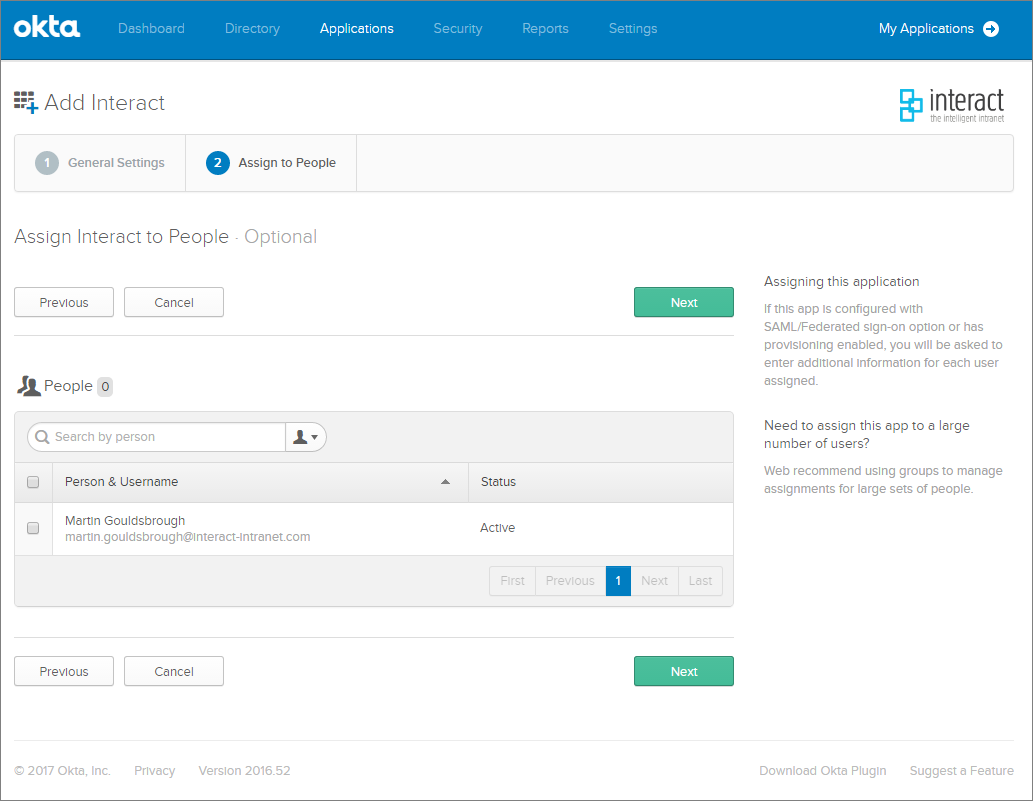
Select which of your users in Okta you want to allow to use SAML to sign in to Interact. Each user must also be created in the People Directory inside Interact.
Step 4: Obtain Okta's IdP metadata
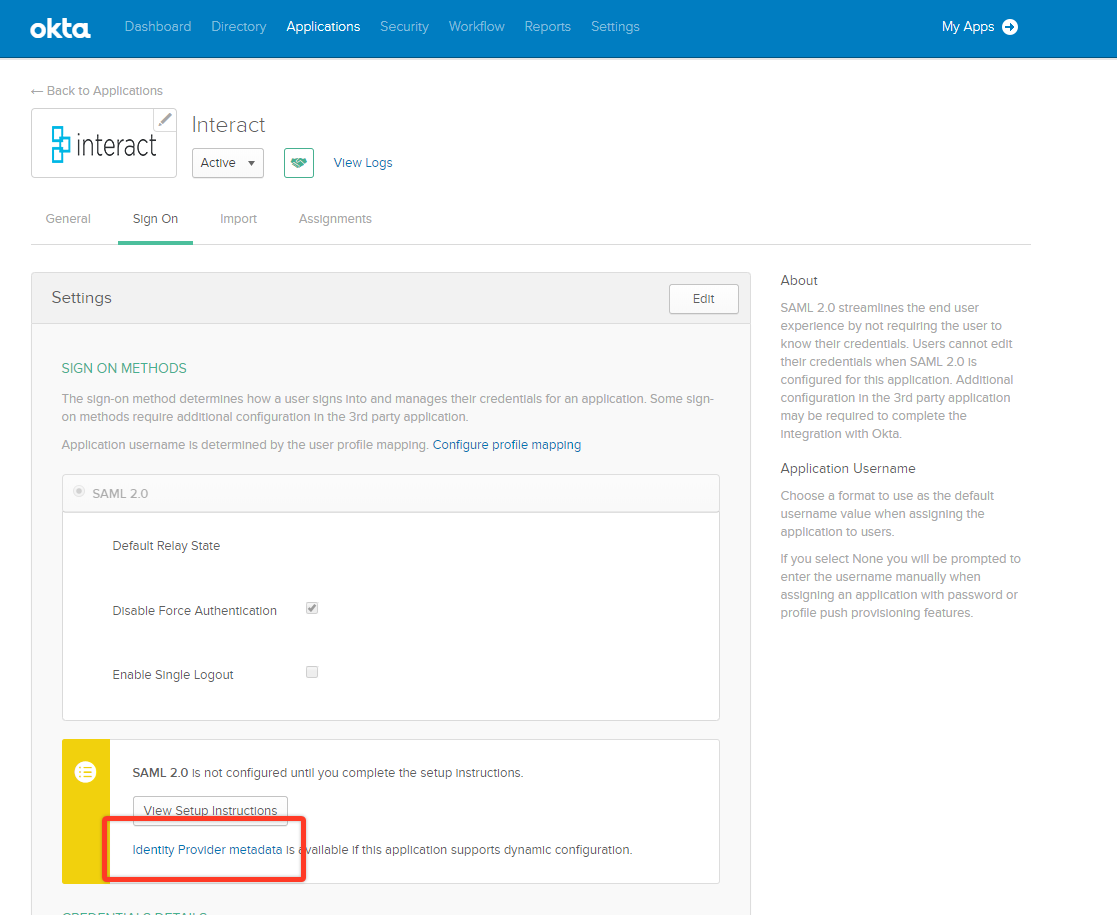
In Okta's Interact application settings, navigate to the Sign On tab and copy the Identity Provider Metadata URL.
Step 5: Import Okta's metadata in Interact
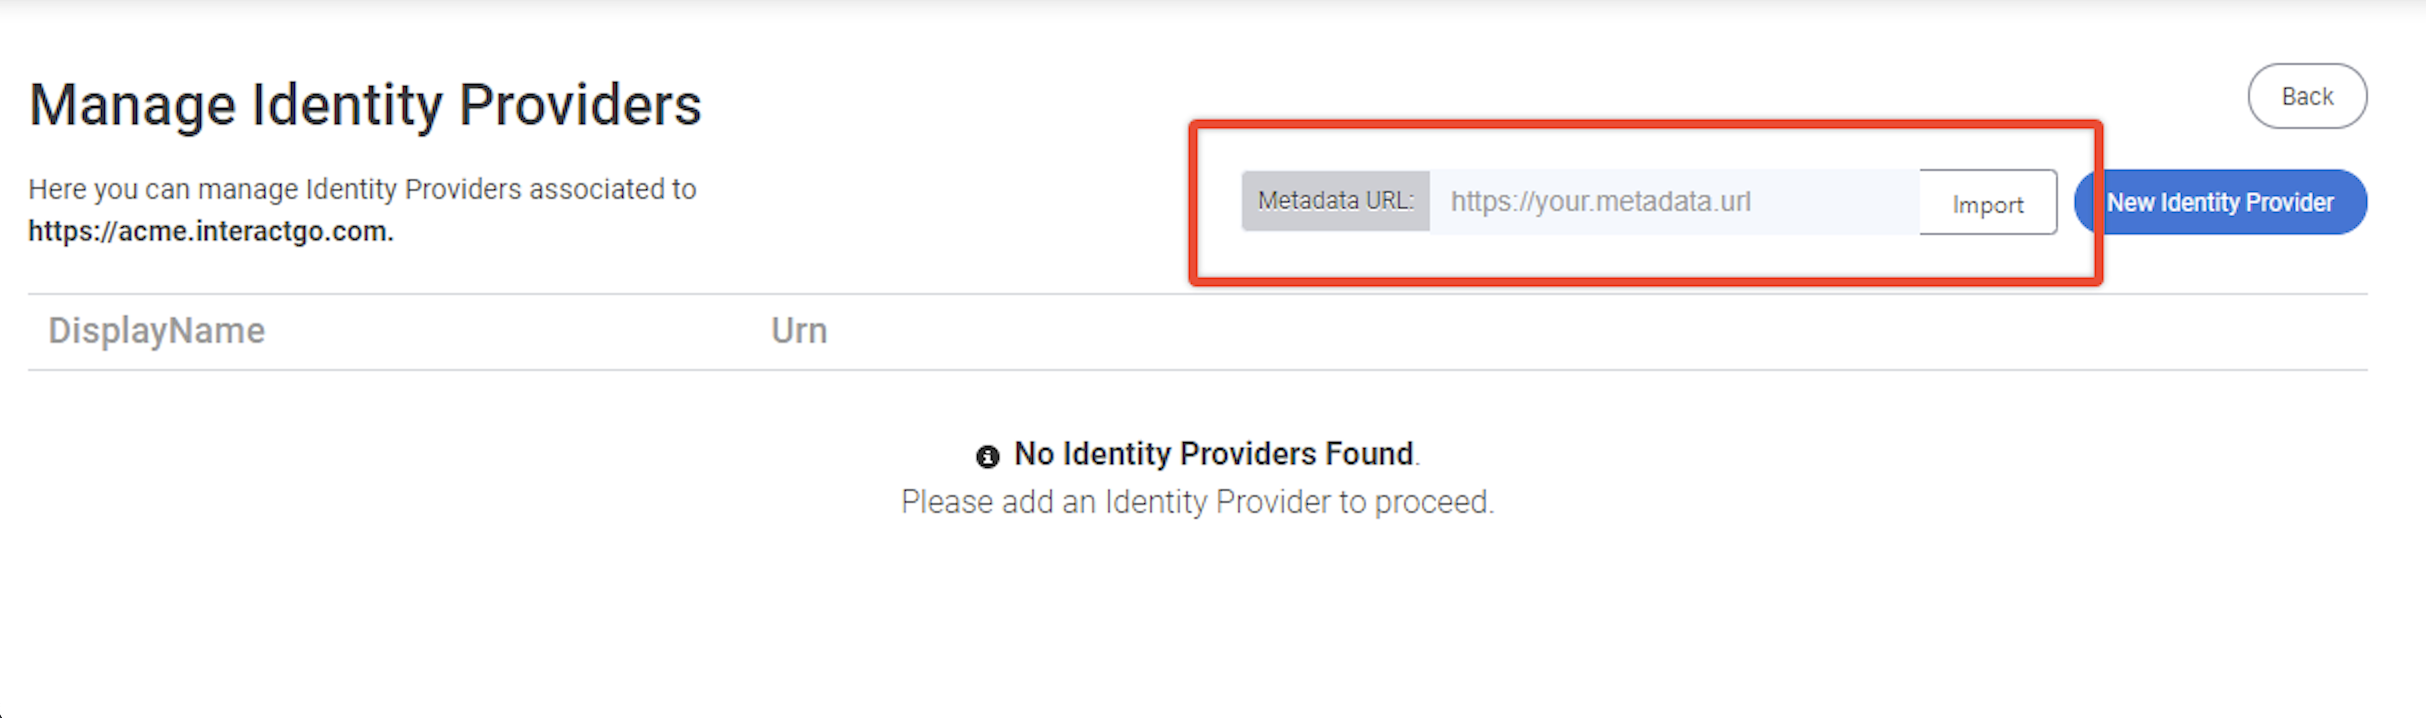
Navigate back to the Manage SAML Authentication page from Control Panel > SAML Authentication and select Identity Providers. Paste Okta's metadata into the Metadata URL field and select Import.
Tip: After adding Okta as an identity provider, you can configure Interact to redirect users to Okta for authentication automatically. Ensure Make Default Provider is enabled for Okta, and the domain is configured to Enable Auto Login from the Manage SAML Authentication page. Users with passwords local to Interact can still reach the native Interact login page by appending
local-loginto your site's URL, for exampleacme.interactgo.com/local-login.