Add Interact to Microsoft Teams
Before you start
- You need the Power User role to configure MSAL authentication in Interact.
- You need access to the Microsoft Entra ID (formerly Azure AD) portal.
Overview
This guide makes your intranet available in Microsoft Teams Desktop, Microsoft Teams Web, and the Microsoft Teams mobile application. You need to do the following:
- Create a new enterprise application within the Entra ID portal.
- Configure Interact for Teams authentication.
Step 1: Configure Entra ID settings
Create a new enterprise application within Entra ID with the following settings.
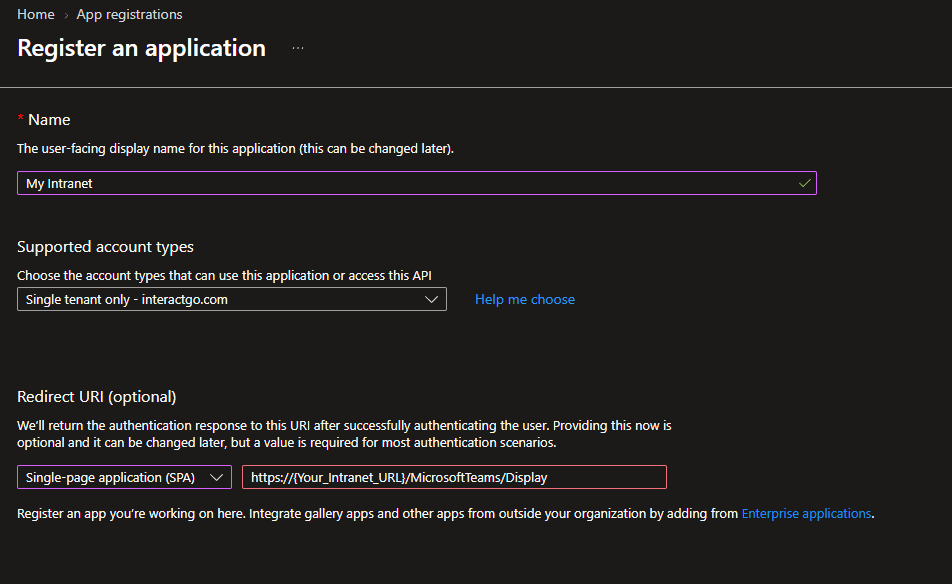
Navigate to Overview > App registrations and select New registration.
Enter an application name. This can be anything suitable for the application.
Select single-tenant account types, so that only accounts within your organisation can use the Teams application.
Set the page up as a single-page application. In the section titled Redirect URI (Optional):
- Select Single-page application (SPA).
- Enter the value
https://{{your_intranet_url}}/MicrosoftTeams/Display
Select Register.
Authentication
Warning: The Microsoft Teams integration requires the Teams login to authenticate against the user's email address associated with their intranet profile. If the Teams login and the intranet profile email addresses differ, a blank screen is displayed when the intranet is opened in Teams.
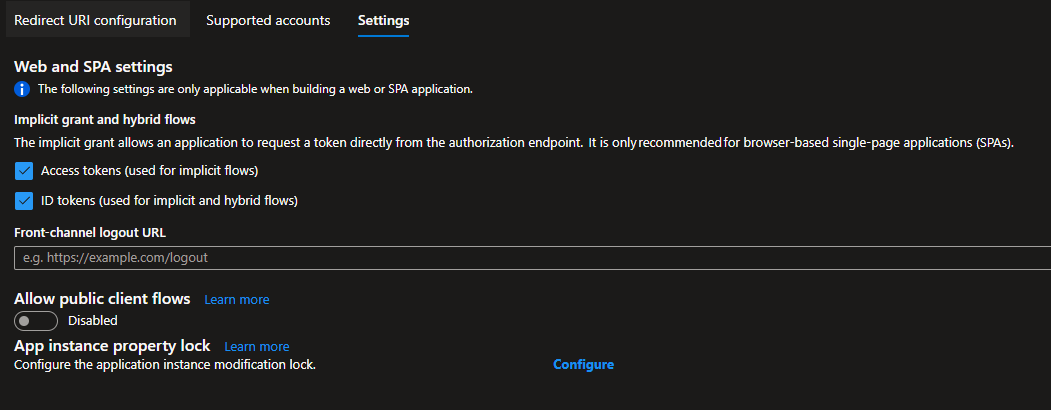
- Navigate to the Authentication tab.
- Enable Access tokens and ID tokens.
Expose an API
Navigate to the Expose an API tab.
Application ID URI
Select Add to configure the Application ID URI.
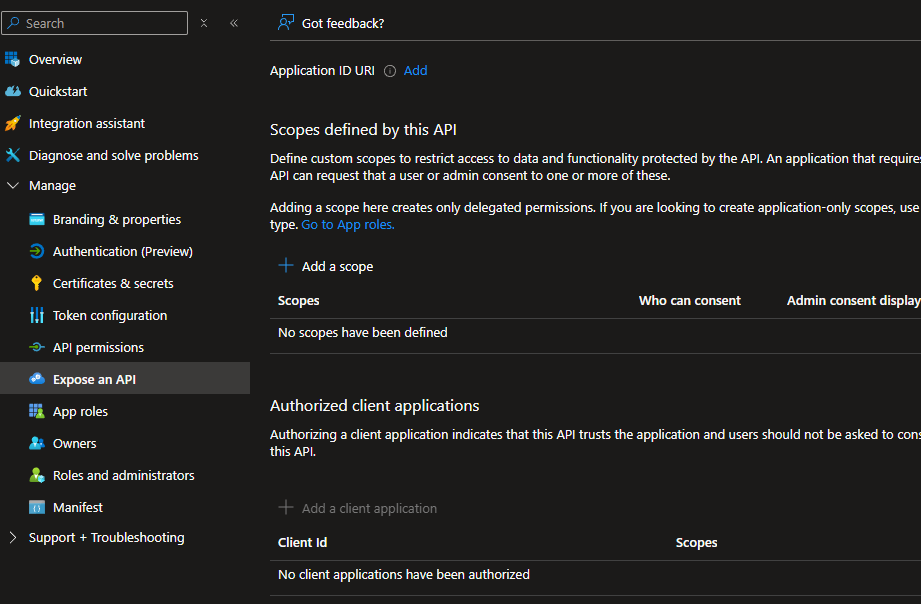
api://{{your_intranet_url}}/3e869b05-24a8-4cfa-b142-e92065be57e2 — Entra ID automatically suggests a new GUID, which you can use.
Scope
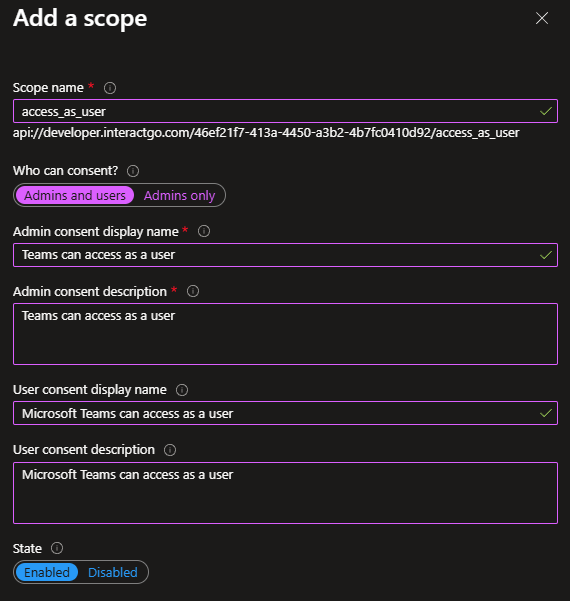
Select Add a scope.
access_as_user
This scope is used by the Teams Authentication Library and must be in this exact format, as shown below.
Authorized client applications
Select Add a client application.
Add both of the GUIDs below, one at a time. You must use these GUIDs exactly as listed. They are the standard Microsoft Teams GUIDs for the Interact application.
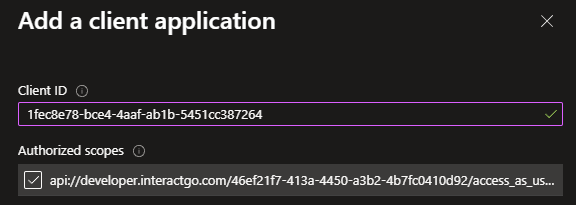
1fec8e78-bce4-4aaf-ab1b-5451cc387264— Teams Mobile/Desktop app5e3ce6c0-2b1f-4285-8d4b-75ee78787346— Teams Web app
The page should now look like this.
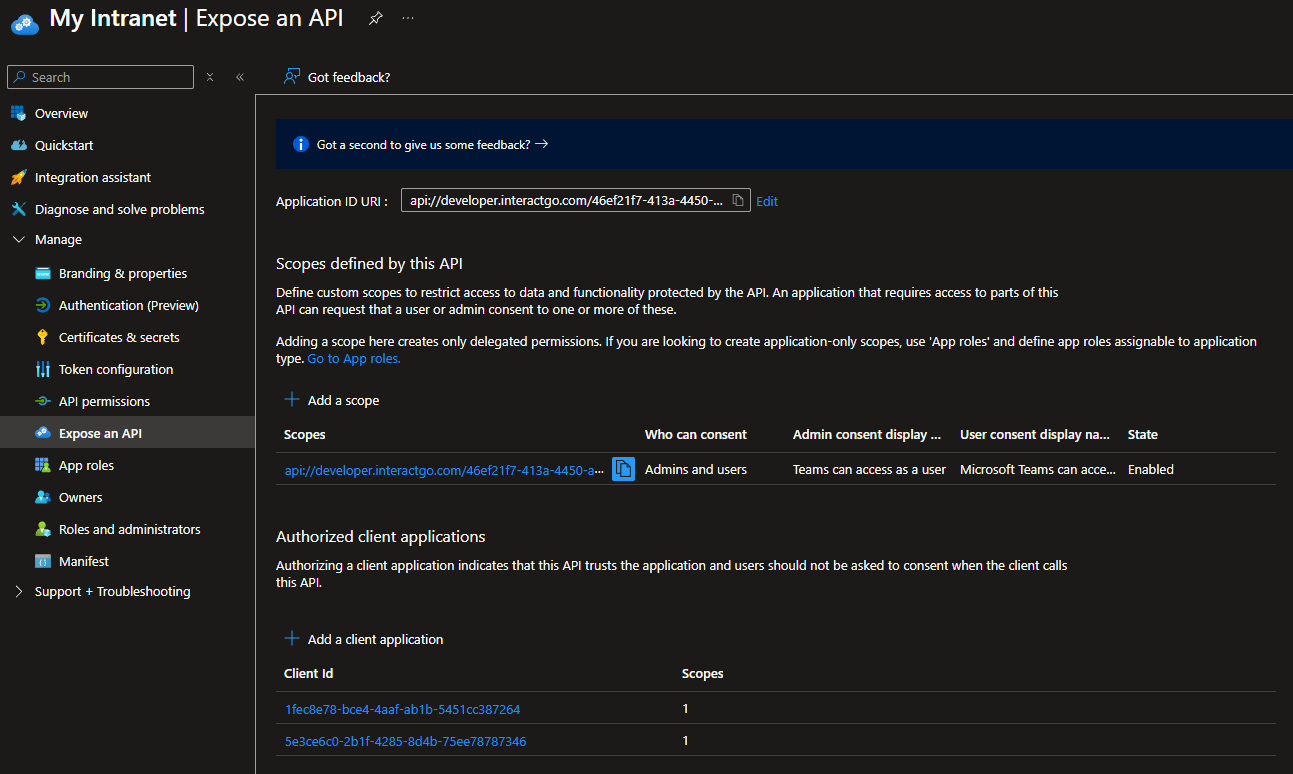
API permissions
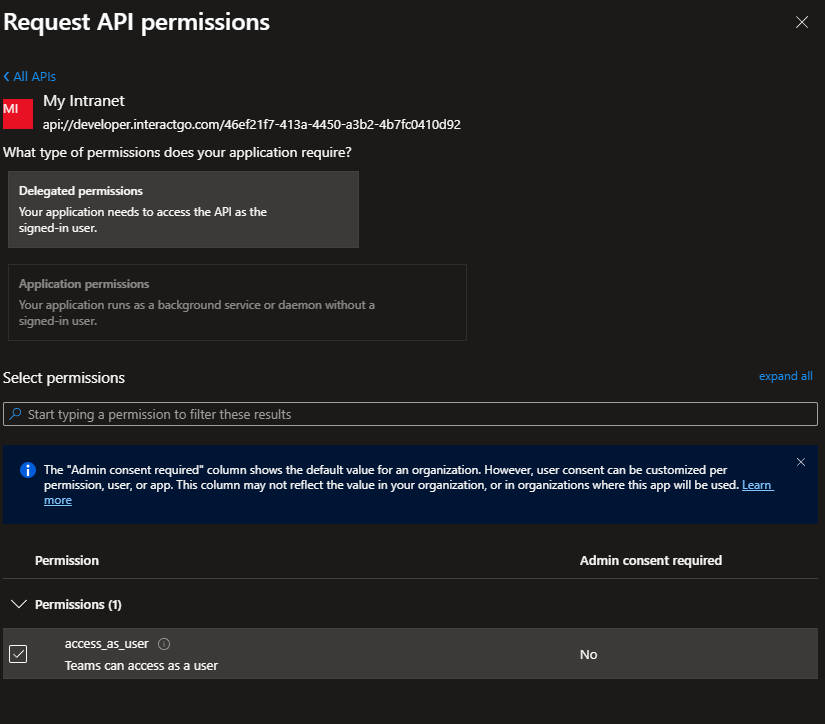
Add the access_as_user permission, which became available when you added it as a scope in the previous section. This scope is used by the Microsoft Teams Authentication Library, so it is required to access the user from the Teams client.
Select Add a permission > My APIs, then select the newly created application name.
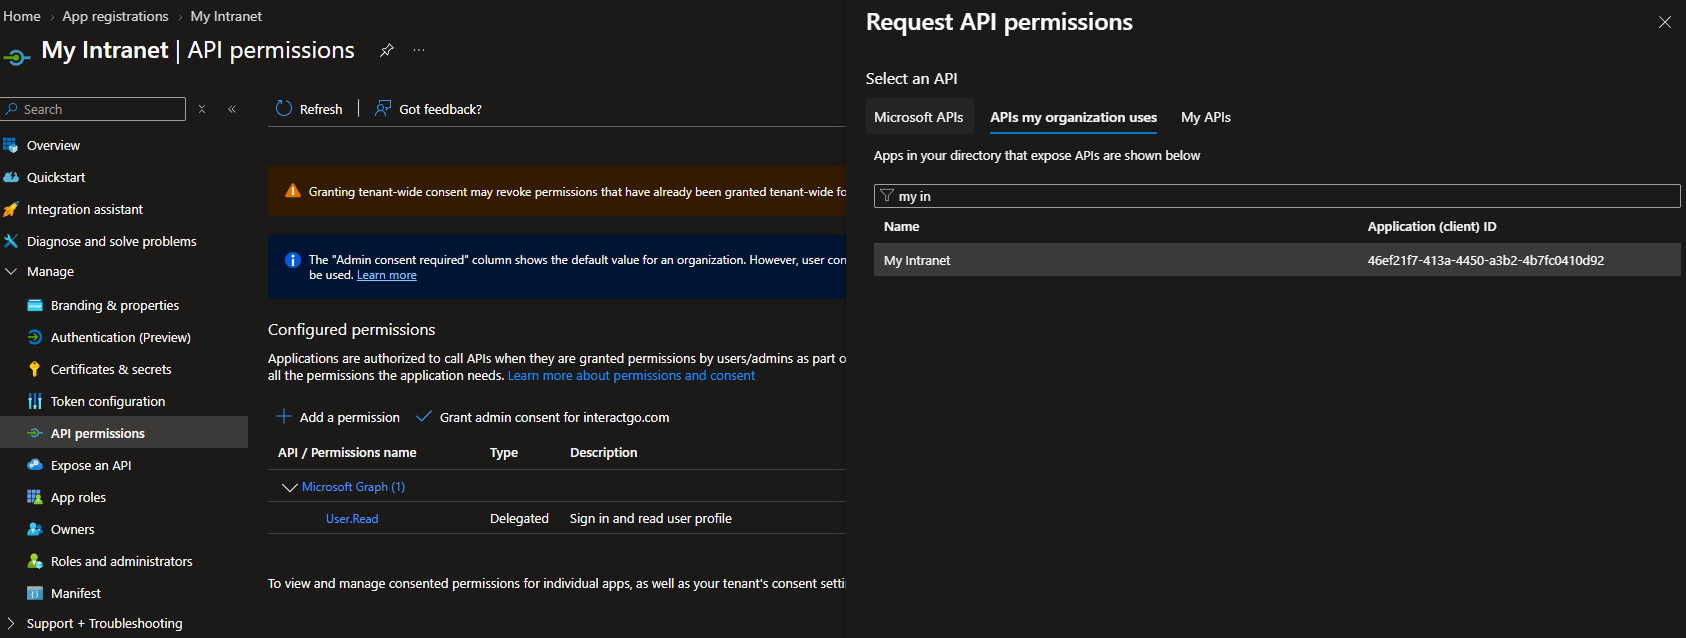
- Tick the access_as_user checkbox.
- Select Add permissions.
Step 2: Configure Interact for Teams MSAL settings
The settings required for Teams authentication are found at Control Panel > MSAL Authentication.
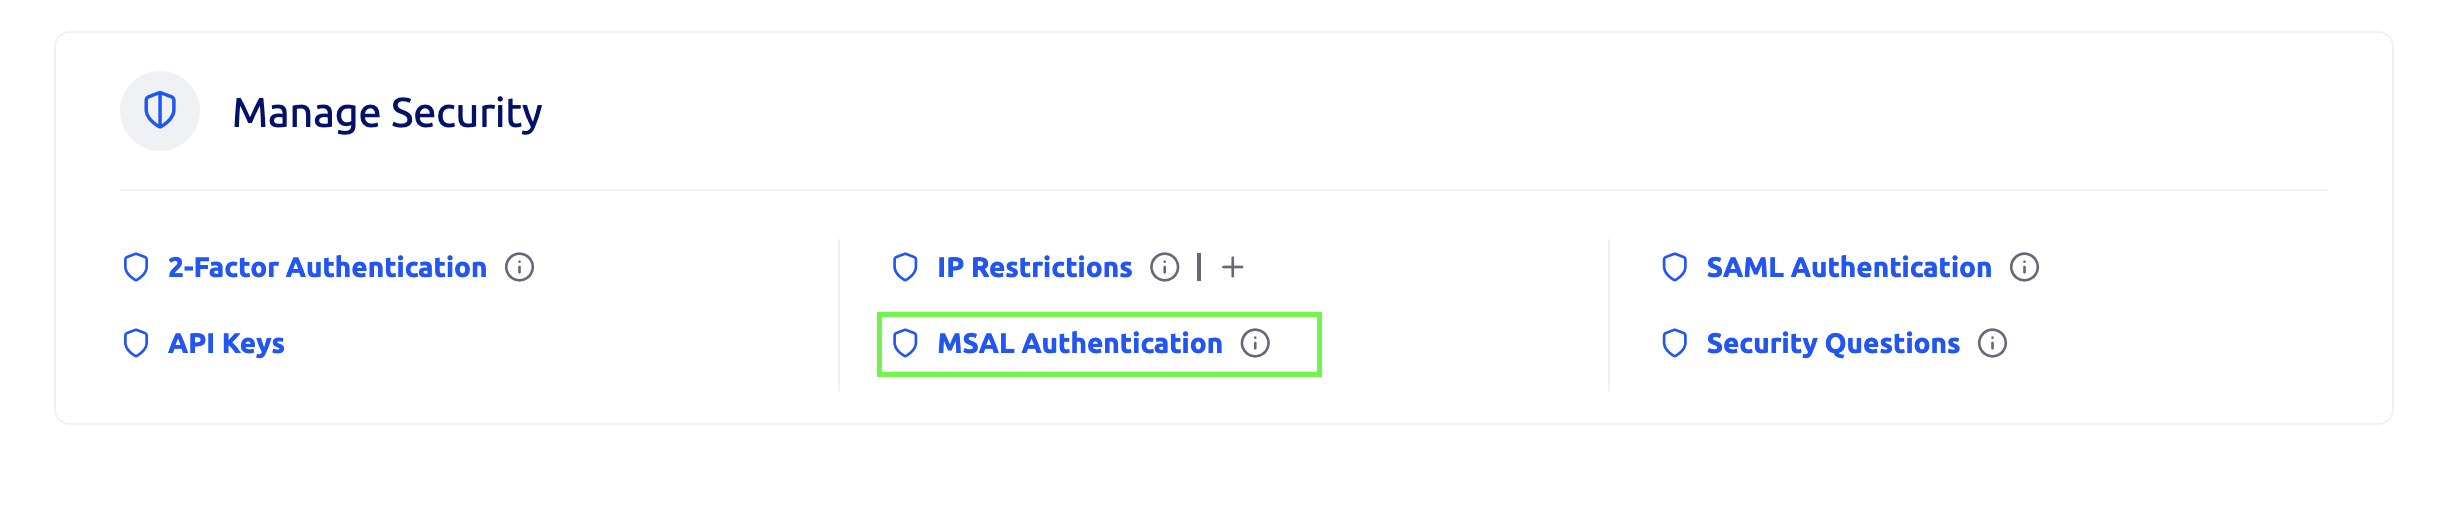
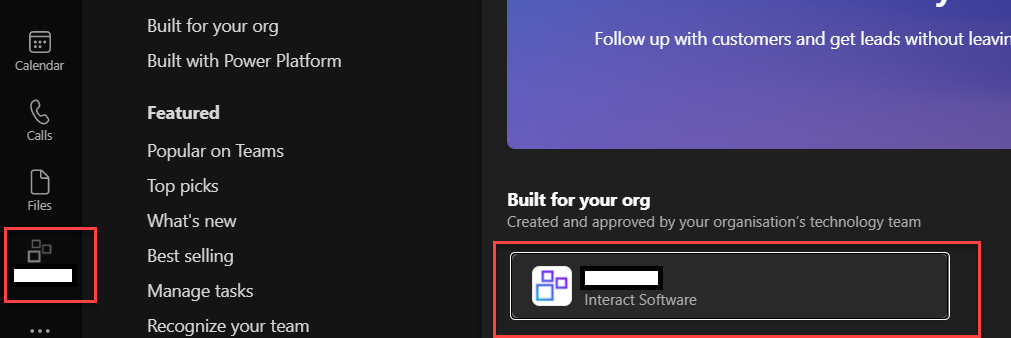
Set a new Teams configuration here to allow a Teams user to authenticate silently against their intranet and load it as an integrated Teams app within the Teams Desktop, Mobile, or Web app, as shown below. The application title matches the name configured for the integration.
Complete the fields:
- Title: any relevant name for the application. This is used as the name of the application within Teams.
- Description: also populates the Teams application description.
- Application ID: the Client ID of the application. You are integrating into Teams, which has the following two Client IDs:
1fec8e78-bce4-4aaf-ab1b-5451cc387264— Teams Mobile/Desktop app5e3ce6c0-2b1f-4285-8d4b-75ee78787346— Teams Web app
- Directory Tenant ID: the Tenant ID, found in the Entra ID app registration.
- Application ID URI: found on the overview page of the Entra ID app registration. It uses the following format:
api://{{site_domain}}/5e3ce6c0-2b1f-4285-8d4b-75ee78787346
- Scope: must be
access_as_user, as this is the scope used by Microsoft Teams. - Redirect URI: the location of the Teams application view. It is found at:
https://{{site_domain}}/microsoftTeams/Display
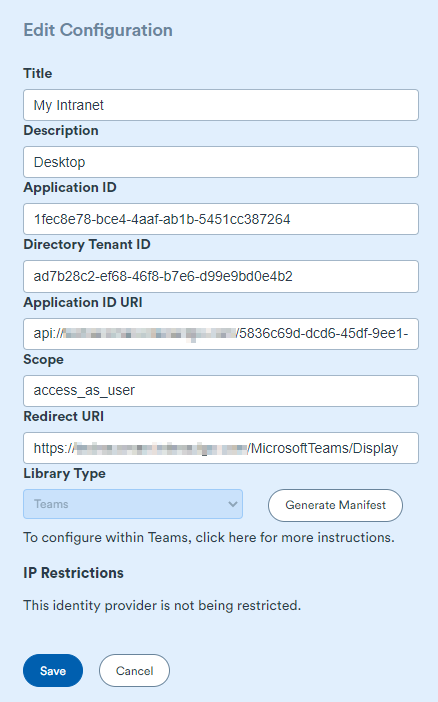
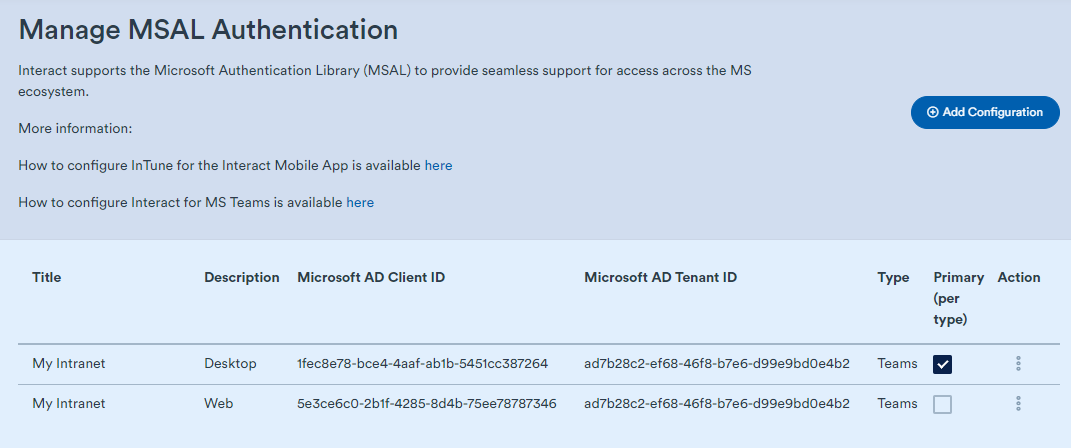
Once complete, select Save, then reopen the edit page (select the three dots). A Generate Manifest button should now be available. Select it to generate a manifest for the Microsoft Teams integration.
Once those steps are complete, contact our Technical Support team, who perform one final step before making your intranet available in the Teams app.
Note: Downloading files from Interact is not available through the Microsoft Teams app in either the browser or the Teams apps.