General Profile Sources
Tip: For new integrations, use SCIM v2.0. It provides real-time provisioning and richer field mapping than General Profile Sources.
Before you start
- You need to be a Power User to create a profile source. If you are not a Power User, work with your organisation's intranet administrator to arrange the necessary access.
- You need a way to produce a valid XML file of your user data (your own application, a PowerShell script, or another method).
Overview
Two services in Interact handle the synchronisation of user data from external sources:
- UMI Connector Service — uses pre-defined native connectors to query a specific source, such as Microsoft Entra ID (formerly Azure AD), and creates import data as a specially structured XML file.
- UMI Processor Service — processes files of that structure and imports the user information into Interact.
If you cannot or do not want to use a pre-defined connector as the source for your user data, you can define a General Profile Source and provide your own XML file for import. As long as the file is structured correctly and delivered to the right place in the infrastructure, the UMI Processor Service handles the file and imports the user data.
This means data from external systems such as ADP, Okta, iTrent, PeopleSoft, or even an Excel spreadsheet can be assembled into a valid XML file.
How it works
- You create a General Profile Source in Interact. This generates an API endpoint that you use in step 3.
- You generate an XML file of user data that conforms to the schema. This could come from your own application, a PowerShell script, or any other method.
- You post the completed XML to the API endpoint. The XML is then processed by the UMI Processor Service.
Step 1: Create a General Profile Source
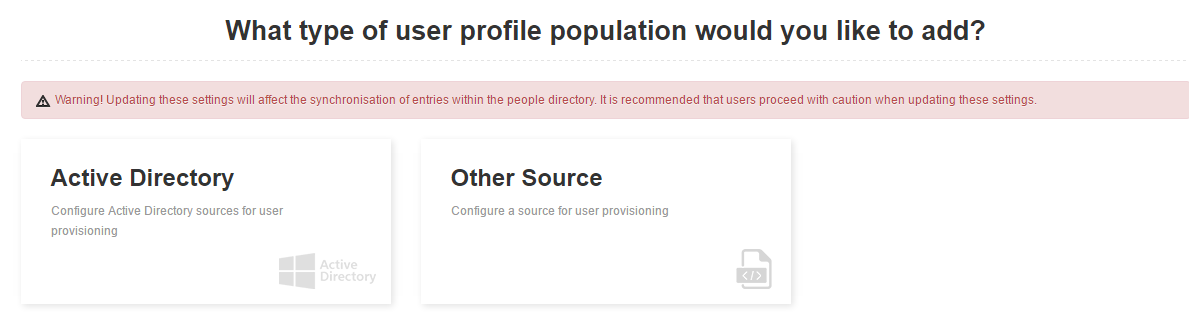
Log in to Interact as a Power User and go to Control Panel > Profile Sources > Other Source.
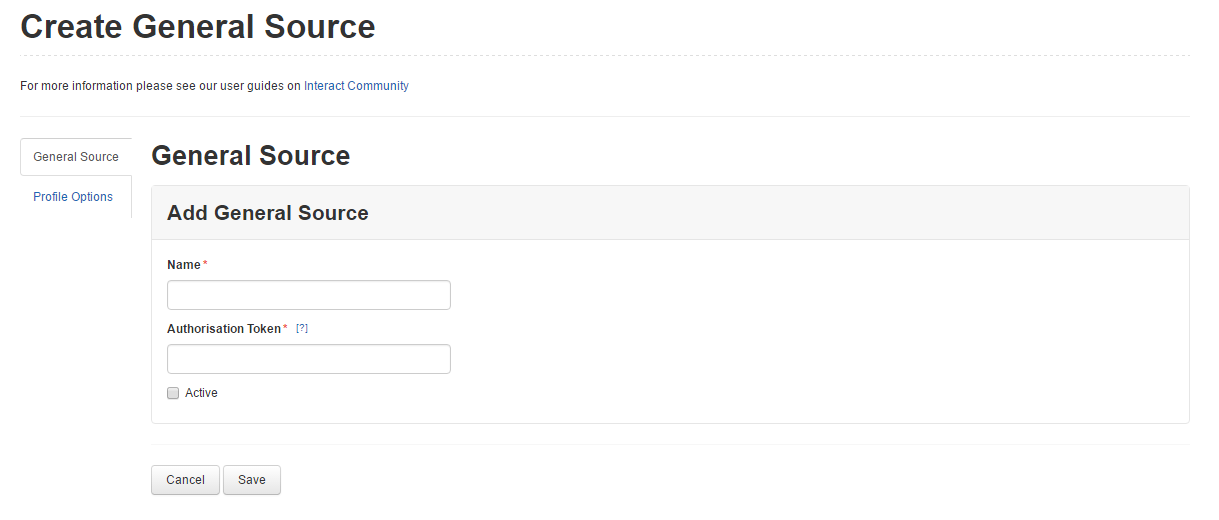
The new source requires two fields:
- Name — a unique name for recognising the source. This is referenced in the
domainattribute of thesyncoptionselement in the incoming XML file. - Authorisation Token — used to verify incoming data files against the source when the API is used.
Note: If you are creating a General Profile Source as part of the Expertise and interests guide, return to that guide once you have saved your new profile source.
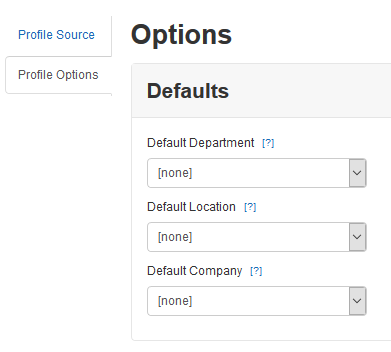
Note: The sync options defined in the incoming file take priority. If they are undefined, you can customise the source via the Profile Options tab.
The Profile Options tab can define the default Department, Location and Company for incoming users. The drop-down lists are populated with data from your Interact instance.
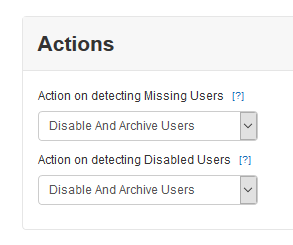
The source holds the definition of actions for handling disabled and missing users. The options are to disable and archive users, or to only disable users, for either case.
The source also defines whether parts of the data are synchronised with the existing database. Each checkbox governs whether the Processor attempts to synchronise that type of data.
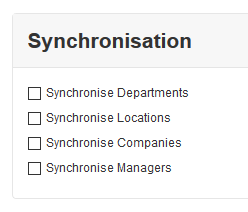
Step 2: Generate user profile data
The UMI Processor Service can process any XML file, regardless of source, as long as the file structure adheres to the required definition. For more on generating a valid file, see:
- The XSD schema — a fully documented XML schema detailing the required and optional elements and attributes expected in a valid file of user profiles.
- The sample XML file — example user and group data showing how the file is expected to look.
- Generate an XML file from an Excel spreadsheet — a sample PowerShell script you can customise to generate and post a valid file from a standard Excel spreadsheet.
Step 3: Post the data to the API endpoint
After creating the source in Interact, an API endpoint is available for posting the user profile data. The data is delivered to the appropriate drop area within the Interact structure.
The endpoint has the format https://{{intranet_url}}/api/umi/{{source_id}}/upload, where {{source_id}} is the unique ID of the source (source/LDAP ID). The API URL suffix is displayed when the profile source is saved, to help you construct the API URL.
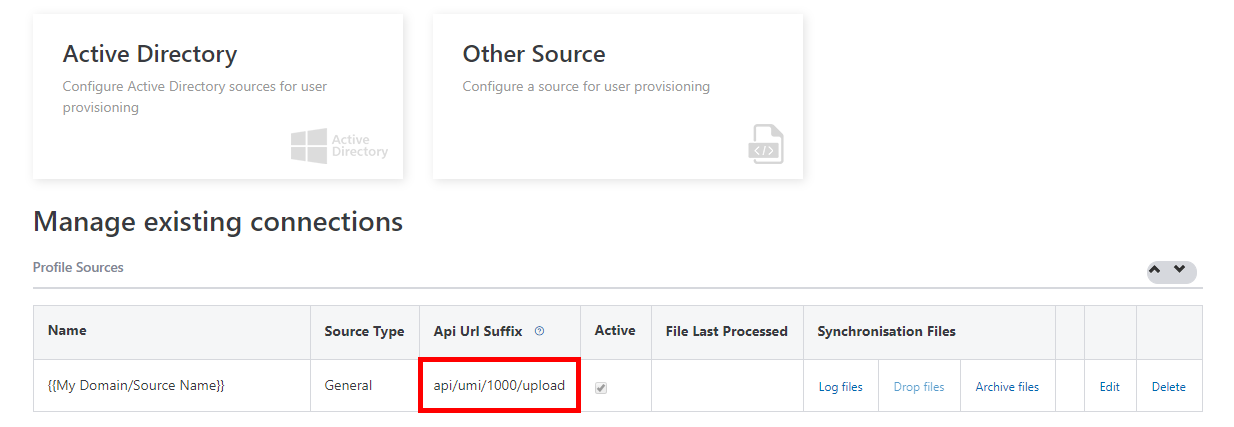
Example scripts
An example PowerShell script to transfer a file:
$endpoint = "https://{{intranet_url}}/api/umi/{{source_id}}/upload"
$xmlPath = "C:\{{path_to_xml}}"
$authToken = "{{auth_token}}"

Invoke-RestMethod -Uri $endpoint -Method Post -InFile $xmlPath -ContentType "multipart/form-data" -Headers @{ 'X-ApiKey' = $authToken }
The same request with curl:
curl --request POST "https://{{intranet_url}}/api/umi/{{source_id}}/upload" \
  --header "X-ApiKey: {{auth_token}}" \
  --header "Content-Type: application/xml" \
  --data-binary "@{{path_to_xml}}"
Note: The value supplied to the
X-ApiKeyheader is the value entered in the Authorisation Token field when you created the profile source in Step 1.Note: The API request uses HTTPS and therefore provides secure encryption during transport.
You can call the API endpoint in whatever way suits you best, whether through a PowerShell script as above or another application. When the endpoint is hit, the attached XML file is validated against the schema as it is transferred to the drop area. The response details any issues found during this process.
Once the XML data is delivered to the API endpoint, it is processed by the UMI Processor Service. The resulting log file and the archived data file are accessible through the interface from the list of profile sources.
Related
- SCIM v2.0
- General Profile Sources schema
- Sample XML file
- Generate an XML file from an Excel spreadsheet
- Profile source field mapping
- Troubleshooting