Promoting to Microsoft Teams
The Block Editor feature within Interact allows Content Authors to promote content across many channels within your business including Microsoft Teams. The following guide explains how to configure Interact to promote to your Teams workspace.
Microsoft Teams is deprecating the "Connectors" integrations, existing Connectors will stop working in December 2025.
- Microsoft recommend new teams integrations should use Workflows. And will be disabling the creation of new Connectors.
- Posting to private channels is currently not supported by Workflows.
Set up an incoming webhook workflow
-
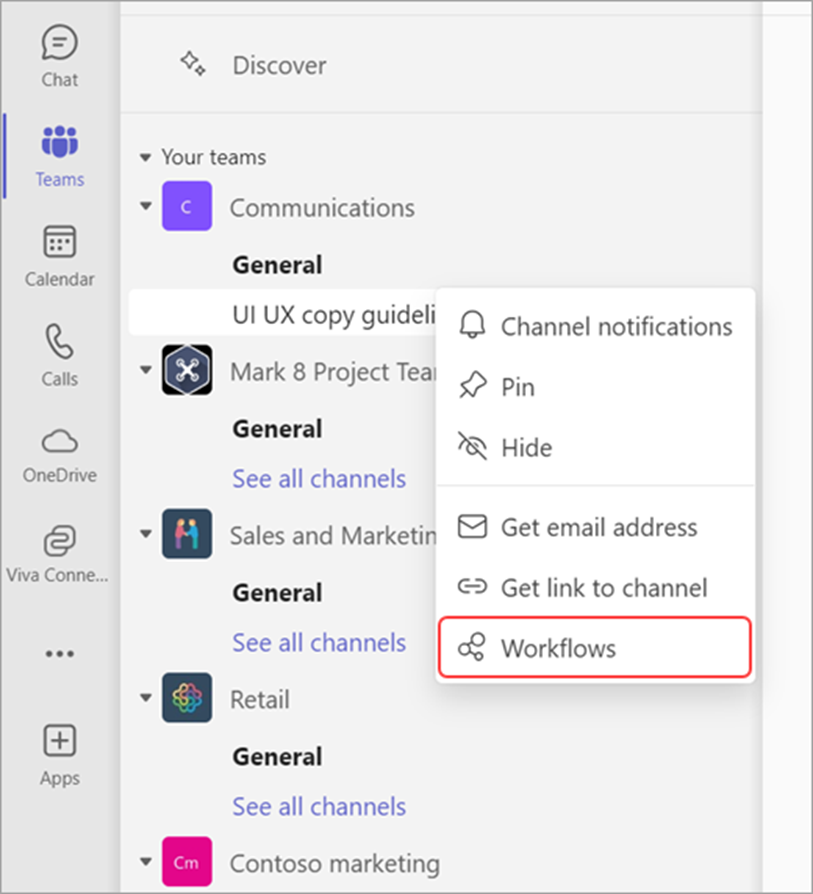
Select More options next to the channel or chat you want to create a workflow for, and then select Workflows.
-
Choose "Send webhook alerts to a channel"
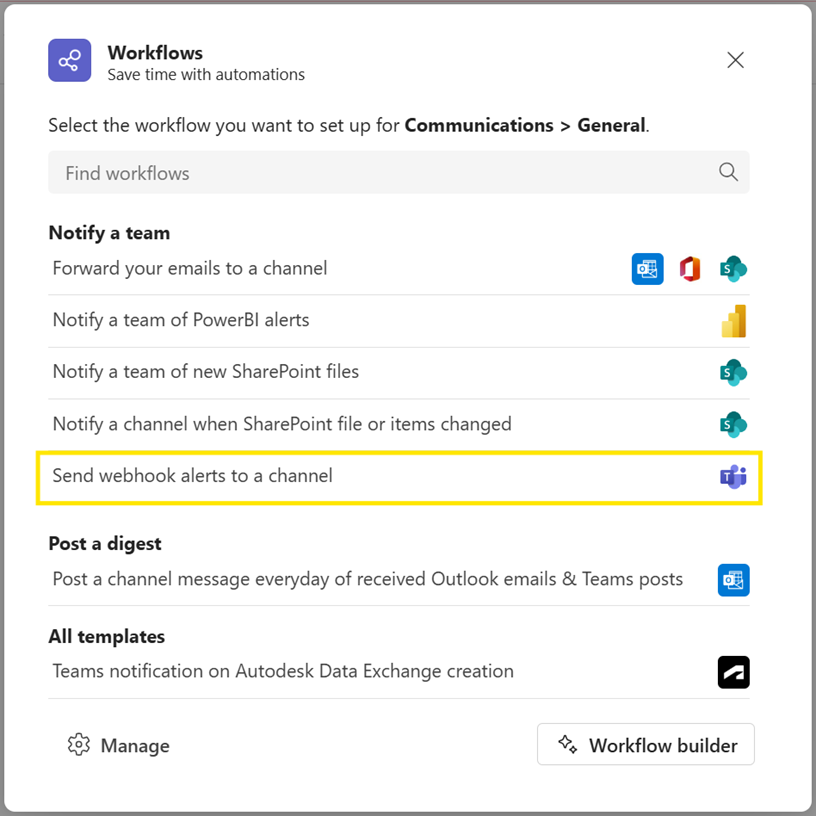
Note: The webhook template Post to a chat when a webhook request is received may not be available depending on your organization type. For more help, contact your IT admin.
-
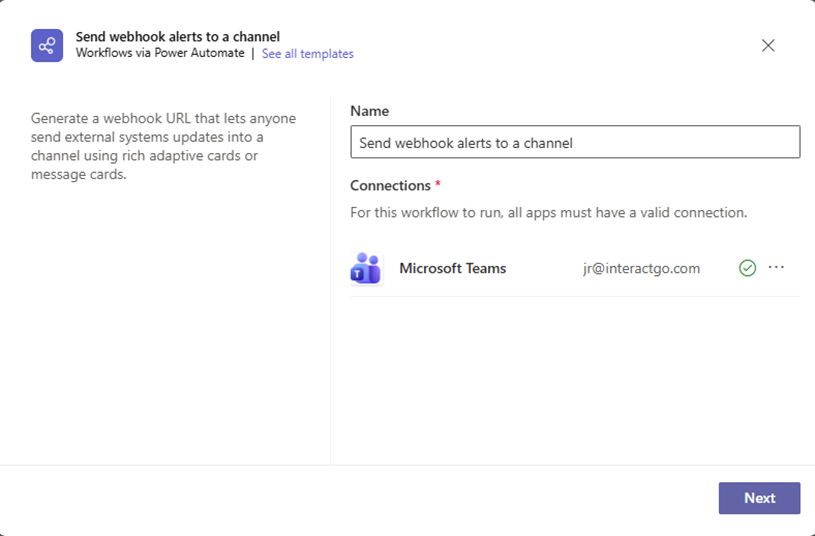
Once the workflow opens, you have the option to change its name.
-
You’ll also need to authenticate with your account to have your workflows post to the channel or chat. If you want to choose a different account to authenticate with, select Switch account and choose the account you want to use.
-
Once you're done updating the name and have the correct account authenticated, select Next.
-
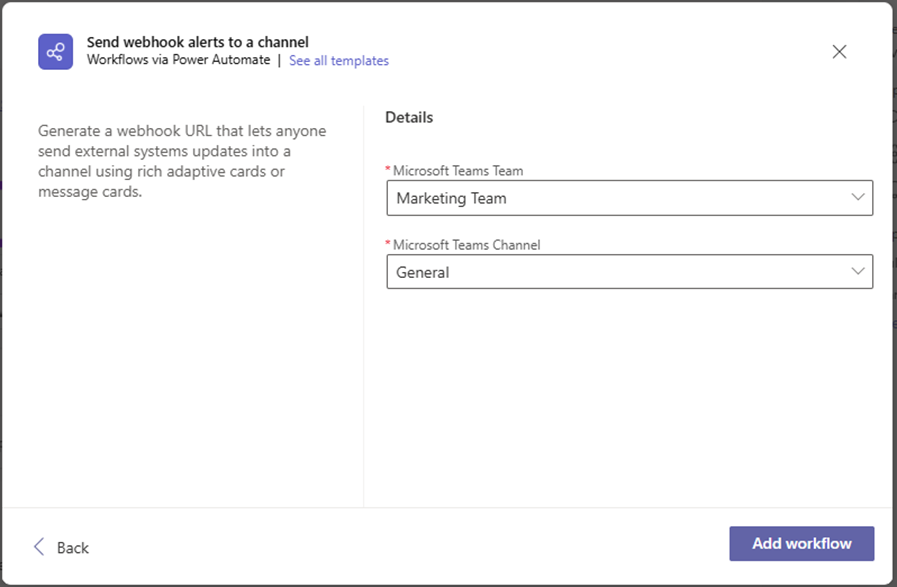
On the next page you’ll be able to choose the Channel that this notification will post to. Note if you are using this workflow from a channel these fields will auto-populate for you. After filling out the required details, select Add workflow.
-
Once the workflow is created, you’ll see a new dialog with the URL that you can copy.
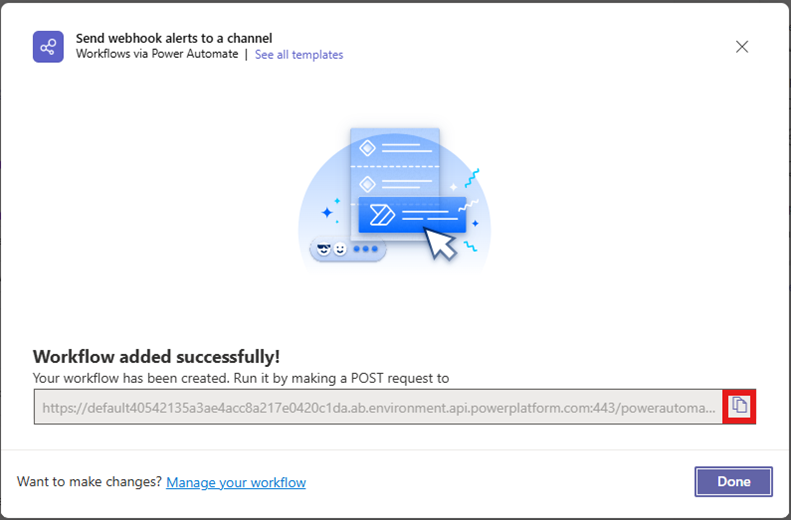
-
If you ever need to copy the workflow URL again, you’ll be able to find it by opening the Workflows app within Teams, selecting the workflow that was created, selecting Edit, and expanding the trigger When a Teams webhook request is received.
The webhook is now available in the Teams channel. For more information about Microsoft Power Automate Workflows: Use Power Automate flows in Microsoft Teams - Power Automate | Microsoft Learn
Configuring Interact to be able to Promote a Page to your Teams workspace.
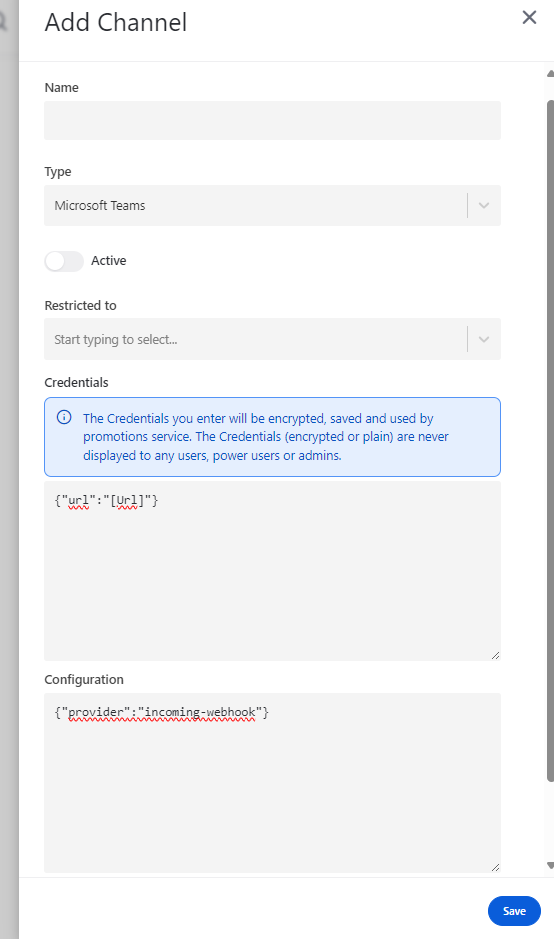
- From Application Settings > Control Panel > Block Editor > Promotion Channels > Add New Channel
- Specify the Name and Type. The Name is what your Content Authors will see when they are selecting which platform to promote to. The 'Type' field must be set to 'Microsoft Teams'.
- Mark it as active.
- In the credentials section, replace [Url] with the URL from the teams Workflow/Connector.
- In the Configuration Section, replace [Provider] with “incoming-webhook”
- Click Save.
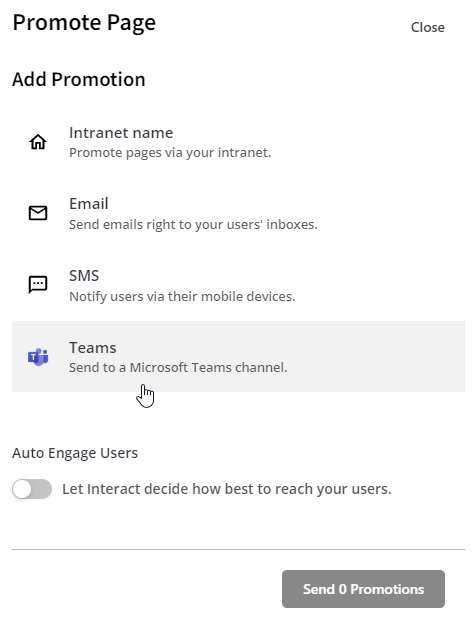
You should now be able to Promote a Page to a public or private Teams channel.

Updated about 1 month ago
